I have a notoriously bad memory. I can’t remember much of my childhood. I can’t recall the names of any of my teachers from elementary through high school, and college professors are getting a little spotty. Yikes. The few memories I do have, I cherish.
One of these memories is of my mom, sister, and me sitting around a kitchen table, folding potstickers. We each had a small pile of wrappers in front of us, small bowls of water, and a communal bowl of potsticker filling in the middle of the table. Baking sheets dusted with flour sat on the table lined with folded dumplings. My mom used chopsticks to scoop the filling from the bowl into her wrapper. My sister and I used spoons.
This time, I stood at the counter alone and folded roughly 100 potstickers filled with tofu, not pork. Mike came in towards the end and helped me. I have to admit, I much prefer the company of my mom and sister to the company of Netflix on my iPad.
So, grab yourself a potsticker buddy or two and get cooking! Or, if you choose to make this alone, choose something better than Toddlers & Tiaras as background noise 😉
If this is your first time making potstickers, don’t be intimidated. It’s actually quite simple. It’s easy as 1, 2, 3… kind of. And don’t forget – practice makes perfect.

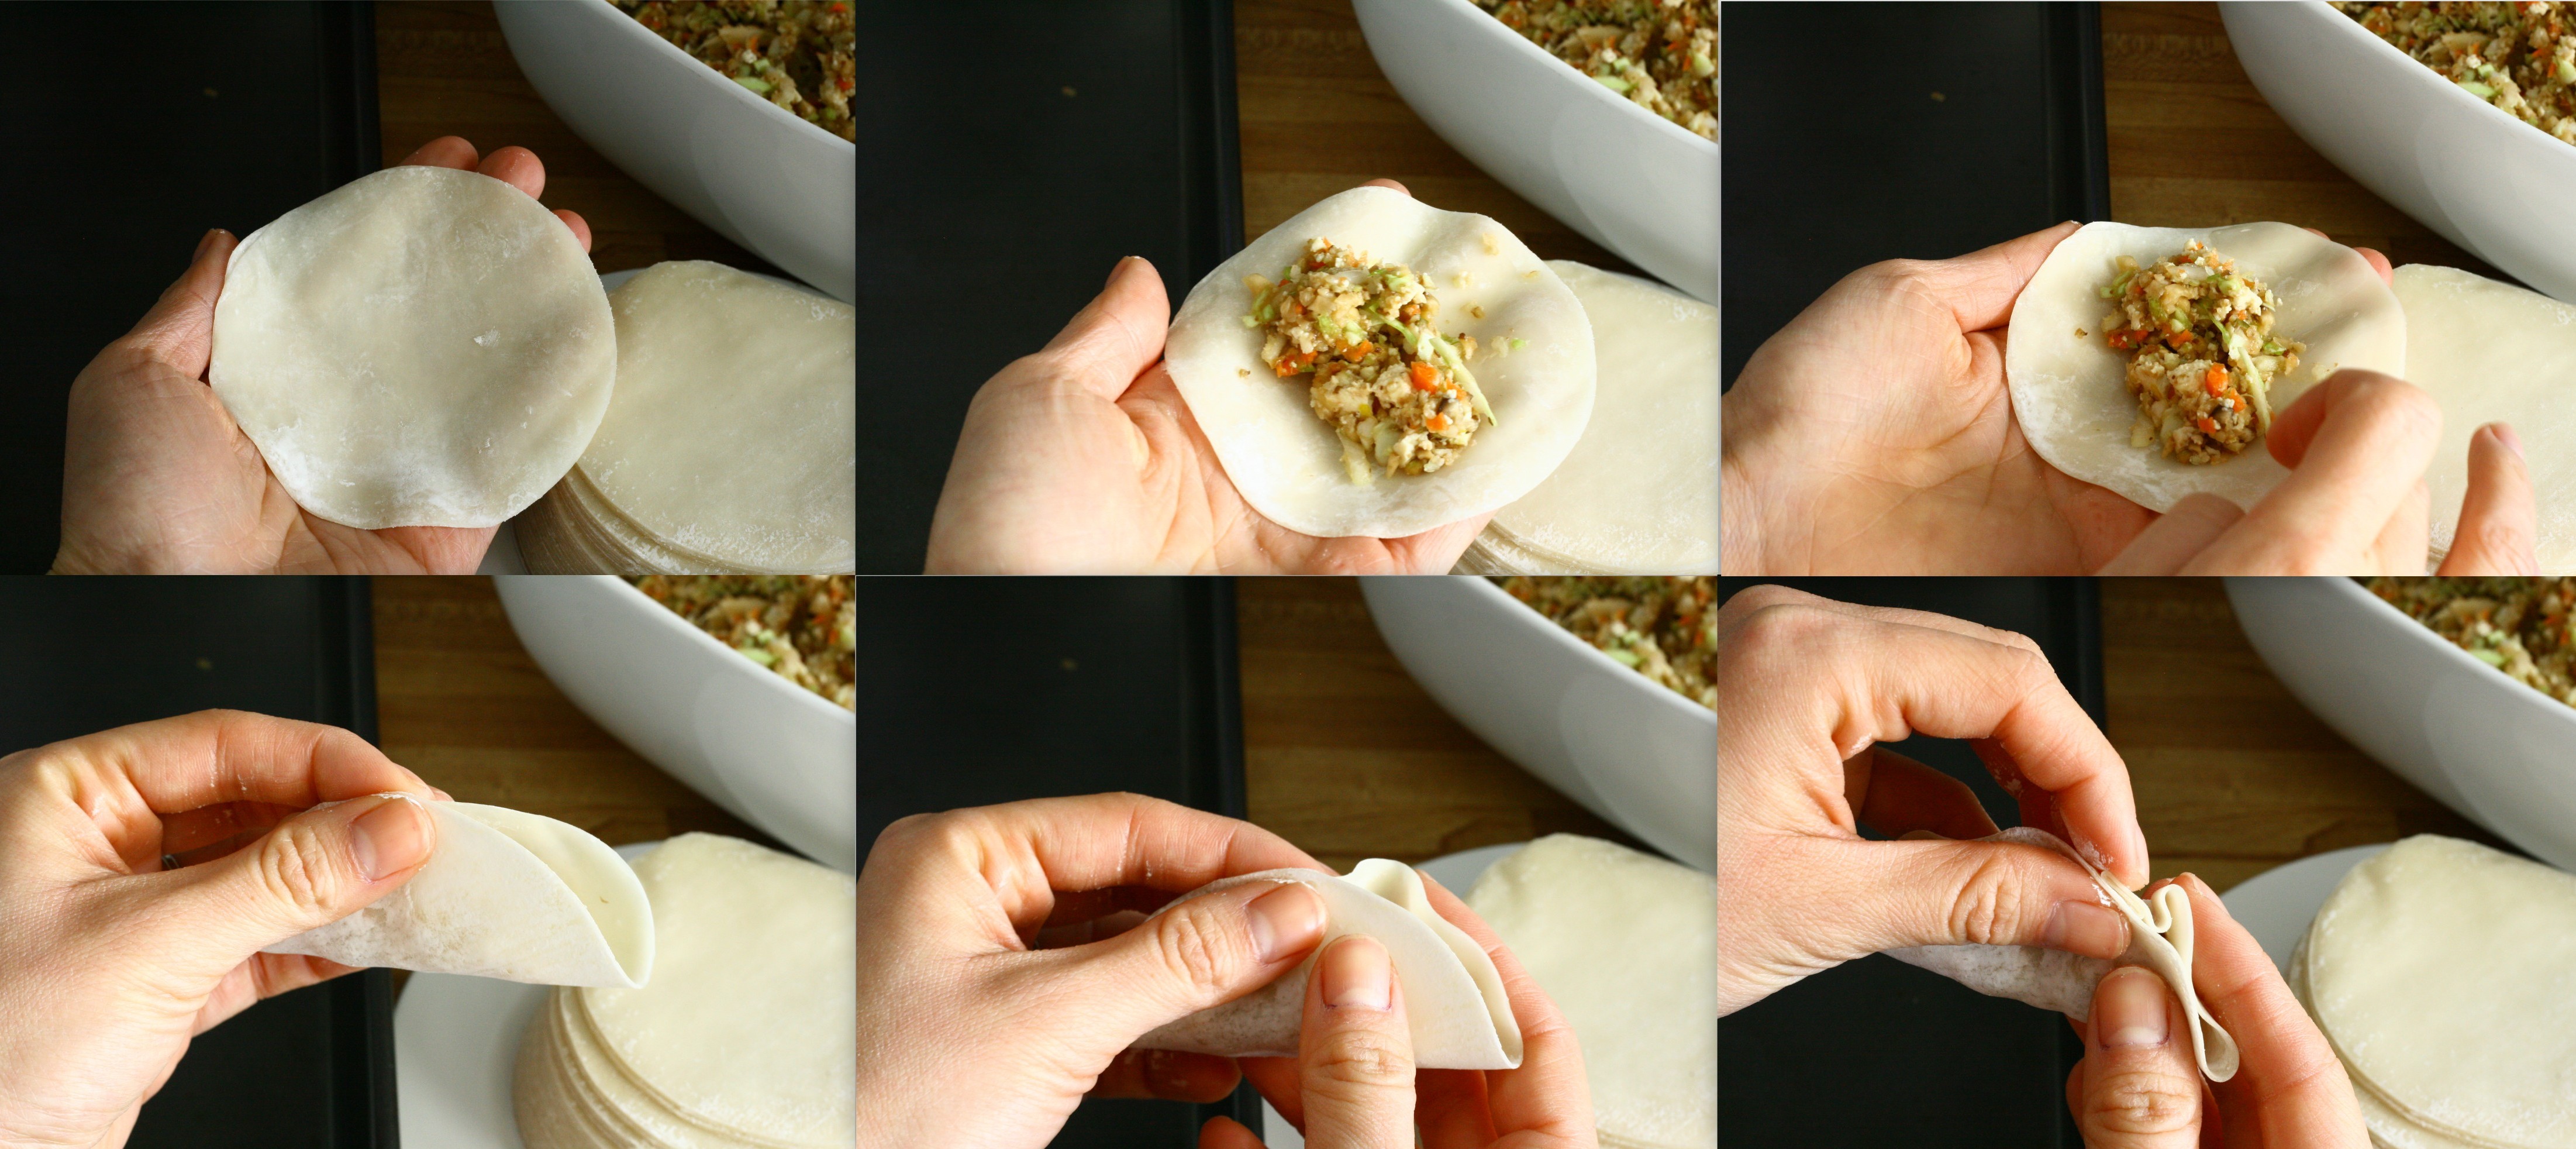
1) take a wrapper 2) 1 tablespoon filling 3) wet edges with water
4) pinch at top 5) pleat down right side 6) pleat down left side

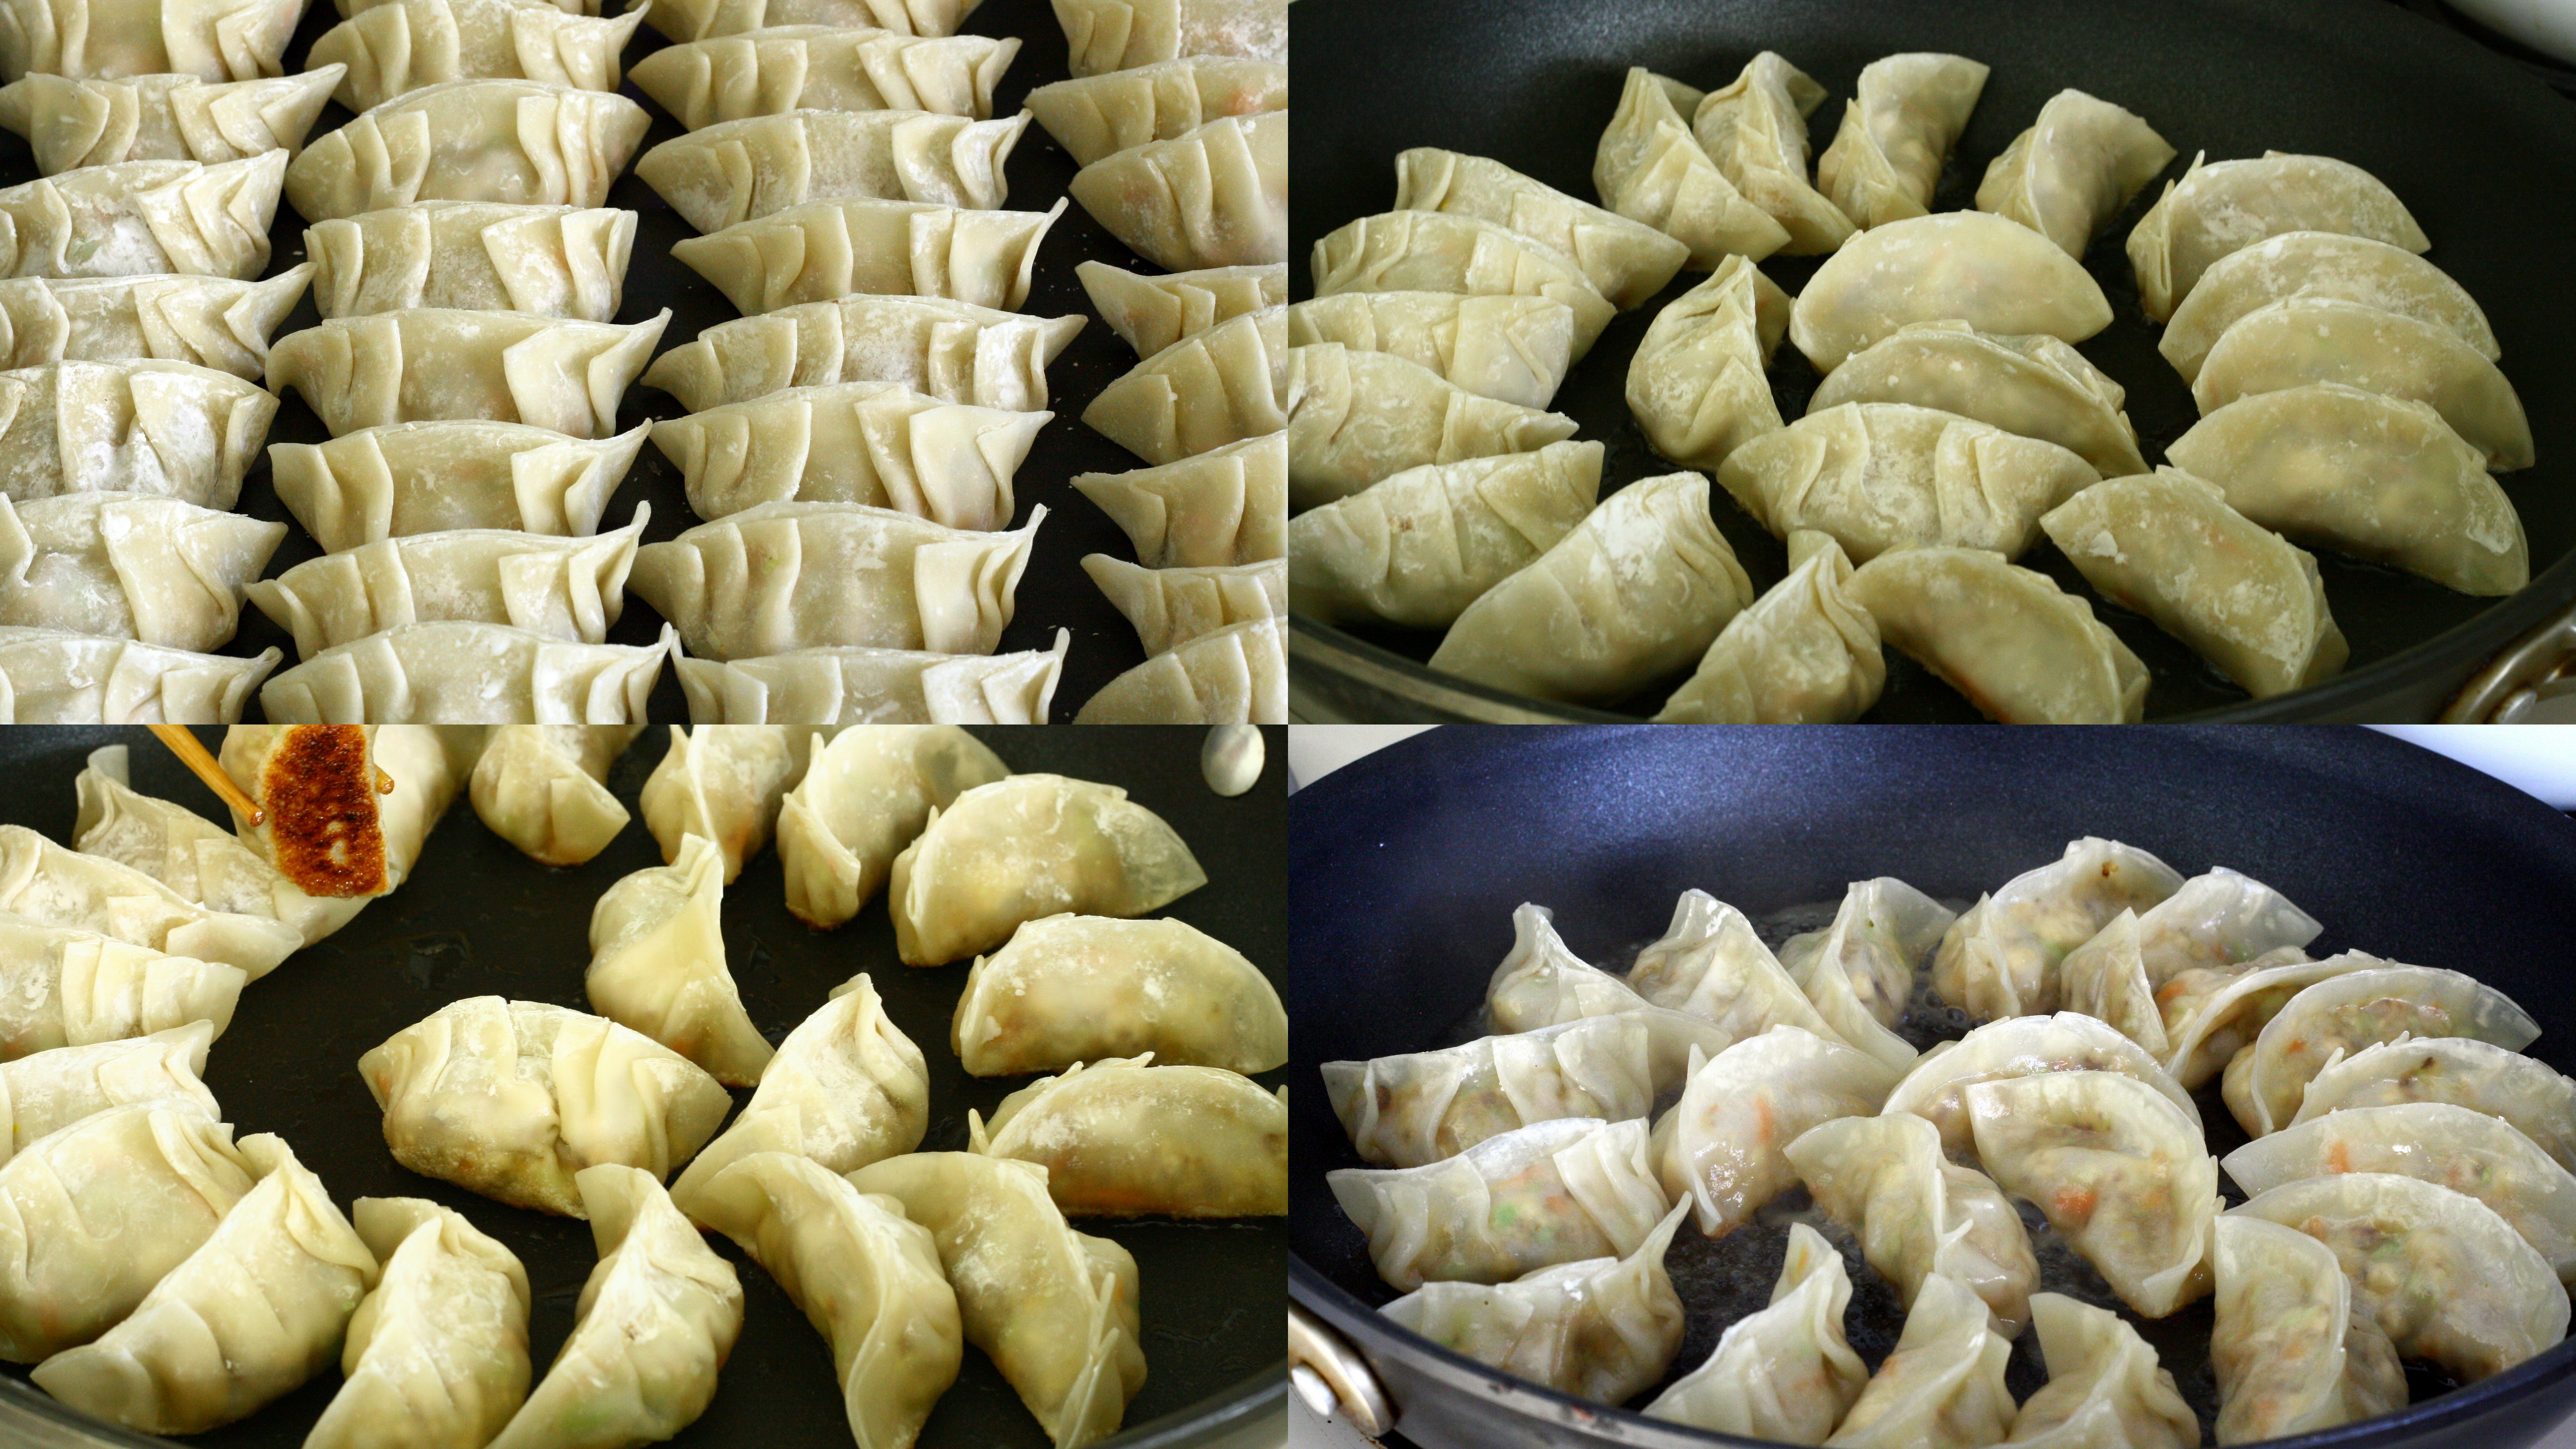
7) arrange potstickers on baking sheet 8) fry in pan – don’t overcrowd
9) cook until brown on the bottom 10) add water & steam to finish cooking
Fair warning – this recipe makes an insane amount of potstickers – over 100 for me. I cooked 1/3 of them and froze the rest to fry up for a quick meal later. To freeze, I simply stuck the baking pan of potstickers into the freezer. Once frozen, I placed them in a freezer bag.

Vegetarian Potstickers
10 ounces firm tofu, drained
1/2 medium onion
1″ piece of ginger, peeled
3 cloves garlic
2 cups shiitake mushrooms, stems removed
1 carrot
1 stalk celery
2 cups cabbage, finely shredded
1 cup bean sprouts, chopped
3 teaspoons sesame oil
4 tablespoons soy sauce
freshly ground pepper and salt, to taste
2 packages gyoza/potsticker wrappers
For dipping sauce:
2 tablespoons soy sauce
2 tablespoons rice vinegar
1 clove garlic, minced
1 small red chili pepper, thinly sliced (optional)
- Crumble tofu with your hands until it resembles ground meat. Place in a strainer and set aside.
- In the bowl of a food processor, combine onion, ginger garlic, mushrooms, carrot, and celery. Pulse until ingredients are roughly chopped. Place mixture into a large bowl. Mix in cabbage, bean sprouts, and tofu. Sprinkle mixture with sesame oil, soy sauce, pepper, and salt and mix well to combine.
- Set up your station: bowl of filling, stack of potsticker wrapper, a small bowl filled with water, and a large baking sheet.
- To fold: place wrapper in your non-dominant hand. Scoop about 1 tablespoon of filling into the center of the wrapper. Wet a finger on your dominant hand and lightly trace the outside of the wrapper. Fold wrapper in half to form a half circle and pinch at the top. Starting at the center, make 3 pleats down toward the bottom-right corner. Repeat on the left side. Continue with the remaining filling and wrappers.
- To cook: heat a large, lidded saute pan over high heat. Add in 1 teaspoon oil and swirl pan to coat. Add pot stickers, pleat-side up, being careful not to overcrowd. Cook until bottoms are browned, about 5 minutes. Add in 1/2 cup water and immediately cover the pan to contain the splatter. After 30 seconds, when splattering has subsided, slightly crack the lid open to allow steam to escape. Cook for an additional 5 minutes or until heated through and water has evaporated. Let cook for an additional 1 – 2 minutes to allow bottom to re-crisp. Serve immediately with dipping sauce.
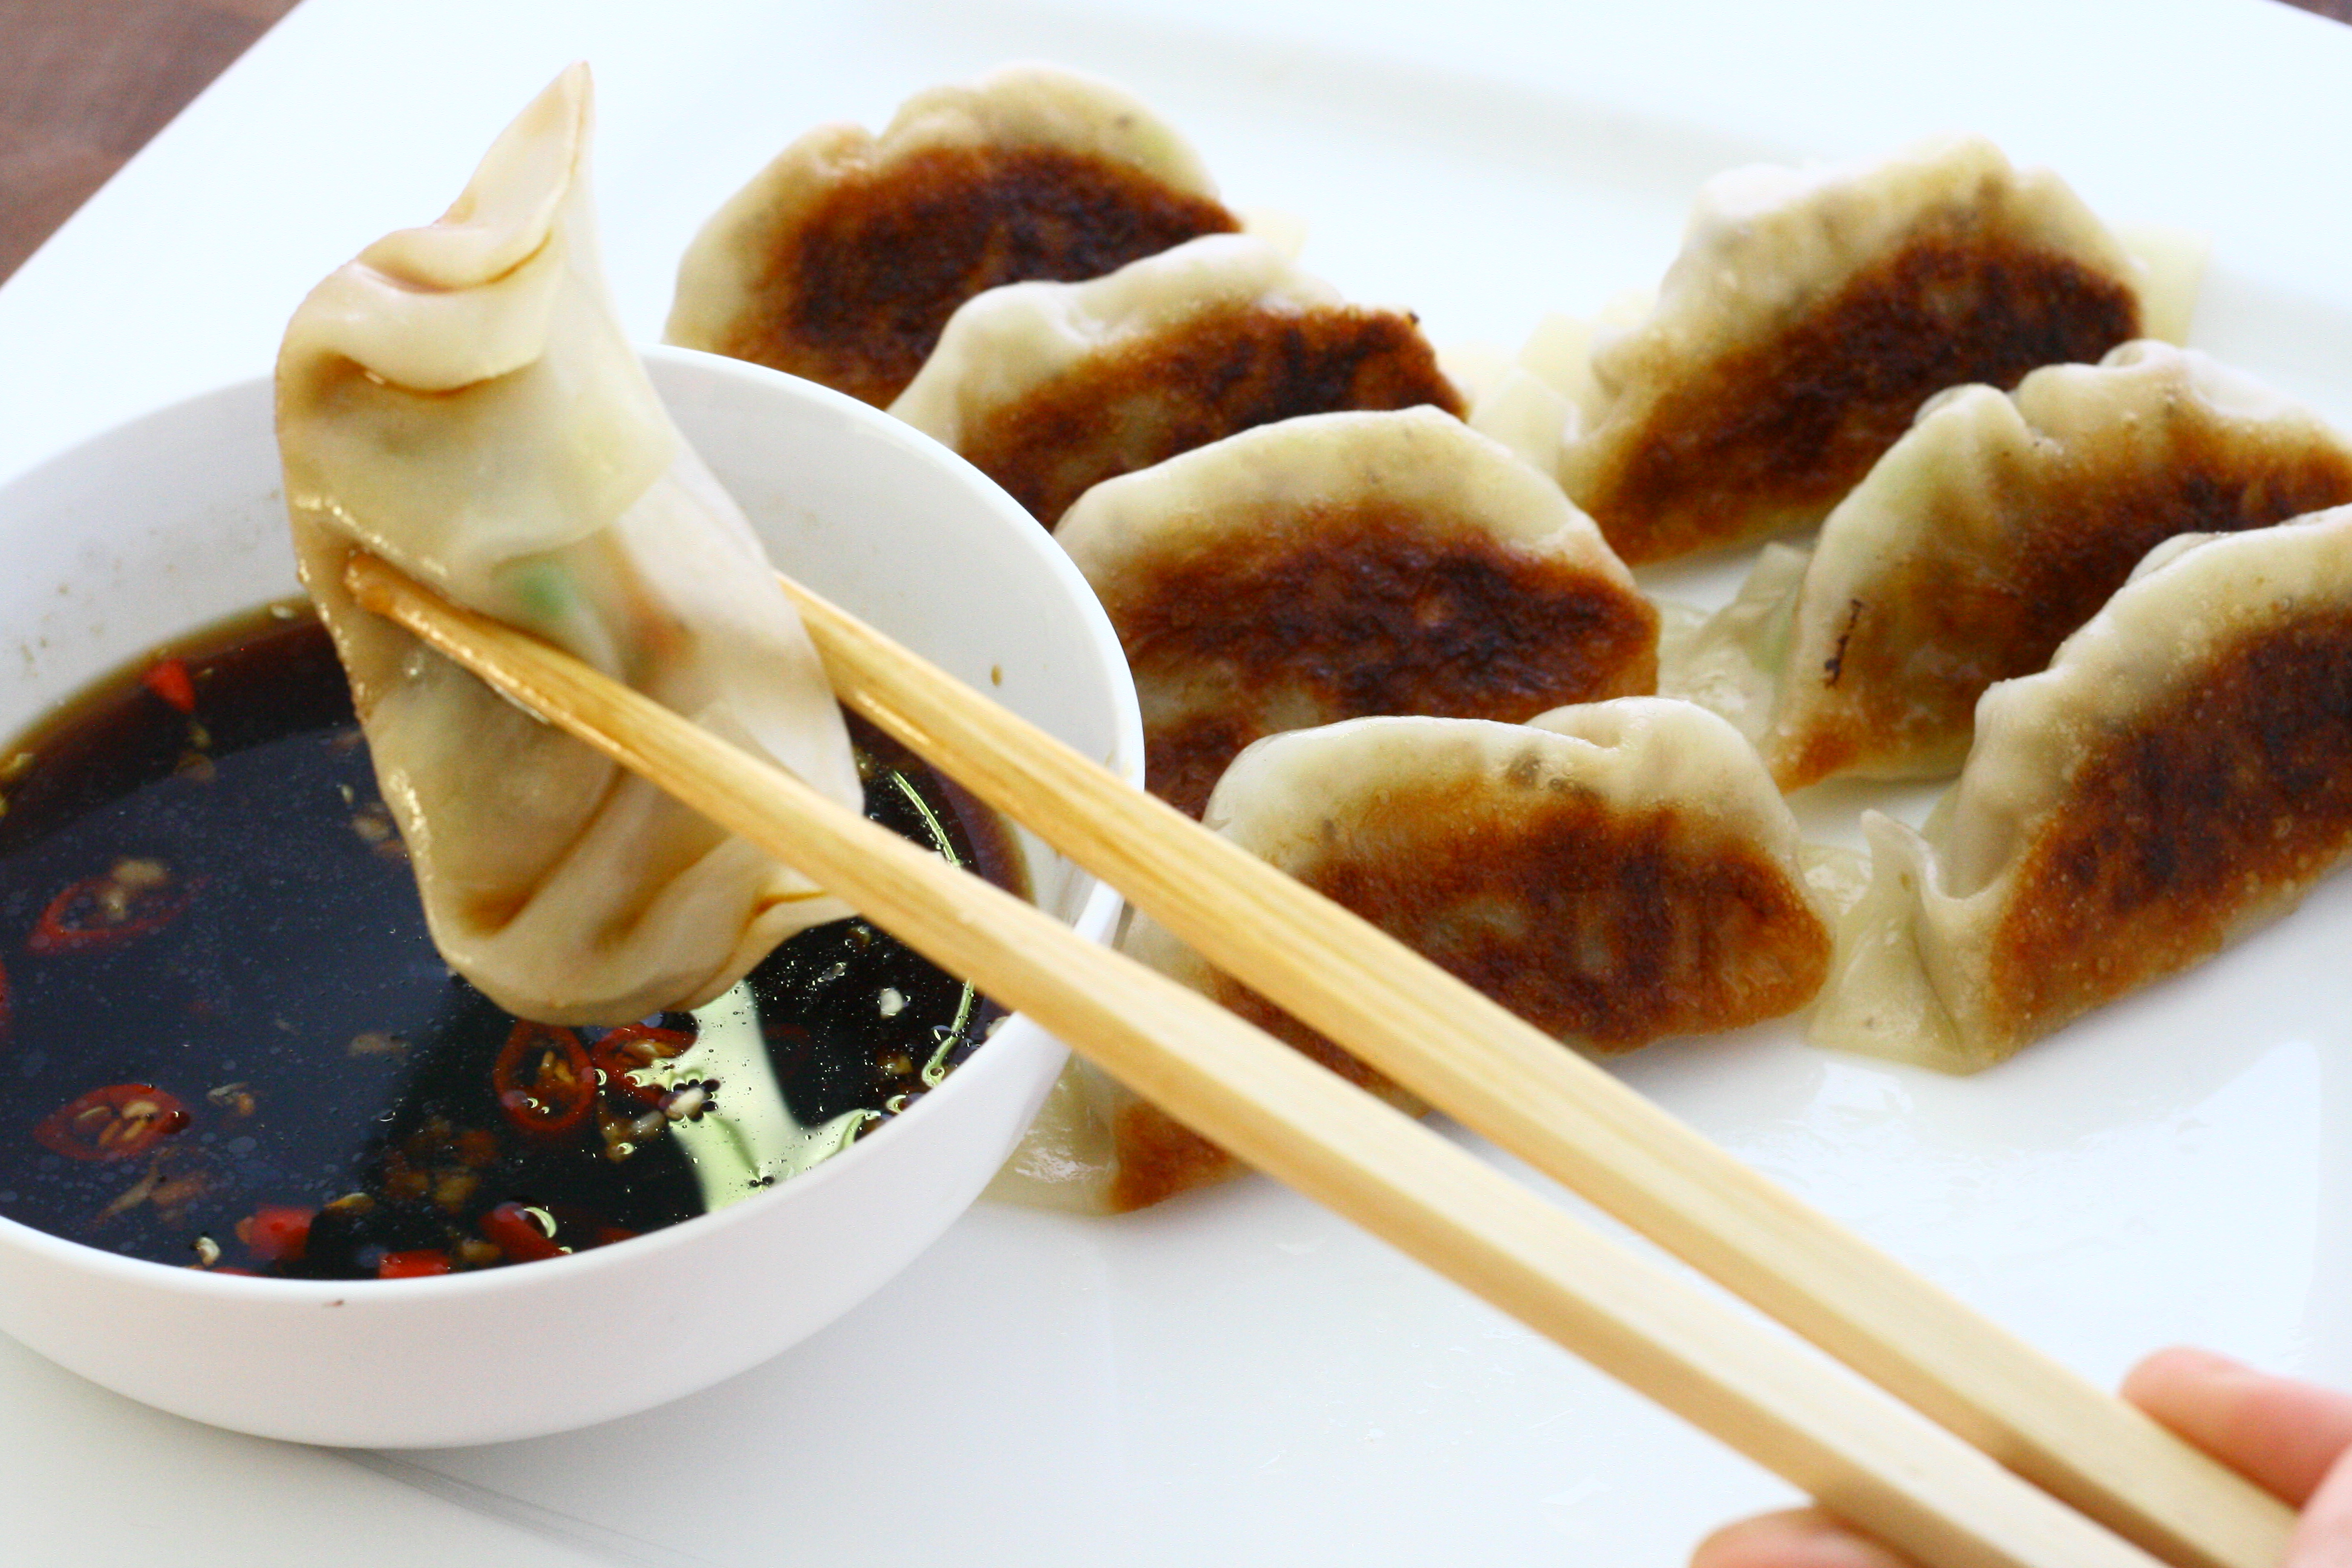
- To make dipping sauce: combine soy sauce, vinegar, garlic, and chili pepper in a small bowl. Stir to combine.