DoughSeeDough

a balanced plate with room for dessert


1 Comment

Turkey & Rice Taco Skillet

Before I dive into our weekend adventures and the recipe,  I want to explain why I haven’t been posting as much (and why I’m eating dairy again). I’m unable to complete even a simple 5 mile run without almost collapsing. I can’t eat without being sick. Two of the most important things in my life: running and food, are now what frustrate me the most.  I’m taking it a day at a time, praying that my doctors can figure out what’s wrong with me soon so I can go back to being normal. Until then, I’ll be posting a bit less; it’s hard to post new recipes when you don’t each much of anything besides cereal and salads 🙂

But onto happier things… Mike and I went on our first camping trip of the season this past weekend with our pups. It rained Friday, but Saturday was picture-perfect and we were able to get in a nice long hike. Really long hike. Because we got lost. But hey, what’s the point of life without a little adventure? I’ve got two camping meals to share with you this week. For our Friday night dinner, I made a Turkey and Rice Taco Skillet. It was pouring, but we huddled under the tarp with the dogs and ate our dinner. It was the perfect meal to keep us warm in the cold, wet weather. I figured I would share this recipe first since it kind of works with the whole Cinco de Mayo thing, too.

Though this was made over a campfire, it is easily adaptable to be made at home on the stove top. That’s the beauty of cast iron – it can be used inside and outside. I’ve finally gotten my “inside use” Dutch oven and skillet to where they are pretty darn well seasoned. The skillet I used while we were camping, though, has been on hundreds of camping trips with Mike when he was growing up. The skillet is so perfectly seasoned that it puts my pieces to shame. I guess I have something to work on, eh?

Turkey & Rice Taco Skillet {camping meal} | doughseedough.net

Turkey and Rice Taco Skillet
serves 4 – 6

2 cloves garlic, minced
1/2 red onion, diced
1 jalapeno, minced (seeded if desired)
1.25 pounds lean ground turkey
1 packet hot taco seasoning mix
4 cups water, divided
3 cups Minute Brown Rice
1 – 15 ounce can corn
1 – 15 ounce can black beans, rinsed and drained
1 – 14.5 ounce can chopped tomatoes with jalapenos
1 cup shredded extra sharp cheddar cheese
2 cups shredded romaine lettuce
sour cream to garnish
olive oil spray

  1. Spray a large 12″ cast iron skillet with olive oil. Add garlic, onion, and jalapeno and cook over the fire (or medium-high heat) until onions are tender. Add the turkey and cook until browned, about 5 minutes. Stir in taco seasoning and two cups of water. Bring to a simmer and stir in rice and remaining two cups of water. Let simmer for 10 minutes, stirring occasionally. Stir in tomatoes, beans, and corn and continue to cook, stirring occasionally, until liquid is absorbed.
  2. To serve, divide between 4 – 6 bowls. Sprinkle with lettuce, cheese and top off with sour cream.


Leave a comment

Spring Veggie Quinoa Power Bowls

Spring is here. With spring, comes spring cleaning. Most people clean out their closets and rid the house of dust bunnies. Why don’t ya take it one step further and clean up your lunchtime routine? Stop running to the closest fast food joint and prep this at home the night before instead. Your body will thank you.

I love quinoa for its amazing health benefits. It has protein, fiber, and iron, plus lots of vitamins and minerals to keep your body healthy and help it repair itself. It’s naturally gluten free and it is one of the few plant foods that is considered a complete protein. As an added bonus, the texture is really, really cool. It can be a bit on the pricier side when you compare it to other grains like pasta, bread, and rice, but it’s worth the cost. (Hint: I like getting it from Costco. They come in huge bags for a good price and it lasts forever.) Asparagus is also packed with fiber, vitamins, and antioxidants. How could you not love a veggie that is a cancer-fightin’, health-improvin’ machine?

spring veggie quinoa power bowls | doughseedough.net

This quinoa bowl is packed with goodness and is so easy to throw together. It’s ready in under 30 minutes and it’s good warm, cold or at room temp. What more could you ask for?

Spring Veggie Quinoa Power Bowls | doughseedough.net

Quinoa Power Bowls
serves 4

1 cup quinoa
2 cups low sodium chicken broth
olive oil spray
2 cloves garlic, minced
1/2 onion, thinly sliced
1 1/2 pounds asparagus, trimmed and chopped into 1 ½ – 2 inch pieces
1 bell pepper, thinly sliced
1 – 15 ounce can garbanzo beans, rinsed and drained
1 large lemon, juiced
8 cups spring mix (lettuce or other salad base of choice works, too)
4 ounces feta cheese
1/2 cup almonds
salt and freshly ground black pepper, to taste

  1. Bring chicken broth to a boil. Add quinoa and reduce heat to a simmer. Cover and cook until all liquid is absorbed, about 15 minutes.
  2. Meanwhile, prepare the rest of the dish. Spray a large pan with olive oil. Add garlic and onion and saute for 1 – 2 minutes, or until onion softens. Add asparagus, bell pepper, and garbanzo beans and cook until vegetables are tender-crisp, about 3 – 4 minutes. Season with salt and pepper to taste. Remove from heat and squeeze lemon juice over the vegetables. Toss to combine.
  3. To serve, divide the spring mix between four bowls. Fluff quinoa with a fork and place on top of greens. Top with vegetables, feta, and almonds.


adapted from Clean Eating Magazine


Leave a comment

Cheesy Spinach and Chicken Stuffed Shells

Today’s recipe is a dish that I can only dream of eating… Making cheesy freezer meals for Mike is kind of torturous. Mike swears these shells taste awesome. I can assure you that they smell awesome, but I couldn’t try them.

Cheesy Spinach and Chicken Stuffed Shells | doughseedough.net

Cheesy Spinach & Chicken Stuffed Shells

1 – 12 ounce box jumbo shells
1 tablespoon extra virgin olive oil
1 pound boneless, skinless chicken breast., diced
1 large onion, diced
3 cloves garlic, minced
1-10 ounce box frozen chopped spinach, thawed and squeezed dried
8 ounce reduced fat cream cheese
1/4 cup unsweetened almond milk
1 1/2 cups shredded Parmesan cheese
2 cups marinara sauce, homemade or store-bought

  1. Cook pasta according to package directions, being careful not to over cook. When pasta is al dente, drain and set aside.
  2. Meanwhile, heat olive oil in a large pan over medium high heat. Add chicken and cook until browned and cooked through, stirring occasionally. Once cooked, remove chicken to a separate plate.
  3. Add more oil to pan, if necessary, and add in onions and garlic. Cook, stirring frequently, until onions are translucent. Stir in spinach, cream cheese and almond milk until cream cheese is melted and mixture is creamy. Stir in cooked chicken. Sprinkle in half the Parmesan cheese and stir until evenly distributed.
  4. Spray two 9×13 baking dishes with olive oil. Spread 1/4 cup of sauce into the bottom of each pan. Spoon filling into cooked shells and arrange in baking dishes. When all shells are filled, drizzle remaining sauce onto the top of the shells and sprinkle with remaining Parmesan cheese.
  5. To serve immediately, preheat oven to 350 and bake for 20-25 minutes. Filling should be hot and bubbly and Parmesan cheese should be melted and lightly browned.
  6. If freezing, prepare as directed using freezer and oven-safe containers. Defrost dish in the refrigerator. Preheat oven to 350 and bake for 35-40 minutes or until filling is hot and bubbly and cheese is melted.


Leave a comment

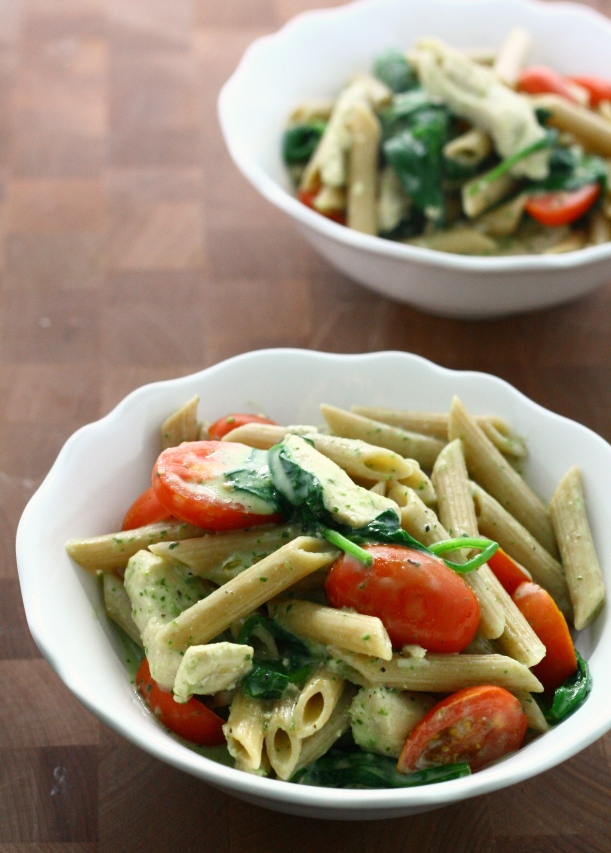
Lightened Up Pesto Chicken Florentine

Lightened Up Pesto Chicken Florentine | doughseedough.net

Being split between two cities is going to be difficult for me. I have to learn to live without my fully-stocked pantry and fridge, my stand mixer, endless pots and pans, and my million different cake, cupcake, bread, and cookie pans. I’m going to have to adjust to cooking with the bare minimum.

This dish will have no problem in my “new” life. It requires no special equipment and can be tossed together in no time. The leftovers make for a pretty great lunch the next day, too.

I lightened up this dish by making my own Alfredo sauce. The canned stuff (or worse, the packet stuff) scares me and has no place in my kitchen! This homemade Alfredo also passes on the heavy cream and copious amounts of butter. Trust me, this sauce is delish and you won’t even miss the cream or butter!

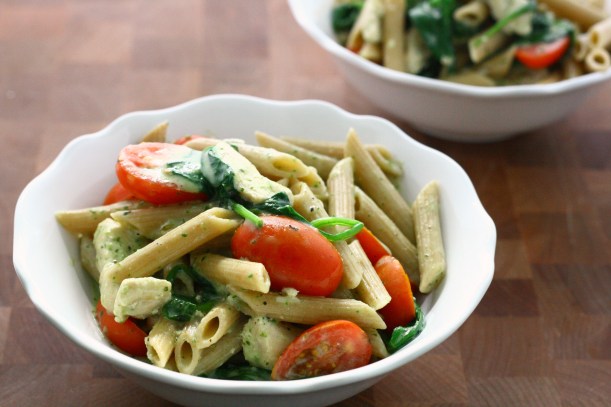
Lightened Up Chicken Pesto Florentine | doughseedough.net

Lightened Up Pesto Chicken Florentine
adapted from All Recipes

8 ounces dried whole wheat penne
1 tablespoon olive oil
2 cloves garlic, minced
2 boneless, skinless chicken breasts, cut into thin strips
1 3/4 cup lightened-up Alfredo sauce, recipe below (jarred will work as well)
2 tablespoons pesto
4 cups fresh baby spinach
1 pint grape tomatoes, halved

  1. Cook pasta according to package directions.
  2. Meanwhile, heat olive oil in a large skillet over medium heat. Add garlic and cook for 1 minute. Add in chicken strips and cook until no longer pink on the inside, about 10 minutes.
  3. Stir in spinach and tomatoes and cook for an additional 1 – 2 minutes, or until spinach is wilted.
  4. Mix together Alfredo sauce and pesto and pour into cooked pasta. Stir in chicken and spinach and mix well to combine.
  5. Serve immediately.

Lightened Up Alfredo Sauce
makes 1 3/4 cup

1 tablespoon unsalted butter
1 clove garlic
2 teaspoons all-purpose flour
1/2 teaspoon salt
1/4 teaspoon freshly ground black pepper
1 ounce reduced fat (Neufchatel) cream cheese
1/2 cup shredded Parmesan cheese

  1. Melt butter in a medium saucepan over medium heat. Stir in garlic and cook for 2 – 3 minutes or until soft.
  2. Whisk in flour, salt, and pepper and stir until smooth. Cook for 1 minute. Slowly whisk in milk and cook for 3 – 5 minutes or until mixture has thickened slightly.
  3. Whisk in cream cheese and Parmesan cheese until smooth.


2 Comments

Lightened Up Cream Cheese Chicken Enchiladas

It’s swap time again! The theme this month was Mexican food and I received a recipe for Cream Cheese Enchiladas from Carrie’s Sweet Life. I read only the name of the dish and raised my eyebrows. I jumped to the conclusion that these were going to be filled with cream cheese and only cream cheese.

Now, don’t get me wrong. I love cream cheese. Seriously. But the thought of eating a cream cheese enchilada was a bit too much for me. I read on and was very relieved to see that there were several other ingredients in the enchiladas in addition to cream cheese. Whew!

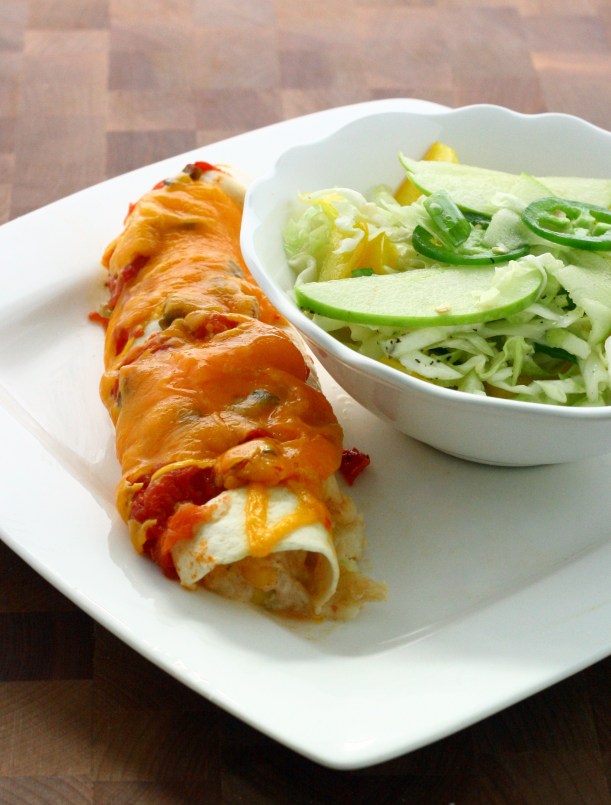
I absolutely loved these. They were super simple to make and had a great flavor, too. I followed in Carrie’s footsteps and made the filling and shredded all the cheese the night before. Then, the next day I assembled and baked them off. While they were in the oven I threw together a quick apple slaw to go with it.

Lightened Up Cream Cheese Chicken Enchiladas | doughseedough.net

Lightened Up Cream Cheese Chicken Enchiladas
slightly adapted from Carrie’s Sweet Life

1 package Neufchatel or reduced fat cream cheese, softened
1/2 cup nonfat Greek yogurt
2 cup prepared salsa (I used some homemade stuff I canned last summer)
1 cup shredded colby cheese
1 cup shredded sharp cheddar cheese
1/2 teaspoon ground chipotle pepper
2 cups cooked, shredded chicken
1 cup frozen corn kernels, thawed
1/2 teaspoon chili powder
1/4 teaspoon cumin
salt and pepper, to taste
8-8 inch flour tortillas

  1. Preheat oven to 325°F.
  2. In a medium bowl, beat together cream cheese and Greek yogurt until smooth. Stir in 1/2 cup salsa, 1/2 cup colby, and 1/2 cup cheddar.
  3. In a separate bowl, mix chicken, corn, cumin, chili powder, salt, and pepper. Fold into cheese mixture and stir until thoroughly combined.
  4. Spread 1/2 cup salsa into the bottom of a large baking dish.
  5. Place 1/3 – 1/2 cup of filling into the bottom third of a tortilla. Roll up and place seam-side down in baking dish. Repeat with remaining tortillas. Pour remaining 1/2 cup salsa on top and sprinkle with remaining cheese.
  6. Bake in preheated oven for 25 – 30 minutes, or until cheese is bubbly and center of enchiladas are hot. Serve immediately.

Thanks to Taste of Home Cooking for organizing! Make sure to check out the other recipe swap posts!


1 Comment

Hazelnut Tiramisu Brownies

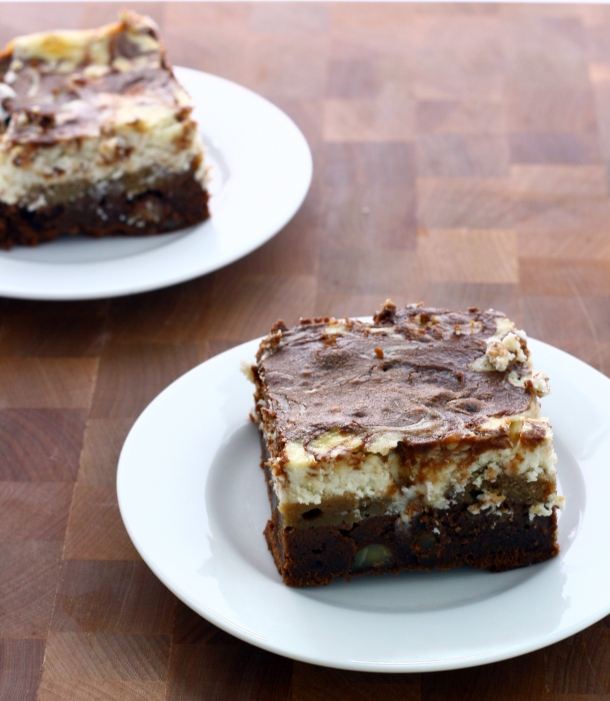
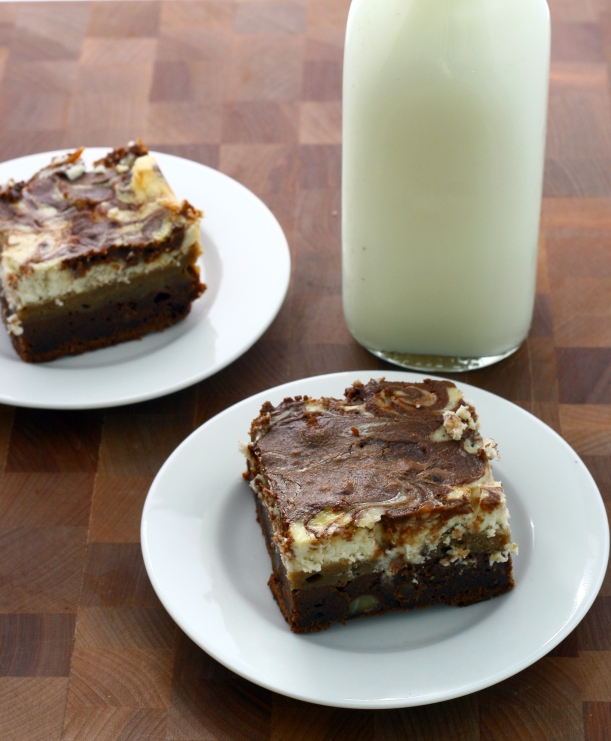
hazelnut tiramisu brownies | doughseedough.net

When Jessica over at My Baking Heart posted these tiramisu brownies, I knew I had to make them. Immediately. Usually I find a recipe that calls out to me and put it on my “to do” list. These babies almost skipped every other dish I had on my list and I made them as soon as I could.

A little tip – if you don’t want the 8 egg yolks to go to waste, do as I did and use 5 of them in these Layered German Chocolate Cupcakes. Then you will have not one, but TWO super decadent treats. It’s probably a good idea to share 😉

hazelnut tiramisu brownies | doughseedough.net

Hazelnut Tiramisu Brownies
yield: 15 large brownies

2 oz dark chocolate chips
16 tbsp unsalted butter, room temperature
1 1/4 c granulated sugar, divided
4 whole large eggs
8 large egg whites, divided
1 cup cake flour
2 tablespoons instant coffee
1/4 cup chopped, roasted hazelnuts
8 ounces Mascapone cheese, room temperature
8 ounces Neufchatel cheese, room temperature
2 teaspoons vanilla extract
1 package ladyfingers
1 cup coffee
2 tablespoons dark rum

  1. Preheat oven to 350°F. Butter and flour a 13×9 baking pan and set aside.
  2. Place chocolate chips in a large microwavable bowl and microwave in 30 second intervals until smooth and melted, stirring after each time. Let cool slightly.
  3. Pour melted chocolate into a mixing bowl fitted with the paddle attachment. Beat in butter on medium speed until well incorporated. Add in 1 cup of sugar, 4 whole eggs, and 4 egg whites, mixing until well blended. Mix in flour and instant coffee on low speed until just combined. Carefully fold in hazelnuts. Remove 1 cup of batter and pour remaining batter into prepared pan.
  4. Place lady fingers rounded-side down on top of the batter, pushing down slightly on each one. Combine coffee with rum and brush onto the ladyfingers until saturated.
  5. In a separate bowl, combine mascarpone cheese, Neufchatel cheese, 1/4 cup sugar, 4 remaining egg whites, and vanilla extract. Carefully spread over the ladyfingers.
  6. Drop dollops of remaining brownie batter on top of the cheese layer and swirl gently with a knife.
  7. Bake for 45 – 50 minutes, or until brownies begin to pull away from the sides of the pan and the center is almost set. Let cool completely in pan before cutting.

Recipe slightly adapted from Chef Maureen Joyce & Barista Prima Coffee house via My Baking Heart


Leave a comment

Whiskey BBQ Burgers with Caramelized Onions & Cheddar

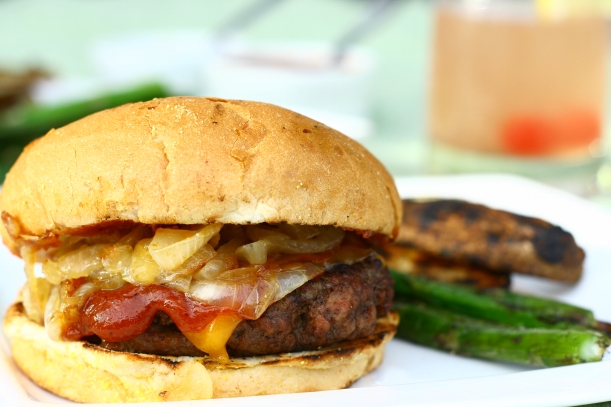
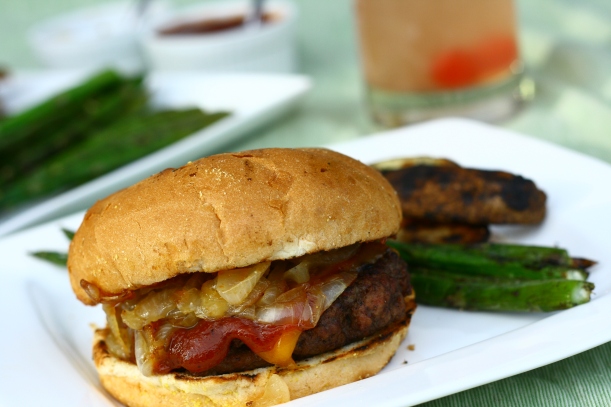
whiskey bbq burgers with caramelized onions & cheddar | doughseedough.net

There’s something about a perfect burger that just screams “summer”! Even though it’s only spring, and even though it’s been a fairly cold spring so far, this burger made everything a-okay. I forgot for a few hours that summer was still forever away. Mike and I enjoyed these burgers with some grilled asparagus, grilled potato wedges, and of course, some fresh whisky sours.

whiskey bbq burgers with caramelized onions & cheddar | doughseedough.net

Whiskey BBQ Burgers with Caramelized Onions & Cheddar
serves 4

for the whiskey barbecue sauce:
1 cup ketchup
1/2 cup water
1/4 cup apple cider vinegar
3 tablespoons brown sugar
2 tablespoons honey
1  teaspoon black pepper
1  teaspoon onion powder
1 teaspoon garlic powder
1 teaspoon ground mustard
1 1/2 teaspoons lemon juice
1 1/2 teaspoons Worcestershire sauce
1/3 cup bourbon

for the caramelized onions:
1 tablespoon butter
1 tablespoon olive oil
1 large yellow onion, sliced
1 teaspoon brown sugar

for the burgers:
1 pound ground beef
salt and pepper
4 ounces extra sharp cheddar cheese, thinly sliced
4 kaiser rolls, lightly toasted

  1. To make the whiskey barbecue sauce:  combine all barbecue sauce ingredients in a medium saucepan. Bring to a boil, stirring frequently. Reduce to a simmer and cook for 40 minutes, or until thick.
  2. To caramelize the onions: heat olive oil and butter in a medium pan over medium-low heat. Add in onions and cook, stirring occasionally, for 10 minutes. Add in brown sugar and continue to cook, stirring occasionally, until onions are caramelized and soft, another 10 – 15 minutes.
  3. To make the burgers: shape beef into 4 even patties. Make a depression in the middle of each patty with your thumb. Season both sides with salt and pepper. Heat a grill to high heat and cook burgers until slightly charred and browned on one side. Flip and cook burgers on second side until browned and slightly charged. Top with sliced cheddar cheese during last minute of cooking.
  4. To assemble burgers: place a patty onto the bottom of  roll. Slather with barbecue sauce and top with a heaping spoonful of caramelized onions. Top with other side of the roll and serve immediately.


Leave a comment

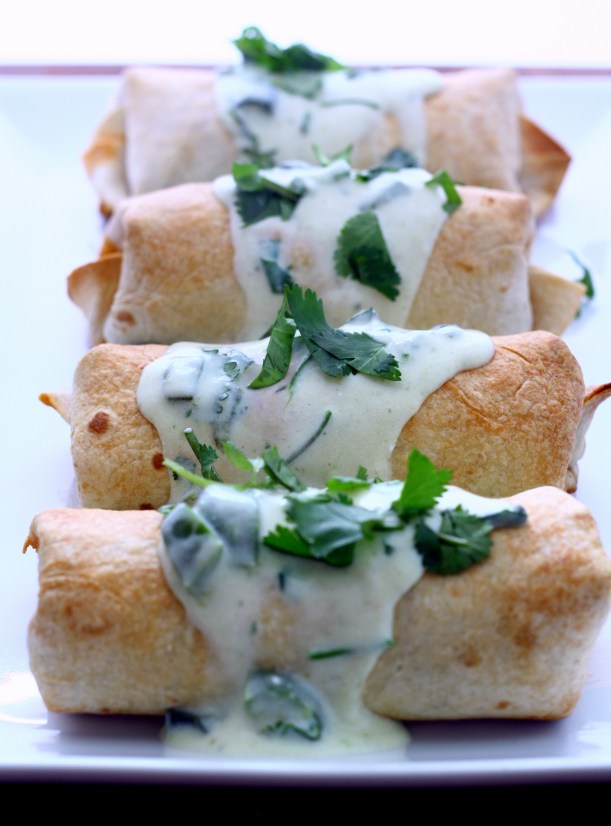
Baked Beef and Bean Burritos with Creamy Poblano Sauce

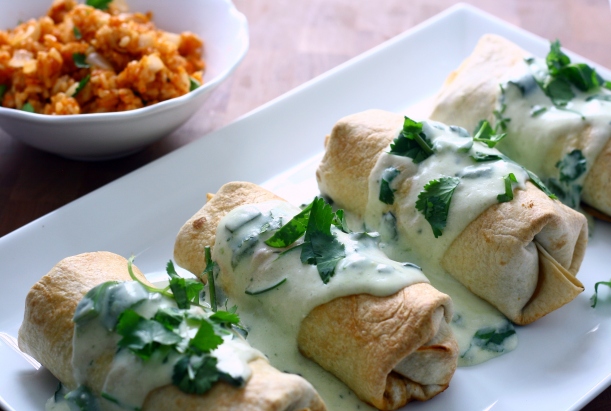
baked beef & bean burritos with creamy poblano sauce | doughseedough.net

I love burritos. I especially love the as-big-as-your-face abominations from Qdoba and Chipotle. If I spend a day with my college friends, there’s a pretty good chance you’ll find us at either a Qdoba or Chipotle at some point during the day. After all, we can’t live on beer and whiskey alone. But apparently beer, whiskey, and burritos = well rounded diet.

Some habits die hard. It’s been 3 years since we graduated, but our drinking and eating patterns during our weekends together are essentially the same. The only difference is now instead of drinking Milwaukee’s Best Light, we drink something a little classier like Miller High Life ;).

Anyway, back to the burritos. Up until now, I’ve never had a baked burrito. Baking these until they developed a perfectly crunchy outside brought the burrito to a whole new level. I ate one and died of happiness. So I ate another. I instantly regretted it, but it was just so… good. So learn from my mistake – eat only one. They are very, very filling.

baked beef & bean burritos with creamy poblano sauce | doughseedough.net

Beef and Bean Baked Burritos with Creamy Poblano Sauce
adapted from Elly Says Opa

for the burritos:
1 tablespoon canola oil
1 large onion, diced
1 pound 93% lean ground beef
4 cloves garlic, minced
1 tablespoon tomato paste
1 can black beans, drained and rinsed
1 cup corn kernels
1/4 cup beef broth
1/2 teaspoon cumin
1/2 teaspoon oregano
1 1/4 teaspoon Mexican chili powder
1/8 teaspoon cayenne pepper
1 teaspoon brown sugar
1/2 teaspoon salt
1 1/2 cups shredded pepper jack cheese
8 large whole wheat tortillas
olive oil cooking spray

for the creamy poblano sauce:
1 poblano pepper, roasted and chopped (see step 2)
2 jalapeno peppers, seeded and chopped
2 tablespoons butter
4 tablespoons flour
1 1/2 cup chicken broth
1/2 teaspoon garlic powder
salt and pepper, to taste
3/4 cup plain nonfat Greek yogurt
1/4 cup chopped fresh cilantro

  1. Preheat oven to 450°F. Spray a large baking sheet with cooking spray and set aside.
  2. To roast the poblano for the sauce: place inside a medium baking dish. Bake in preheated oven and turn every 6 – 8 minutes until skin is blistered on all sides, about 25 minutes total. Place in a clean kitchen towel and wrap up. Let cool slightly and rub the skin off the pepper with the towel. Remove the stem, seeds, and ribs.
  3. To make the burritos: heat oil in a large skillet over medium heat. Add onions and cook until they begin to soften, about 3 – 5 minutes. Add in ground beef and cook and stir to break up the meat. Cook until well browned. Add in garlic and tomato paste and stir well to combine.
  4. Add in black beans, beef broth, cumin , oregano, chili powder, cayenne, brown sugar, and salt. Bring to a boil, reduce heat to a simmer, and cook until most of the liquid has been absorbed.
  5. To assemble the burritos: place 2 – 4 tablespoons of cheese at the end of a tortilla and spoon in some of the beef mixture over the cheese. Fold the left and right sides of the tortilla in and then roll the tortilla up, starting from the end closest to you. Place seam-side down on prepared baking sheet. Repeat with remaining tortillas. Spray tops of burritos with cooking spray. Bake in preheated oven until lightly browned and crispy, about 25 minutes.
  6. Meanwhile, make the sauce: melt butter in a medium saucepan over medium heat. Stir in chopped roasted poblano and jalapenos. Sprinkle in the flour and stir to combine. Cook, stirring frequently, until flour is lightly browned, about 1 – 2 minutes. Whisk in chicken broth, garlic powder, salt, and pepper. Let cook over medium heat, stirring frequently, until the mixture bubbles and thickens. Remove from heat. Stir in Greek yogurt and cilantro. Serve over baked burritos.


2 Comments

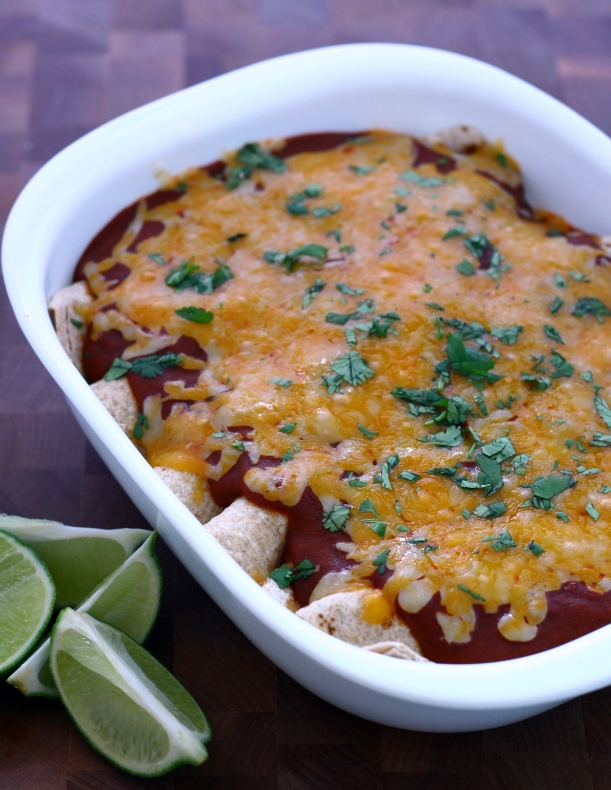
Garlic Lime Chicken Enchiladas

Wow, I can’t believe it’s May already! Time has been absolutely flying by. I feel like whenever I have deadlines looming in future time just gets away from me. Right now the deadlines are mostly work-related, but my impending half marathon is also out there. I have been only half-heartedly training so it should be interesting. I’m just hoping the weather will be nicer this year! Last year, they shut the race down just minutes after I crossed the finish line due to the extreme heat.

Last Friday I spoke briefly about how I had found so many great recipes on Kim’s blog, Feed Me, Seymour. I had to choose just one recipe for the swap, but I couldn’t stop myself from making another dish. So, today I share with you the other dish – garlic lime chicken enchiladas.

I adapted her recipe slightly and made a homemade enchilada sauce and used Mexican rice instead of plain white rice. If I’m ever short on time I will definitely use a canned sauce and white rice – this dish is so full of flavor that I’m sure it’s just as tasty the original way!

If you notice that the enchiladas seem a bit squished in the photo, well, it’s because they are. I couldn’t find my 9×13 pan anywhere.  I tore the kitchen apart looking for it and finally settled on using a smaller pan. I “found” the 9×13 pan a week later when my mom returned it to me 😉 Guess I need to keep better track of my bakeware, huh?

garlic lime chicken enchiladas | doughseedough.net

Garlic Lime Chicken Enchiladas
adapted from Feed Me, Seymour

enchilada sauce:
2 tablespoons canola oil
2 tablespoons flour
1/4 cup chili powder
8 ounces tomato sauce
1 1/2 cups low sodium chicken broth
1/4 teaspoon ground cumin
1/4 teaspoon garlic powder
1/4 teaspoon onion powder
1/2 teaspoon salt

Mexican rice:
1 tablespoon olive oil
1 small onion, chopped
1 garlic clove, minced
1 cup uncooked white rice
1 teaspoon garlic powder
1/2 teaspoon ground cumin
1/2 cup tomato sauce
2 cups low sodium chicken broth

3 cloves minced garlic
1 thinly sliced red onion
juice of 1 lime
2 tsp. cayenne pepper
3 Tbsp. tomato paste
2 chicken breasts, cooked and shredded
2 cups cooked Mexican rice (recipe above)
1/4 cup cilantro, chopped and divided
2 cups enchilada sauce (recipe above)
1 tsp. olive oil
6 whole wheat flour tortillas
1 cup shredded cheddar jack cheese

  1. To make the enchilada sauce, heat oil in a skillet over medium heat. Stir in flour and chili powder and cook, stirring constantly, until lightly brown. Gradually stir in remaining ingredients and stir until smooth. Cook for 10 – 15 more minutes, until slightly thickened.
  2. To make the rice, heat oil in a large pan over medium-high heat. Add in onion and saute until translucent, 3 – 4 minutes. Add in garlic and rice and cook until rice is slightly toasted, about 2 minutes. Stir in remaining ingredients and bring to a boil. Reduce heat to a simmer, cover, and cook until rice is tender, about 20 minutes. Remove pan from heat and fluff with a fork.
  3. To make the enchiladas, preheat oven to 375°F. Heat olive oil in a pan over medium-high heat. Saute onions until slightly soft. Add in garlic and saute for an additional minute. Stir in lime juice, cayenne pepper, and tomato paste.
  4. Remove pan from heat and add in chicken, Mexican rice, and half the cilantro. Stir to combine.
  5. To assemble: place tortillas on a clean surface. Put 2 large spoonfuls of filling onto each tortilla and roll tightly. Place seam side down in a 9×13-inch baking dish. Pour enchilada sauce on top of tortillas and top with shredded cheese. Bake in preheated oven for 10 minutes or until cheese is melted.
  6. Sprinkle with remaining cilantro before serving.


Leave a comment

Beef & Ricotta Meatballs

Nothing quite beats a good plate of spaghetti and meatballs. I have been looking for ways to use up the cans of marinara I have in my pantry. You see, last summer our garden did really well. However, we planted mostly tomatoes. This meant that at the end of summer we had roughly a bajillion tomatoes in our garden. And as much as I love tomatoes, there was no way we could eat all of them. I decided to make salsa and marinara with the tomatoes. In hindsight, I wish I had canned whole tomatoes, because now I have a lot of marinara and salsa to use up.

So, this summer we plan to plant even more tomatoes. And I promise to be much smarter about how I go about canning them!!

I saw this recipe on Prevention RD and was intrigued – I’ve never put ricotta into my meatballs before. Since I’m always looking for new things to cook up, I decided to give it a try. The result? Absolutely delish. They were wonderful and tender and best of all, I was able to use up a jar of marinara 🙂

beef & ricotta meatballs

Beef & Ricotta Meatballs
from The Lemon Bowl via Prevention RD

1 pound ground sirloin (90% lean)
2/3 cup low-fat ricotta
1/3 cup freshly grated parmesan cheese
2 egg whites, whisked
1 garlic clove, grated
1/4 cup parsley, minced
1/2 teaspoon salt
1/4 teaspoon nutmeg
1/4 teaspoon black pepper

  1. Preheat oven to 400°F and spray a baking sheet with non-stick spray and set aside. 
  2. In a medium bowl, combine all ingredients, being careful not to over-mix.
  3. Using a small cooking scoop, scoop out meat mixture and shape into balls. Place in an even layer on the  baking sheet.
  4. Bake for 20 – 25 minutes or until browned.
  5. Serve with pasta and sauce of choice.