DoughSeeDough

a balanced plate with room for dessert


3 Comments

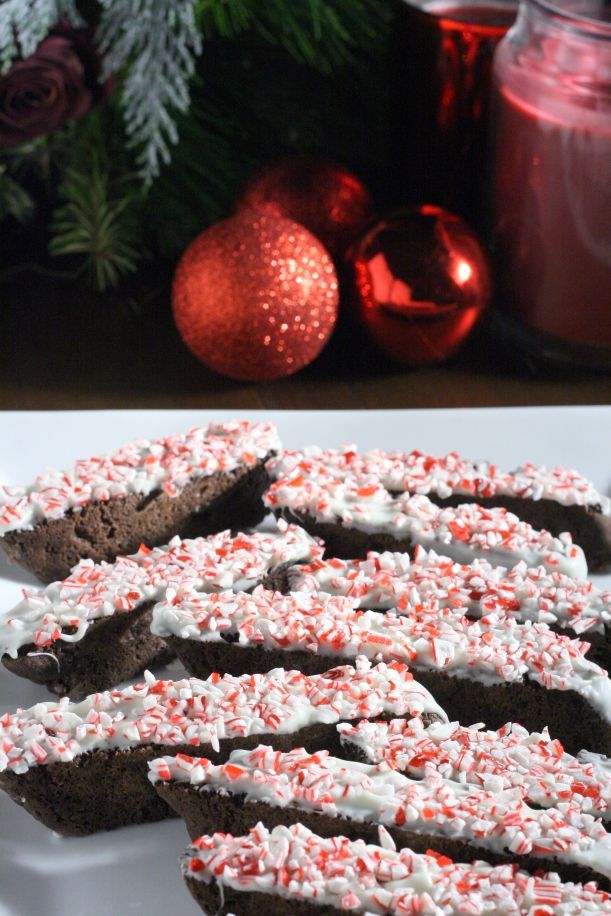
Double Chocolate Peppermint Biscotti

2015 has been quite the year for us. I just finished my first year of grad school and I am transitioning to a new job that will allow me to be at home with Mike once again. While I have loved my work in Madison the last 2 1/2 years, being away from my husband during the week was more difficult than I had anticipated. I’m sad to be leaving a great job and my wonderful coworkers, but I am excited to see what opportunities my new position will bring.

Christmas is just a few days away, but the weather outside is more spring-like than winter. I’m not sure how I feel about the lack of snow. I’m trying to find ways to get into the Christmas spirit and this biscotti really hit the spot. The double chocolate base pairs perfectly with the white chocolate and candy canes. It’s sweet and crunchy and perfect with a mug of hot chocolate or some coffee.

Double Chocolate Peppermint Biscotti | doughseedough.net

I made my go-to Andes mint cookies for a cookie exchange last week, but I think that these biscotti will be my new holiday treat. So easy, so festive, and so good!

Double Chocolate Peppermint Biscotti | doughseedough.net

I want to wish you and your loved ones a very merry Christmas and a wonderful new year!

Double Chocolate Peppermint Biscotti

1 stick (8 tablespoons) unsalted butter, room temperature
3/4 cup + 2 tablespoons granulated sugar
2 large eggs
2 teaspoons vanilla extract
1 3/4 cup + 2 tablespoons all-purpose flour
1/4 cup + 2 tablespoons unsweetened cocoa powder
1 teaspoon baking soda
3/4 teaspoon salt
3/4 cup semisweet chocolate chips
8 ounces white chocolate chips
3/4 cup crushed peppermint candies

  1. Preheat oven to 350°F and line a baking sheet with parchment paper.
  2. In the bowl of a stand mixer, beat the butter and sugar together until light and fluffy, about 1 – 2 minutes. Scrape down the sides and add eggs in, one at a time, until well combined. Scrape down the sides and add in the vanilla extract.
  3. In a medium bowl, whisk together flour, cocoa powder, baking soda, and salt.  Add the dry ingredients and semisweet chocolate chips into the butter mixture and mix on low speed until just combined.
  4. Lightly flour a work surface. Using a rubber spatula, scrape the dough onto the work surface (it will be very sticky) and lightly dust with flour. Using your hands, shape the dough into a ball and divide into two even pieces.
  5. Form the dough into a log by rolling it back and forth. Place the logs onto the prepared baking sheet and press the dough into a longer log that is about 2 inches wide and 3/4 inch high. Make sure to leave enough room between the logs to allow them to spread slightly during baking.
  6. Bake in preheated oven for 35 minutes. Allow to cool on the baking pan for a couple minutes, or until just cool enough to handle.
  7. Using a sharp knife, cut the logs diagonally into 3/4 inch slices. Turn the biscotti onto their side and bake for 10 more minutes to allow the biscotti to crisp up. Allow biscotti to cool for 5 minutes on the pan and move to a wire rack to cool completely .
  8. Once biscotti are cool, it’s time to decorate them. Line the baking pan with a clean sheet of parchment paper.
  9. Place white chocolate chips into a microwave-safe bowl and microwave for about 1 minute, stirring every 20 seconds, or until chocolate is melted and smooth.
  10. Dip one side of the biscotti into the melted chocolate, using the back of a spoon to make sure the biscotti is evenly covered. Sprinkle with crushed peppermint candy. Repeat with the remaining biscotti, re-heating the chocolate as needed.

recipe adapted from Once Upon a Chef


2 Comments

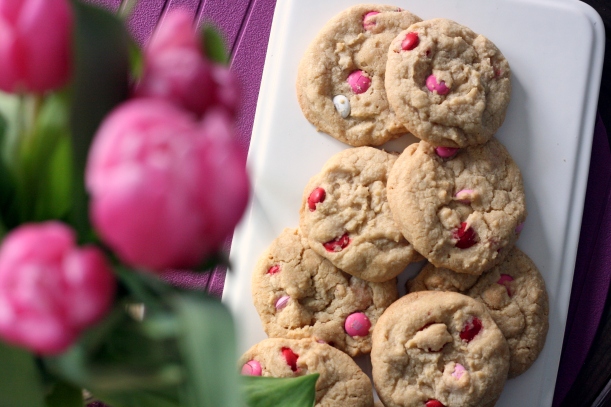
Thick & Chewy M&M Cookies

Thick & Chewy M&M Cookies | doughseedough.net

I took today off work with the hopes of getting stuff done around the house. My garden is a jungle of weeds. I need to dust, vacuum, and do approximately 20 loads of laundry. Instead of doing anything productive, so far today I have made bourbon caramel apple cinnamon rolls, biked to Baskin Robbins for ice cream, and watched a shameful amount of Netflix. I decided to blog a bit so I could cross at least one thing off my “to do” list.

I’ve been meaning to share this cookie recipe with y’all for a while. I first made them in the winter, during my search for the perfect chocolate chip cookie. I tested several recipes, and decided that Cook’s Illustrated’s Thick and Chewy Chocolate Chip Cookies were the winner.

I’ve been making them 4 dozen at a time ever since with a variety of mix-ins – chocolate chips, M&Ms, nuts… basically whatever your heart desires. Mike told me that he prefers them with M&Ms, so I’ve been making them with just M&Ms ever since. The best part of this recipe? Unlike this awesome cookie recipe, it doesn’t require any overnight refrigeration. That means instant gratification. Enjoy them this holiday weekend with some red, white and blue M&Ms! Happy Independence Day, everyone!

Thick & Chewy M&M Cookies | doughseedough.net

Thick and Chewy M&M Cookies
slightly adapted from Cook’s Illustrated

2 1/8 cups all-purpose flour
1/2 teaspoon salt
1/2 teaspoon baking soda
12 tablespoons butter, melted and cooled
1 cup brown sugar
1/2 cup sugar
1 large egg + 1 large egg yolk
2 teaspoons vanilla extract
2 cups of any combination of the following: chocolate chips, chocolate chunks, M&Ms, nuts

  1. Preheat oven to 325°F. Line two baking sheets with parchment paper and set aside.
  2. In a medium bowl, mix together flour, salt, and baking soda; set aside.
  3. In the bowl of a stand mixer, mix butter, brown sugar, and sugar until blended. Mix in egg, yolk, and vanilla. Add in dry ingredients until just combined. Stir in chocolate chips.
  4. To form the cookie: Scoop a heaping tablespoon of dough and form it into a ball. Using the fingertips of both hands, pull the ball into two equal halves. Rotate the halves ninety degrees so that the jagged edges are facing up. Gently press the halves together to form a single cookie dough ball, being careful not to smooth out the jagged surface. Place the dough 2 inches apart on the prepared cookie sheet.
  5. Bake cookies for 10 – 13 minutes, or until cookies are a light golden brown and the outer edges have started to harden. Let cookies cool for 5 minutes on a cookie sheet before transferring to a cooling rack to cool complete.

Thick & Chewy M&M Cookies | doughseedough.net


1 Comment

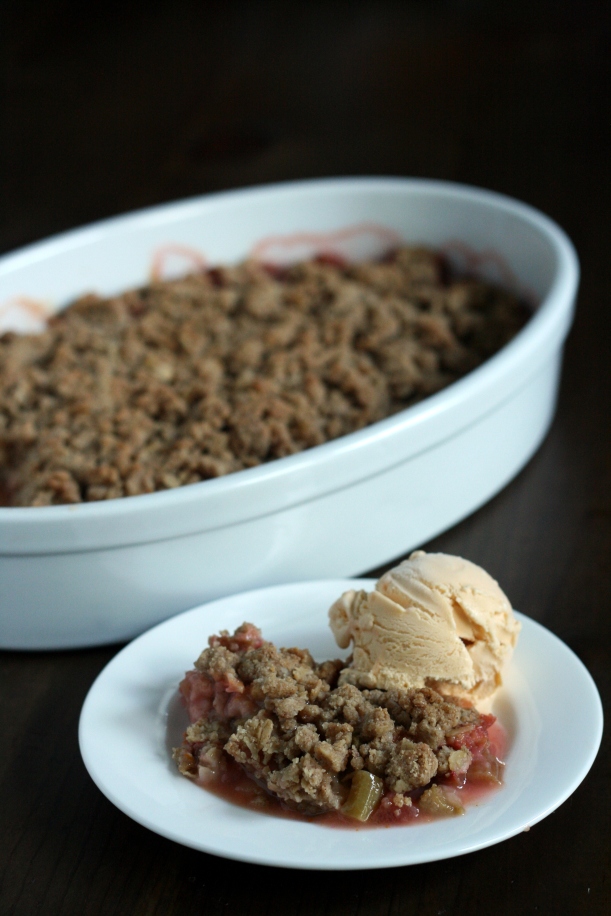
Rhubarb Ginger Crisp {GF & Vegan}

Rhubarb Ginger Crisp {GF & Vegan} | doughseedough.net

I’m a bit of a cheater. This month’s What’s Baking theme was “Baking with Fresh Fruit”. Rhubarb is a veg, but I’m going to go and act like it’s a fruit. Because rhubarb is seriously one of my favorite things to bake with in the summer. Over the years, I’ve drifted towards a preference of rhubarb dishes that are a bit more in-your-face tart. The tartness of rhubarb is one of the reasons I love it so much. I’ve mentioned that I’m obsessed with sour candy, right? Rhubarb is nature’s sour candy and I can’t get enough of the stuff.

Rhubarb Ginger Crisp {GF & Vegan} | doughseedough.net


Want to know how much I loved this? I served this during dinner with Mike’s family and instantly regretted it. I selfishly kept the leftovers to myself and managed to eat them before I crawled into bed. So, do yourself a favor and just make a double batch: one to share and one to keep for yourself. Or just keep both for yourself. Good food is meant to be shared, but really good food is meant to be hoarded and eaten in secret without the threat of someone swooping in to take a bite.

Rhubarb Ginger Crisp

for the filling:
5 cups chopped rhubarb (about 2 pounds)
1/3 cup finely chopped crystallized ginger
1/3 cup sugar
2 tablespoons oat flour
zest and juice of 1 orange

for the topping:
1 cup oat flour
1 cup old fashioned oats
1/2 teaspoon salt
1 teaspoon cinnamon
1/2 cup brown sugar
1 tablespoon freshly grated ginger
7 tablespoons Earth Balance, softened

  1. Preheat oven to 350°F. Butter a 2 quart baking dish and set aside.
  2. To make the filling: In a large bowl, combine the rhubarb, crystallized ginger, sugar, 2 tablespoons oat flour, orange zest and juice. Stir until well combined. Spread filling into the bottom of the prepared dish.
  3. To make the topping: In a separate bowl, stir together the oat flour, oats, salt, cinnamon, brown sugar, and grated ginger. Using your clean hands, work in the softened butter until the mixture coarse crumbs the size of a pea. Spread topping evenly over rhubarb filling.
  4. Bake for 45 minutes to 1 hour in preheated oven or until filling is tender and bubbling and topping is golden brown.


Leave a comment

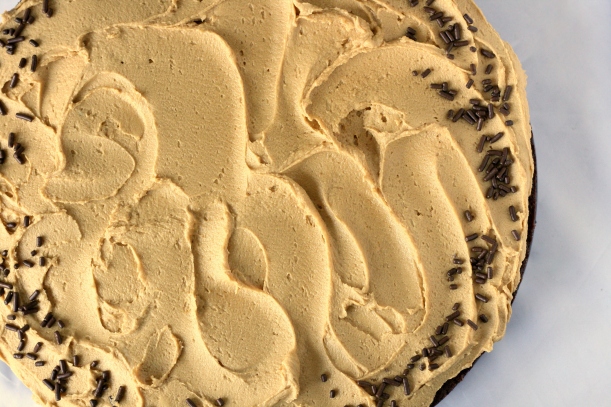
Brownie Cake with Biscoff Frosting

Brownie Cake with Biscoff Frosting |doughseedough.net

I can’t really explain my obsession with Biscoff cookies. I love them so much that my sister hoards them from her travels and gives them to me. On her last trip back from the UK, she brought me a jar of Biscoff spread along with a handful of the cookies. The spread sat in my pantry for months; I didn’t know what to do with it. She threw some ideas at me – eat it with a spoon! on bread with Nutella! with a banana! – but none of them really sounded special enough to me. This was my first experience with Biscoff spread. I wanted everything to be perfect. After searching a bit, I found this recipe for a Biscoff Brownie Cake and I was sold.

Brownie Cake with Biscoff Frosting |doughseedough.net

I will admit that I ate a disgusting amount of frosting with a spoon. And I may have eaten a spoonful of the spread when I was making the frosting, too. Maybe.

Brownie Cake with Biscoff Frosting
slightly adapted from Bakers Royale

for the brownie:
12 tablespoons unsalted butter
6 ounces unsweetened chocolate, roughly chopped
2 1/4 cups granulated sugar
1/2 teaspoon salt
3 teaspoons vanilla extract
3 large eggs
1 1/2 cups all purpose flour
3 tablespoons cocoa powder

for the frosting:
1/2 cup butter, room temperature
1 cup Biscoff spread
1 1/2 cups powdered sugar, sifted
1 – 3 tablespoons milk

  1. Preheat oven to 350°F. Line a 9-inch springform pan with parchment paper and butter parchment paper. Set aside.
  2. To make the brownie: Combine butter and chocolate in a large microwave-safe bowl. Heat in 30 second increments, stirring after each increment, until chocolate is melted and mixture is smooth. Set aside to cool slightly. Stir in sugar, salt, and vanilla until blended. Add in eggs, one at a time, stirring after each egg until well blended. Stir in flour and cocoa powder and mix until just combined. Scrape batter into prepared springform pan and smooth out the top with a spatula. Bake for 35 – 40 minutes, or until a toothpick inserted into the center comes out with a few moist crumbs.
  3. Set pan on a wire rack to cool. Run a knife around the edge of the brownie and release from the springform pan. Flip brownie onto a flat surface and peel off parchment paper. Turn brownie right-side up and allow to cool completely.
  4. To make the Biscoff frosting: Beat butter and Biscoff spread on medium speed until smooth. Add in powdered sugar and milk until mixture is smooth. Add more milk and/or powdered sugar to reach desired consistency.
  5. To assemble: Spread frosting on top of cake and smooth with an offset spatula. Decorate with chocolate sprinkles, if desired.

Brownie Cake with Biscoff Frosting |doughseedough.net


2 Comments

Mini Cranberry Swirl Cheesecakes

Cranberries are one of my favorite parts about winter. So many cranberries, so little time. These cheesecakes were the perfect way to showcase a bit of the tart fruit. Mini Cranberry Swirl Cheesecakes | doughseedough.net I think these mini cheesecakes are my new go-to party dessert. They’re super quick and easy and they are the perfect amount of pretty. These baby cheesecakes won’t crack and won’t brown before they’re cooked through. They’re pretty much impossible to mess up. So, if you’re looking for an easy, stress-free dessert, your search is over! These mini cranberry swirl cheesecakes are the dessert for you. Enjoy! Mini Cranberry Swirl Cheesecakes | doughseedough.net Mini Cranberry Swirl Cheesecakes makes 3 dozen for the cranberry swirl: 1/2 cup cranberries 1/8 cup sugar 1/2 teaspoon lemon zest 1/2 cup water for the crust: 3/4 cup graham cracker crumbs (about 6 whole graham cracker sheets) 3 tablespoons butter for the filling: 2 (8 ounce) packages cream cheese, room temperature 3/4 cup sugar 1/2 teaspoon vanilla 1/8 teaspoon salt 2 large eggs, room temperature

  1. Preheat oven to 325°F. Line a mini cupcake pan with paper liners and set aside.
  2. Prepare the cranberry sauce: In a small saucepan over medium-high heat, combine the cranberries, sugar, lemon zest, and water. Cook, stirring frequently, until mixture comes to a boil. Reduce to a simmer and continue cooking, stirring frequently, until mixture thickens. Remove from heat and set aside to cool.
  3. Prepare the crust: In a small bowl, combine the graham cracker crumbs and melted butter. Stir together until well combined. Spoon a heaping teaspoon of graham cracker crumbs into the bottom of each liner. Press down to pack into a crust; I found a shot glass worked really well for this step. Bake in preheated oven for 5 minutes. Remove and allow to cool.
  4. Prepare the filling: In the bowl of an electric mixer, beat the cream cheese on medium-high speed or until smooth and fluffy. Mix in the sugar, vanilla, and salt until well combined. Add in eggs one at a time, beating well after each addition.
  5. To assemble the cheescakes: Fill each liner 3/4 of the way with cheesecake filling. Carefully place 1/4 – 1/2 teaspoon of cranberry sauce on top of the cheescake filling. Swirl the cranberry sauce using a toothpick to create a marbled effect.
  6. Bake cheesecakes in preheated oven for about 15 minutes, or until cheesecake is set.
  7. Allow cheesecakes to cool in pan on a wire rack. Once cool, cover with plastic wrap and refrigerate for at least one hour.

adapted from The Baker Chick, originally from Martha Stewart


1 Comment

Overnight Apple Gingerbread Cinnamon Rolls

These beauts were made for this month’s gingerbread-themed What’s Baking, hosted by Catherine at Pursuing a Domestic Goddess-ness. When I found out that the theme was gingerbread, I knew immediately that I just had to make some cinnamon rolls.

Overnight Apple-Gingerbread Cinnamon Rolls | doughseedough.net

There are few sweet brunch foods that I like. Waffles and pancakes? No thanks. But, cinnamon rolls are one food that I can get behind. Soft, fluffy, warm-from-the-oven bundles of goodness. Gingerbread and a bit of apple make these the ultimate winter breakfast or brunch dish. Make someone’s day by waking them up with some fresh-baked cinnamon rolls.

Overnight Apple-Gingerbread Cinnamon Rolls | doughseedough.net

Overnight Apple Gingerbread Cinnamon Rolls

for the dough:
1 cup skim milk
2 1/4 teaspoons active dry yeast
1 teaspoon sugar
4 – 5 cups all-purpose flour
1/4 cup brown sugar
1/2 teaspoon salt
1 teaspoon cinnamon
1 teaspoon ginger
1/4 teaspoon nutmeg
1 large egg
1/4 cup butter, melted and cooled
1/3 cup molasses

for the filling:
1 cup brown sugar
1 teaspoon cinnamon
2 Granny Smith apples, diced (2 cups)
1/4 cup butter, softened

for the icing:
2 cups powdered sugar
1 teaspoon vanilla extract
3 – 4 tablespoons milk

  1. Heat milk to 115°F. Stir in yeast and 1 teaspoon sugar until evenly dispersed. Set aside for 10 minutes to proof.
  2. In the bowl of a stand mixer, combine 4 cups flour, brown sugar, salt, cinnamon, ginger, and nutmeg. Set mixer on low and slowly add in yeast mixture, egg, butter, and molasses. Add in remaining flour 1/4 cup at a time, kneading well after each addition, until dough turns smooth and soft but still slightly sticky. Transfer dough to a lightly greased bowl. Cover and let rise in a warm location for 1 hour, or until doubled in size.
  3. Line a 9×13-inch pan with parchment paper and set aside.
  4. Lightly flour your work surface. Turn dough out onto surface and roll into a 20×13-inch rectangle.
  5. Spread softened butter over the entire surface. Sprinkle evenly with brown sugar and cinnamon. Distribute diced apples over the entire surface.
  6. Starting at the long end closest to you, tightly roll the cinnamon roll up. Gently pinch the end to seal and turn the roll seam-side down. Cut into 12 equal pieces. Place rolls into prepared baking pan. Cover tightly with plastic wrap and refrigerate overnight.
  7. Remove rolls from the refrigerator and allow to sit at room temperature for 45 minutes.
  8. Preheat oven to 350°F. Bake for 35 – 40 minutes or until lightly browned.
  9. Prepare the icing: In a medium bowl, combine powdered sugar, vanilla extract, and milk and whisk until smooth. Drizzle over warm rolls and serve.


adapted from Baked by Rachel


3 Comments

Chai Latte Cupcakes

Chai Latte Cupcakes | doughseedough.net

I’m not a coffee drinker, but I will never turn down a cup of chai. Chai tea and chai tea lattes will always be my drink of choice. My favorite chai tea latte is soon going to disappear forever; the cafe is closing at the end of the year. So, in honor of the great run Harmony Cafe had and in celebration of Cupcake Day, I thought I would bake some chai latte cupcakes topped with a spiced maple buttercream frosting.

Chai Latte Cupcakes | doughseedough.net

Chai Latte Cupcakes

for the cupcakes:
1 teaspoons ground cinnamon
1/4 teaspoon ground clove
1/4 teaspoon ground cardamom
1/2 teaspoon ground ginger
1/4 teaspoon freshly ground black pepper
3 black tea bags
3/4 cup milk (plus a little extra)
1/2 cup butter, room temperature
1 cup sugar
1 teaspoon vanilla extract
2 large eggs + 1 egg yolk, room temperature
1 3/4 cup flour
1/2 teaspoon baking soda
1/2 teaspoon baking powder
1/4 teaspoon salt

for the frosting:
1 cup butter, room temperature
1 teaspoon vanilla extract
1 tablespoon milk
⅛ cup maple syrup
¼ teaspoon cinnamon
¼ teaspoon cardamom
2 – 3 cups powdered sugar, sifted

  1. Preheat oven to 350F. Line a muffin tin with 12 cupcake liners and set aside.
  2. In a small pot, combine spices, tea bags, and milk. Bring to a simmer and remove from heat. Let steep for 10 minutes. Remove tea bags, squeezing to remove as much liquid as possible. Pour liquid into a measuring cup and add in more milk to bring it to exactly 3/4 cup.
  3. In the bowl of a stand mixer or in a large bowl, cream together butter and sugar until light and fluffy, about 2 – 3 minutes. Mix in vanilla and beat in eggs one at a time, mixing well after each addition.
  4. In a separate bowl, whisk together flour, baking soda, baking powder, and salt.
  5. Pour milk mixture and flour mixture into mixing bowl and mix until just combined.
  6. Fill cupcake liners ⅔ full and bake for 18 – 20 minutes or until the tops spring back when lightly touched or when a toothpick inserted into the center comes out clean.
  7. Transfer to a cooling rack and allow to cool completely before frosting.
  8. To prepare the frosting: in the bowl of a stand mixer, beat butter until creamy. Mix in vanilla, maple syrup, and spices. Beat in powdered sugar ½ cup at a time until the desired consistency is reached. Spread or pipe frosting onto cooled cupcakes.


adapted from Naturally Ella


Leave a comment

Cinnamon Chip Snickerdoodles

Taste-testing is something I take very seriously. I taste-test to make sure the food I make and post about isn’t absolute garbage and… well, because I really love to eat. I can usually control myself and take a bite or two of a dessert before packaging it all up and sending it off to friends, coworkers, and family members. These cookies, though… I took one bite, loved it, and took another, and another. Before I knew it, I had eaten 2.5 cookies. I then proceeded to eat 2.5 more after I Instagrammed the evidence of my lack of self control.

Cinnamon Chip Snickerdoodles | doughseedough.net

I have already professed my love for cinnamon chips in this post. This takes my love to a whole new level. I purposefully left the remaining 4 dozen cookies in Appleton so I wouldn’t be tempted to eat the whole batch during the work week. Trust me, folks. There is nothing better than a soft, chewy cinnamon-y snickerdoodle cookie studded with cinnamon chips.

Cinnamon Chip Snickerdoodles | doughseedough.net

Cinnamon Chip Snickerdoodles

1 cup (2 sticks) butter, room temperature
1 1/2 cups sugar
2 large eggs
1 teaspoon vanilla extract
2 teaspoons cream of tartar
1/2 teaspoon baking soda
3 cups all-purpose flour
10-ounce bag (1 1/2 cups) cinnamon chips
1/4 cup sugar
1 teaspoon cinnamon

  1. Preheat oven to 375°. Line two baking sheets with parchment paper and set aside.
  2. In the bowl of a stand mixer or in a large bowl, beat together butter and 1 1/2 cups sugar and light and fluffy, scraping down the sides of the bowl a couple times. Mix in eggs and vanilla until well combined. Stir in cream of tartar, baking soda, and flour until well combined. Mix in cinnamon chips.
  3. In a separate, shallow bowl, mix together 1/4 cup sugar and cinnamon. Shape dough into 1-inch balls and roll in the cinnamon sugar. Place dough balls 2 inches apart on the prepared baking sheets. Bake for 10 – 12 minutes or until edges or golden brown. Let cool on baking sheets for one minute before moving to a cooling rack to cool completely.


makes 4 dozen cookies


6 Comments

New York Cheesecake

I love cheesecake. I can’t really pinpoint when or how my love for cheesecake started, but there are two memories I strongly associate with the dessert:

  1. Back in high school, Mike and I would buy Sara Lee cheesecakes and eat the whole dang thing while watching Family Guy. Yes, a whole cheesecake. Between two people. Oh, how I wish I could still get away with eating like that!
  2. My sister, a self-proclaimed cheesecake-hater-turned-cheesecake-lover all because of (drum roll please) my cheesecake. I’m convinced that she’s just never had good cheesecake until I made one from scratch.

Part of me regrets ever introducing my sister to the magic of a good cheesecake; she’s always requesting it. I declined more than I care to admit. The stress of a cheesecake was just too much for me sometimes. Yes, I am that weirdo that will stress out to the max over a cheesecake that browned a little too much or cracked just when I thought everything was perfect. I finally gave in over Thanksgiving weekend and made a New York cheesecake for her. This beaut has five (yes, five) bricks of cream cheese in it. Make sure you mix well or you will end up with chunks of cream cheese. I mixed, scraped, mixed, and scraped for a long time and still ended up with some streaks of cream cheese. I blame it on my mixer bowl: it could barely contain the massive amount of filling. (Will someone please convince Mike that I need an industrial mixer in my kitchen?)

If your cheesecake browns a little too much or if it cracks, don’t fret – smother it in a delicious strawberry topping and it will be your little secret. 😉

New York Cheesecake with Strawberry Topping | doughseedough.net

New York Cheesecake with Strawberry Topping

for the crust:
15 full graham cracker sheets
8 tablespoons butter, melted

for the filling:
5  8-ounce packages cream cheese, softened
1 3/4 cups sugar
3 tablespoons all-purpose flour
zest of 1 orange
zest of 1 lemon
5 large eggs
2 large egg yolks
1 teaspoon vanilla extract

for the strawberry topping:
1 pound strawberries, hulled and sliced
1/4 cup water
1/8 – 1/4 cup sugar
1/2 lemon, juiced

  1. Preheat oven to 500°F. Butter the bottom and sides of a 9-inch springform pan and set aside.
  2. Prepare the crust: Place graham crackers in a food process and pulse into fine crumbs. Combine graham cracker crumbs and melted butter in a medium bowl until well combined. Press the crumbs onto the bottom and 2 1/2-inches up the sides of the prepared springform pan. Place pan in freezer until ready to fill.
  3. Prepare the filling: Place cream cheese, sugar, flour, orange zest and lemon zest in the bowl of a stand mixer or in a large bowl. Mix on medium-low speed until smooth. Add eggs and egg yolks one at a time, mixing well and scraping down the sides of the bowl between each addition. Mix in vanilla extract.
  4. Place springform pan in a shallow baking pan. Pour filling into the crust (it will be very full) and bake in the middle of the preheated oven for 12 minutes, or until puffed. Immediately reduce the temperature to 200°F without opening the oven door and continue baking for an additional hour, or until cheesecake is mostly firm with a slightly wobbly center.
  5. Run a knife around the top edge of the cheesecake to loosen. Place pan on a wire rack and allow to cool completely. Chill cheesecake, loosely covered, for at least 6 hours.
  6. Prepare the topping: Combine strawberries, water, sugar, and lemon juice in a saucepan over medium heat. Bring to a simmer and allow to cook for 20 minutes. Mash strawberries with a fork or blend with a stick blender, if desired. Transfer to a covered container and chill until ready to use.
  7. To serve: Remove side of pan and transfer the cheesecake to a serving plate. Spread topping over the top. Serve immediately or bring to room temperature before serving.

recipe adapted from Gourmet Magazine


2 Comments

Bourbon Fudge Brownies

Asking me to pick between these bourbon fudge brownies and the espresso bourbon brownies I made a few months ago is like asking me to choose between Sour Patch Kids or Sour Skittles. It’s pretty much impossible for me to pick. They’re both delicious. If you have people who aren’t huge coffee fans but still enjoy a nice hint of bourbon, these are the perfect brownie.

Mike likes to eat these with a little glass of bourbon on the side. I love these best when they’re straight from the oven. I mean, seriously, does anyone actually wait for stuff to cool before eating? I’m pretty sure I spend most of my life with a burnt tongue and/or roof of my mouth. I should probably work on my self control.

Bourbon Brownies | doughseedough.net

Bourbon Fudge Brownies

1/4 cup bourbon
1/4 cup semisweet chocolate chips
1 1/2 cups all-purpose flour
1/2 cup unsweeetened cocoa powder
1 teaspoon baking powder
1/2 teaspoon salt
1 1/3 cups sugar
6 tablespoons butter, softened
1 teaspoon vanilla extract
2 large eggs
cooking spray

  1. Preheat oven to 350°F. Coat a 9×9-inch baking pan with cooking spray and set aside.
  2. Bring bourbon to boil in a small saucepan. Remove pan from heat, add chocolate chips and stir until smooth.
  3. In a medium bowl, combine the flour, cocoa powder, baking powder, and salt and whisk until combined and lump-free.
  4. Combine the sugar and butter in a large bowl and beat with a mixer at medium speed until well combined. Add vanilla and eggs and beat to combine.
  5. Add bourbon and flour mixture and mix on low speed until just combined.
  6. Spread batter into prepared pan. Bake for 25 minutes or until a toothpick inserted in the center comes out clean.


recipe slightly adapted from Cooking Light