I’m gearing up for the holidays once again. It seems like the reasons to bake are never ending- fundraisers, brunch and cookie swaps at work and just-for-the-hell-of-it treats for friends and family. I’m going to send as many holiday baked goods your way in the next few weeks. You won’t want to miss any updates, so make sure you’re signed up for my email updates or follow me on Facebook (check it out on the right).
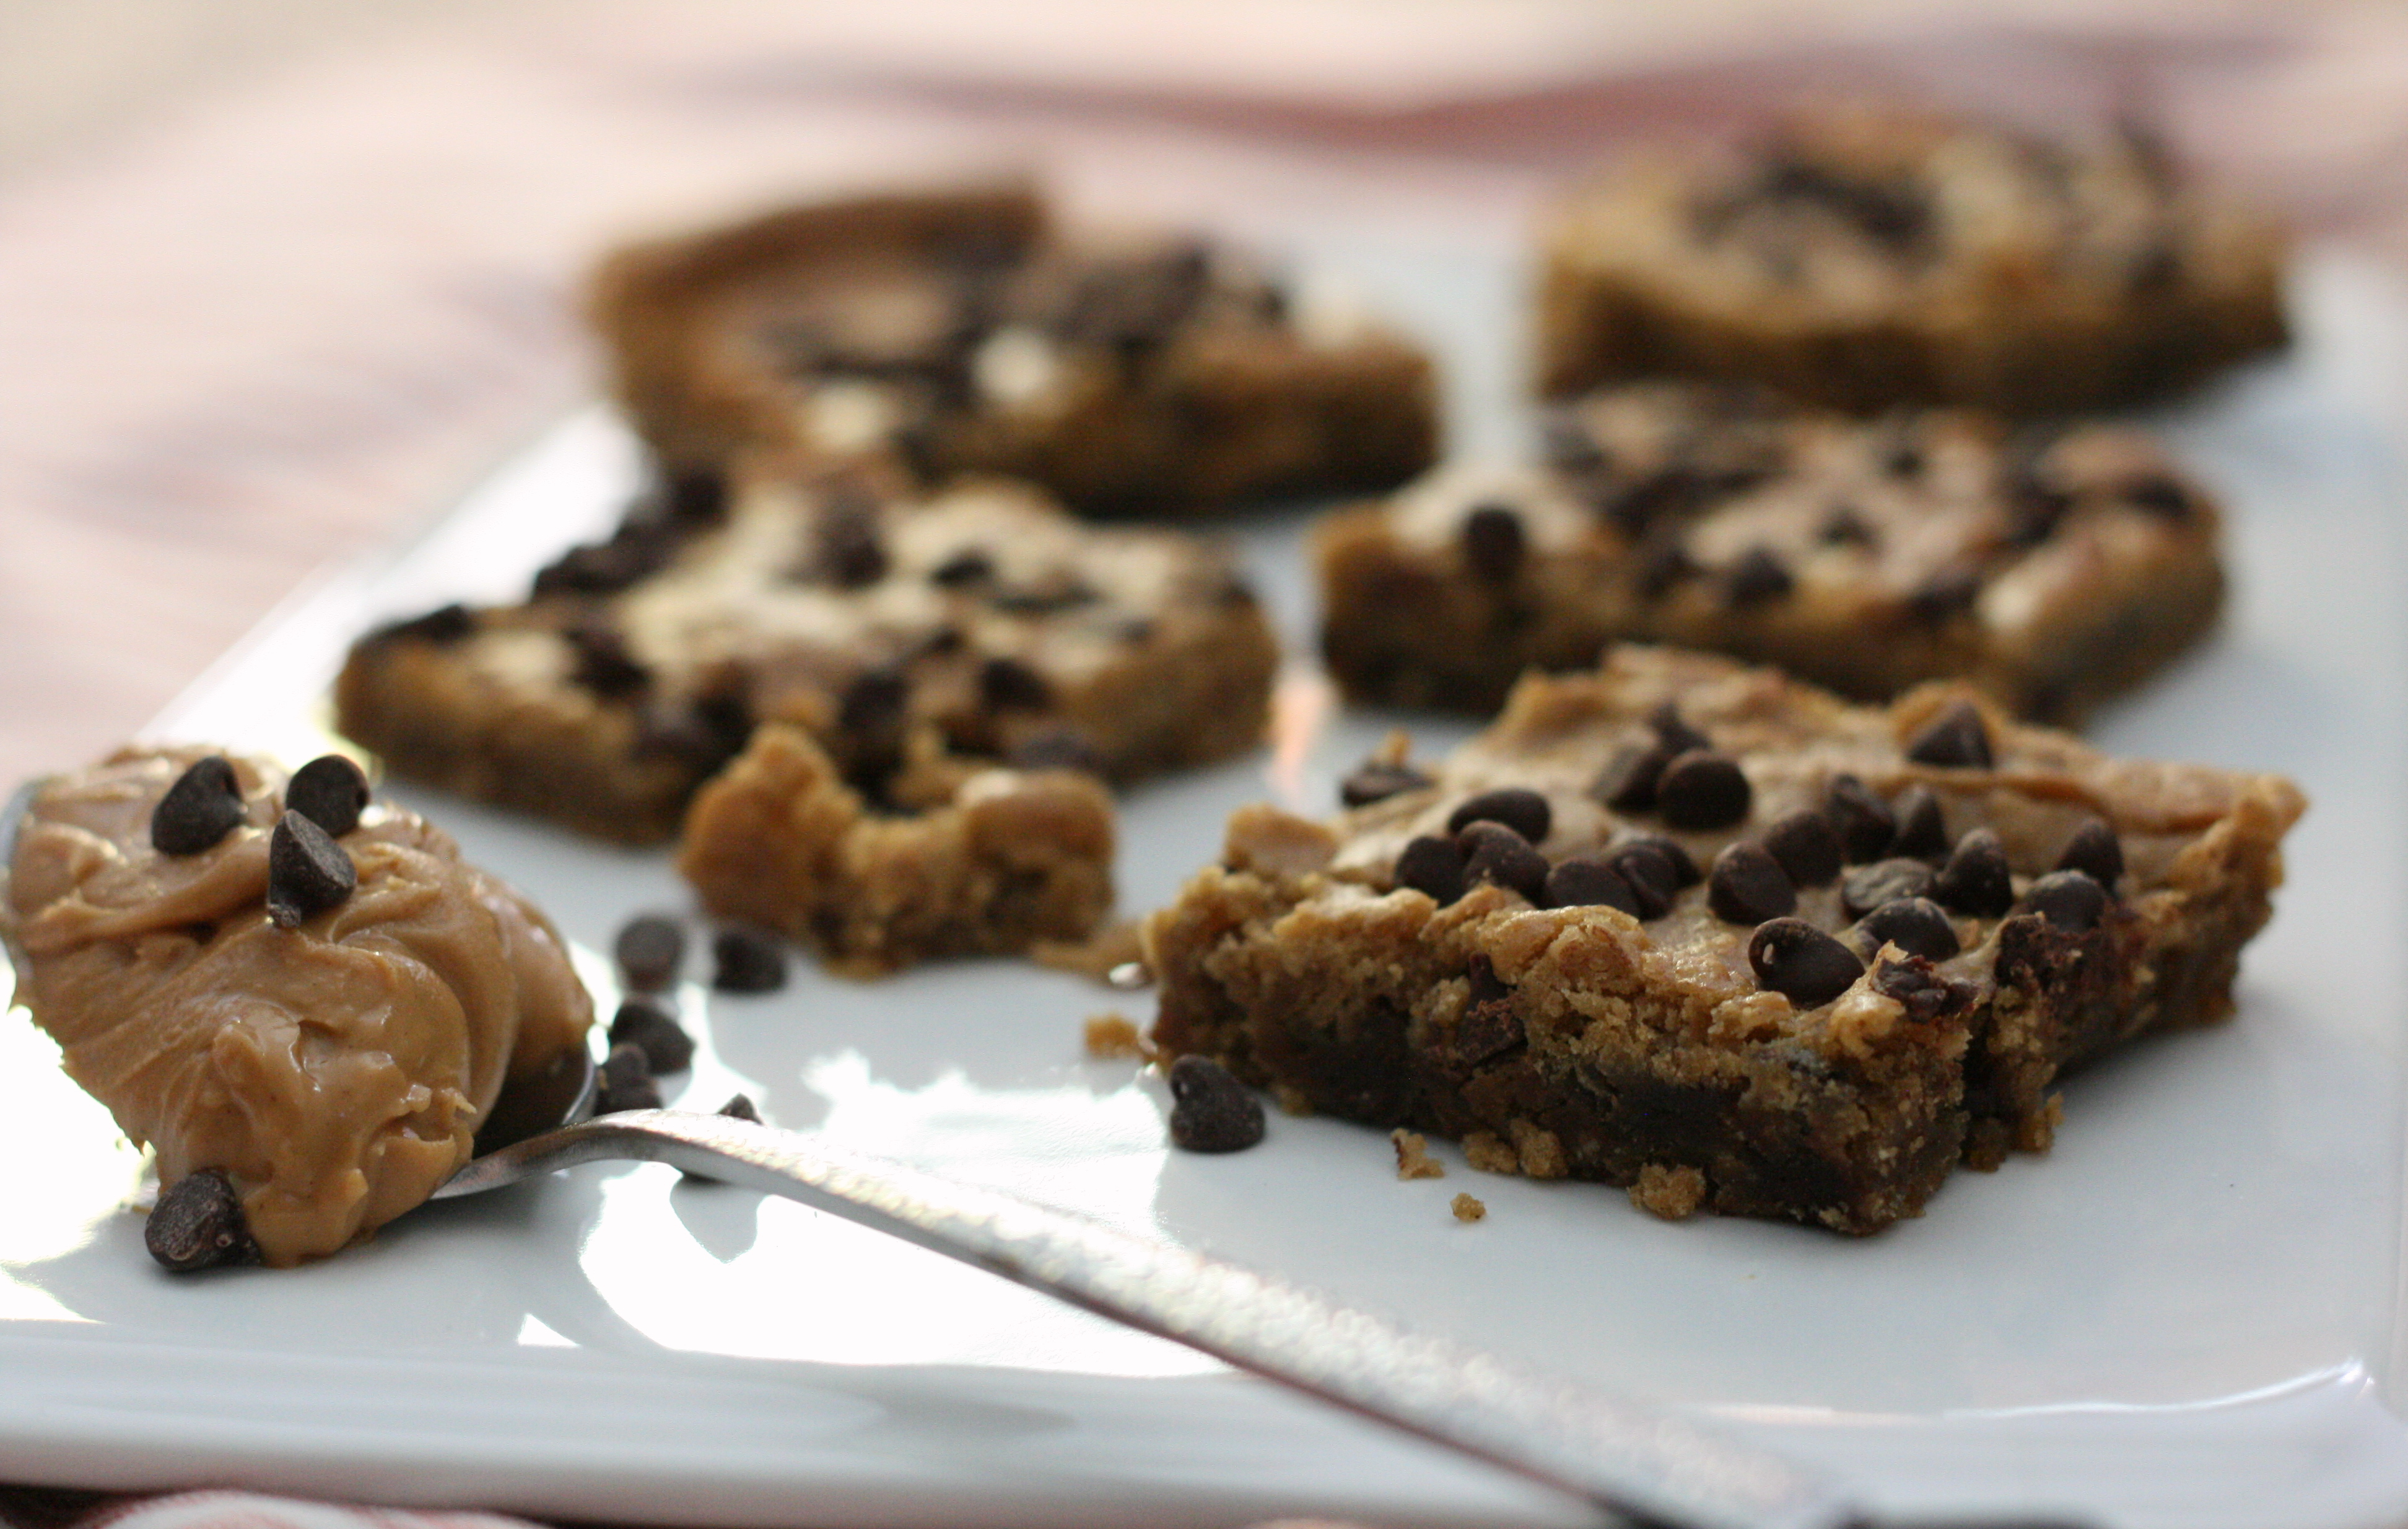
I’m kicking things off with these Chocolate Caramel Coconut Bars. You guys, this dessert it to die for. I got a bar similar to this at the farmers’ market a few weeks back. It was good, but not great. The bars were so insanely sweet that it took me four days to eat the tiny square. These bars? They’re definitely decadent and sweet, but not overly sweet. That said, I’m a big fan of sweet + salty, so I have a feeling that salted caramel will be making an appearance in the next batch I make!
Chocolate Caramel Coconut Bars
38 caramels (about 1 ¼ cup), unwrapped
6 tablespoons heavy cream
½ teaspoon vanilla extract
½ cup sugar
1 cup all purpose flour
1 cup old fashioned oats
¼ teaspoon salt
½ teaspoon baking soda
½ cup butter, room temperature
1 ½ cups semisweet chocolate chips
1 ½ cups shredded sweetened coconut
Preheat oven to 325°F. Line a 7×11-inch (or 9×9-inch) baking pan with parchment paper and set aside.
In a small pan over medium heat, heat the caramels and heavy cream until caramels are melted. Remove pan from heat and stir in vanilla extract. Set aside.
In a large bowl, mix together sugar, flour, oats, salt, baking powder and butter until mixture is crumbly. Press the mixture into the bottom of the prepared pan. Bake in preheated oven for 20 minutes.
Sprinkle chocolate chips on top of crust in an even layer. Pour the caramel sauce over the chocolate chips and sprinkle the coconut on top. Bake for an additional 20 – 25 minutes or until coconut is toasted and the edges of the bars are golden brown.
Let cool completely and lift the bars out of the pan with the parchment paper. Set on cutting board and cut bars into squares.
I can’t really remember how (or why) I started making biscotti. But for as long as I can recall, my mom has always requested biscotti as her gift for just about everything – birthday, Mother’s Day, Christmas… Thanksgiving?
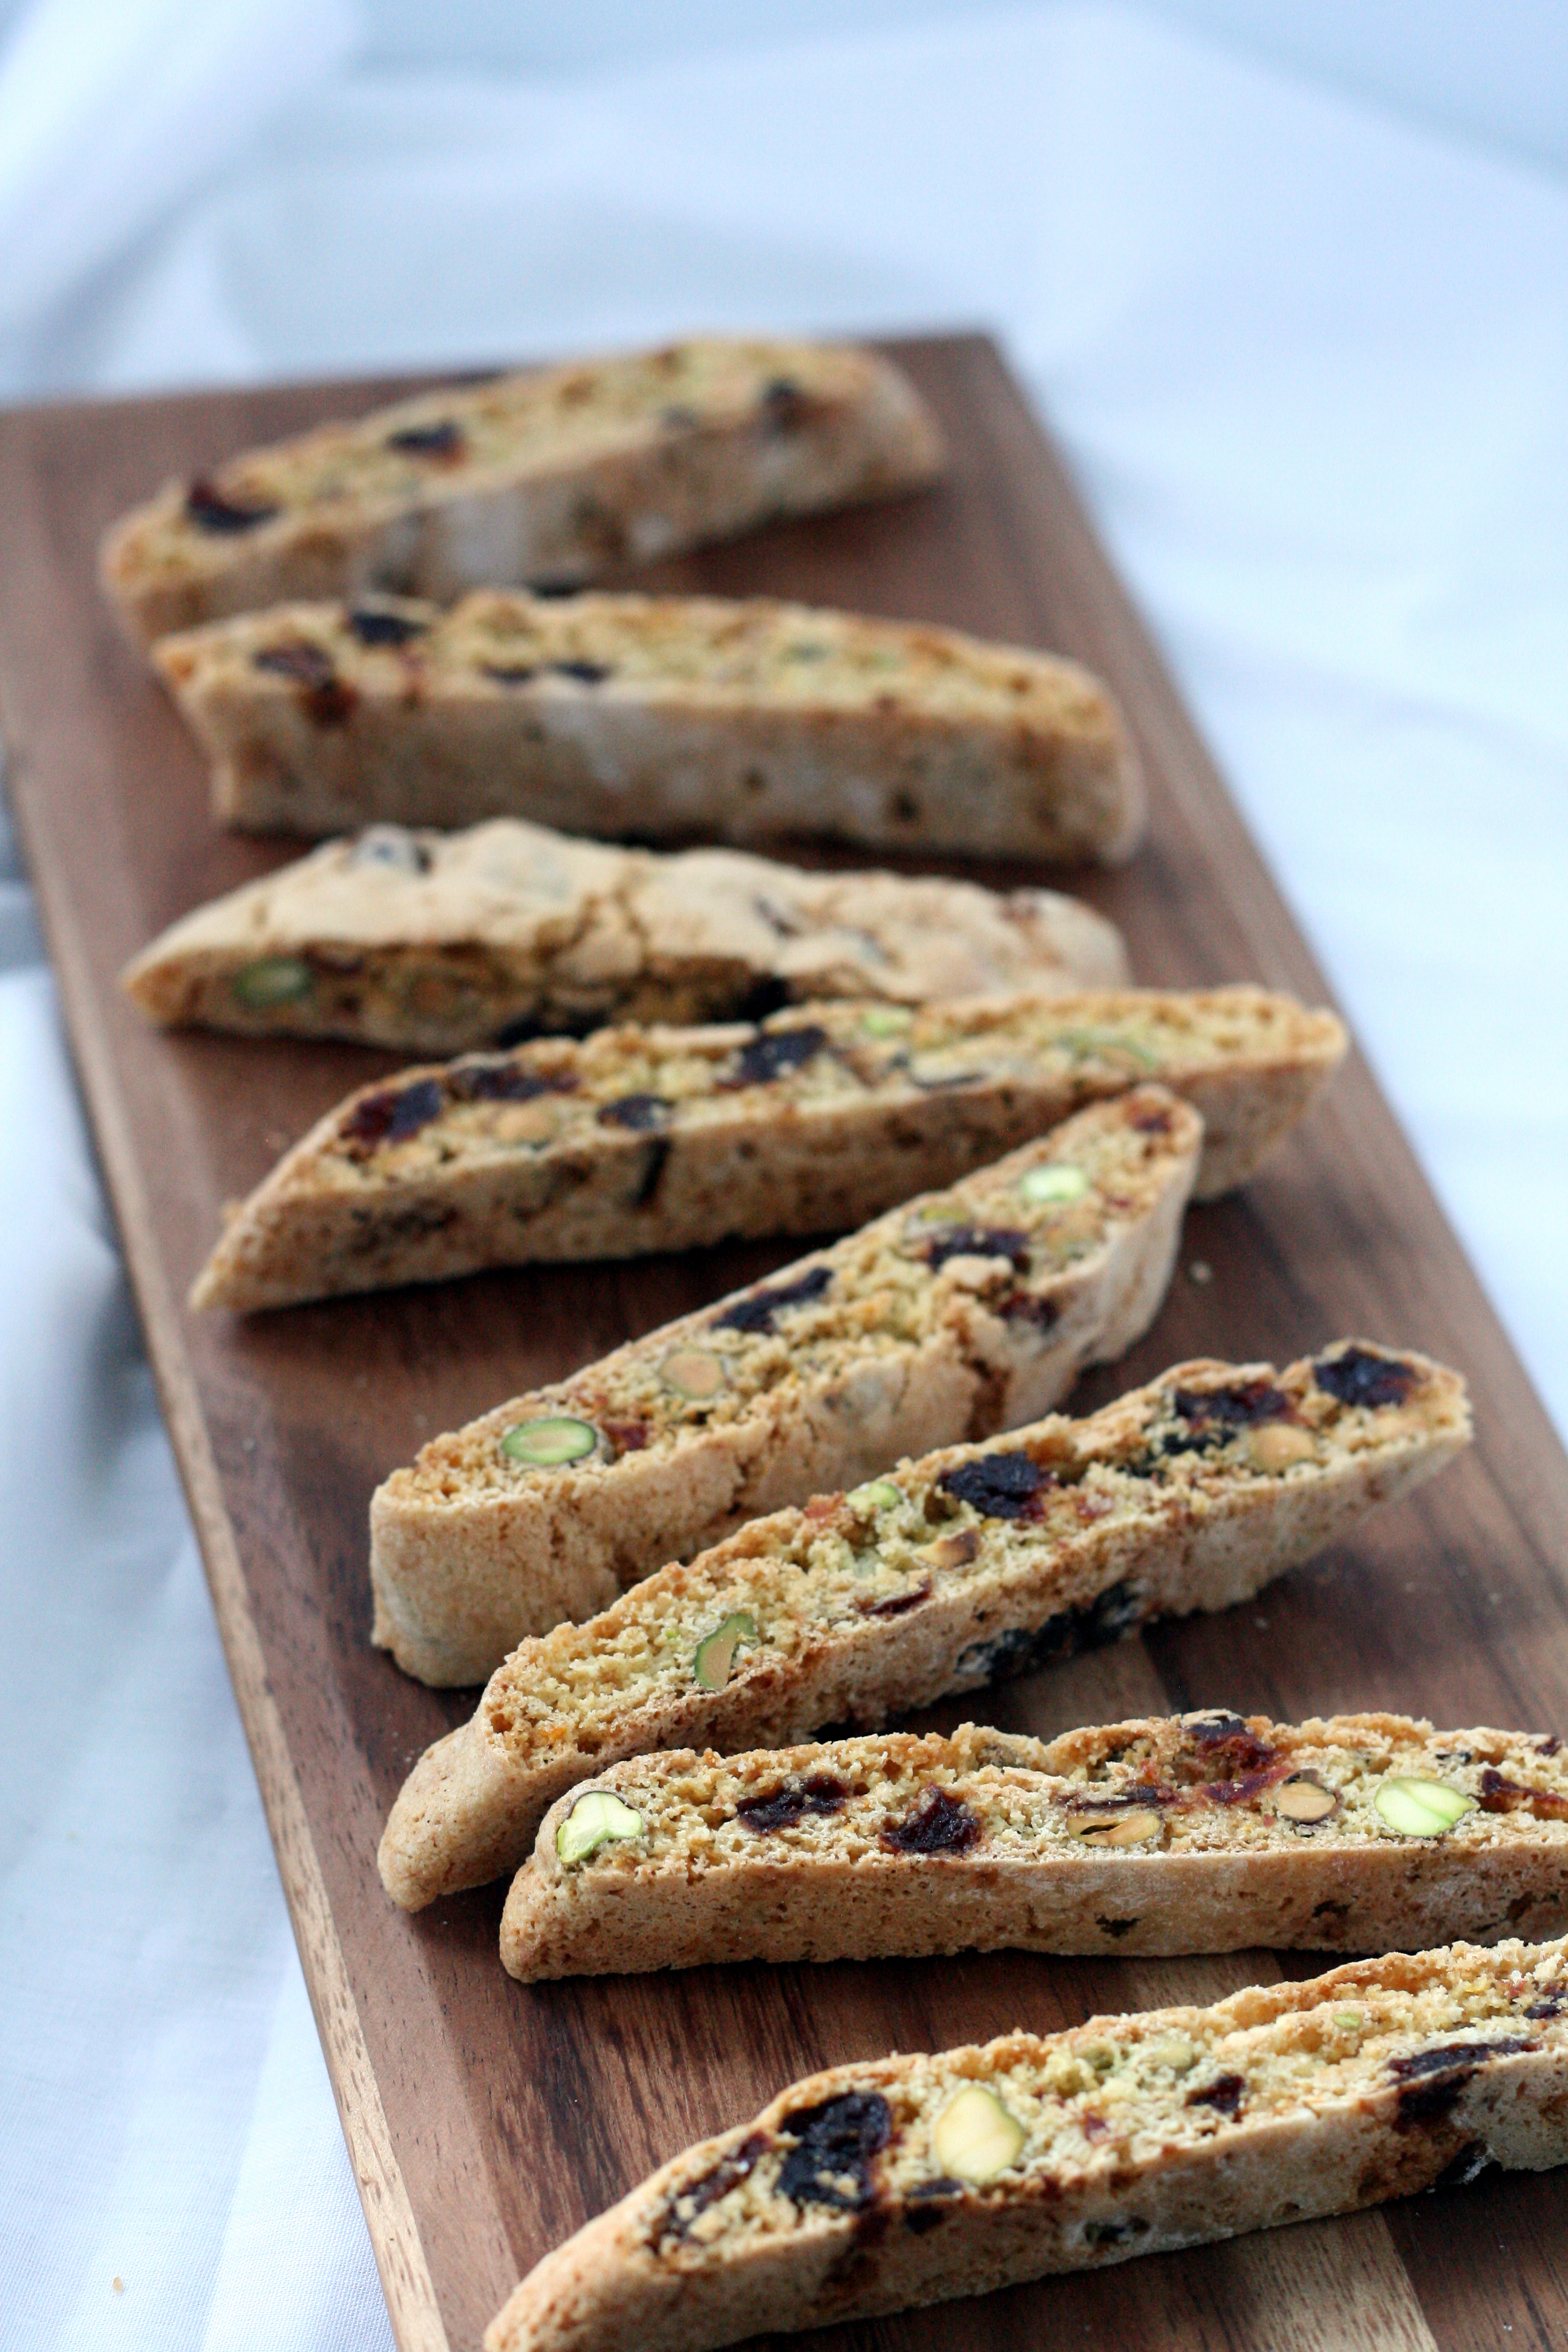
I usually make some sort of chocolate biscotti, but this time I opted for something new – pistachios + dried cherries. How did it turn out? Amazing. Better than any of the chocolate-based biscotti I’ve ever made or tasted. Better than any biscotti I’ve ever had, period. I’m dreaming of the day that I can make these again – I’m hoping to get my hands on some delicious Door County cherries!
Pistachio and Dried Cherry Biscotti
1 3/4 cups all-purpose flour
1 cup sugar
1/2 cup old-fashioned oats
1 teaspoon baking powder
1/2 teaspoon baking soda
1/2 teaspoon kosher salt
2 large eggs
3 tablespoons canola oil
1 tablespoon orange zest
2 teaspoons lemon zest
1 1/2 teaspoon vanilla extract
1/2 teaspoon almond extract
1 cup dried cherries, roughly chopped
1 cup unsalted, shelled pistachios
Preheat oven to 350°F. Line a baking sheet with parchment paper and set aside.
In the bowl of a stand mixer or in a large mixing bowl, combine flour, sugar, oats, baking powder, baking soda, and salt. Mix for 30 seconds to combine.
In a separate bowl, whisk together eggs, oil, orange zest, lemon zest, vanilla extract and almond extract. Add egg mixture to flour mixture and beat on low speed until dough is crumbly and just combined, about 1 minute. Knead dough with your hands for another minute until dough comes together. Fold in cherries and pistachios.
Transfer dough to a lightly floured surface and divide in half. Dust hands with flour and shape each piece of dough into a 16-inch long log. Transfer logs to prepared baking sheet and use your palm to flatten into a 2-inch wide strip.
Bake until biscotti is lightly browned and set, about 30 minutes, rotating pans halfway through. Allow cookies to cool slightly on the baking sheet for 15 minutes.
Turn oven down to 250°F. Line a second baking sheet with parchment paper and set aside.
Transfer biscotti logs to a cutting board and slice diagonally into 2/3-inch thick slices*. Arrange pieces, cut side down, on prepared baking sheets.
Bake biscotti for 20 minutes. Flip biscotti and bake for an additional 20 minutes or until cookies are crisp. Carefully transfer cookies cooling rack and let cool completely. Store in an air-tight container until ready to serve.
*Most recipes call for cutting biscotti with a serrated knife, but I’ve had better luck with my super-sharp Santoku. Do as you wish!
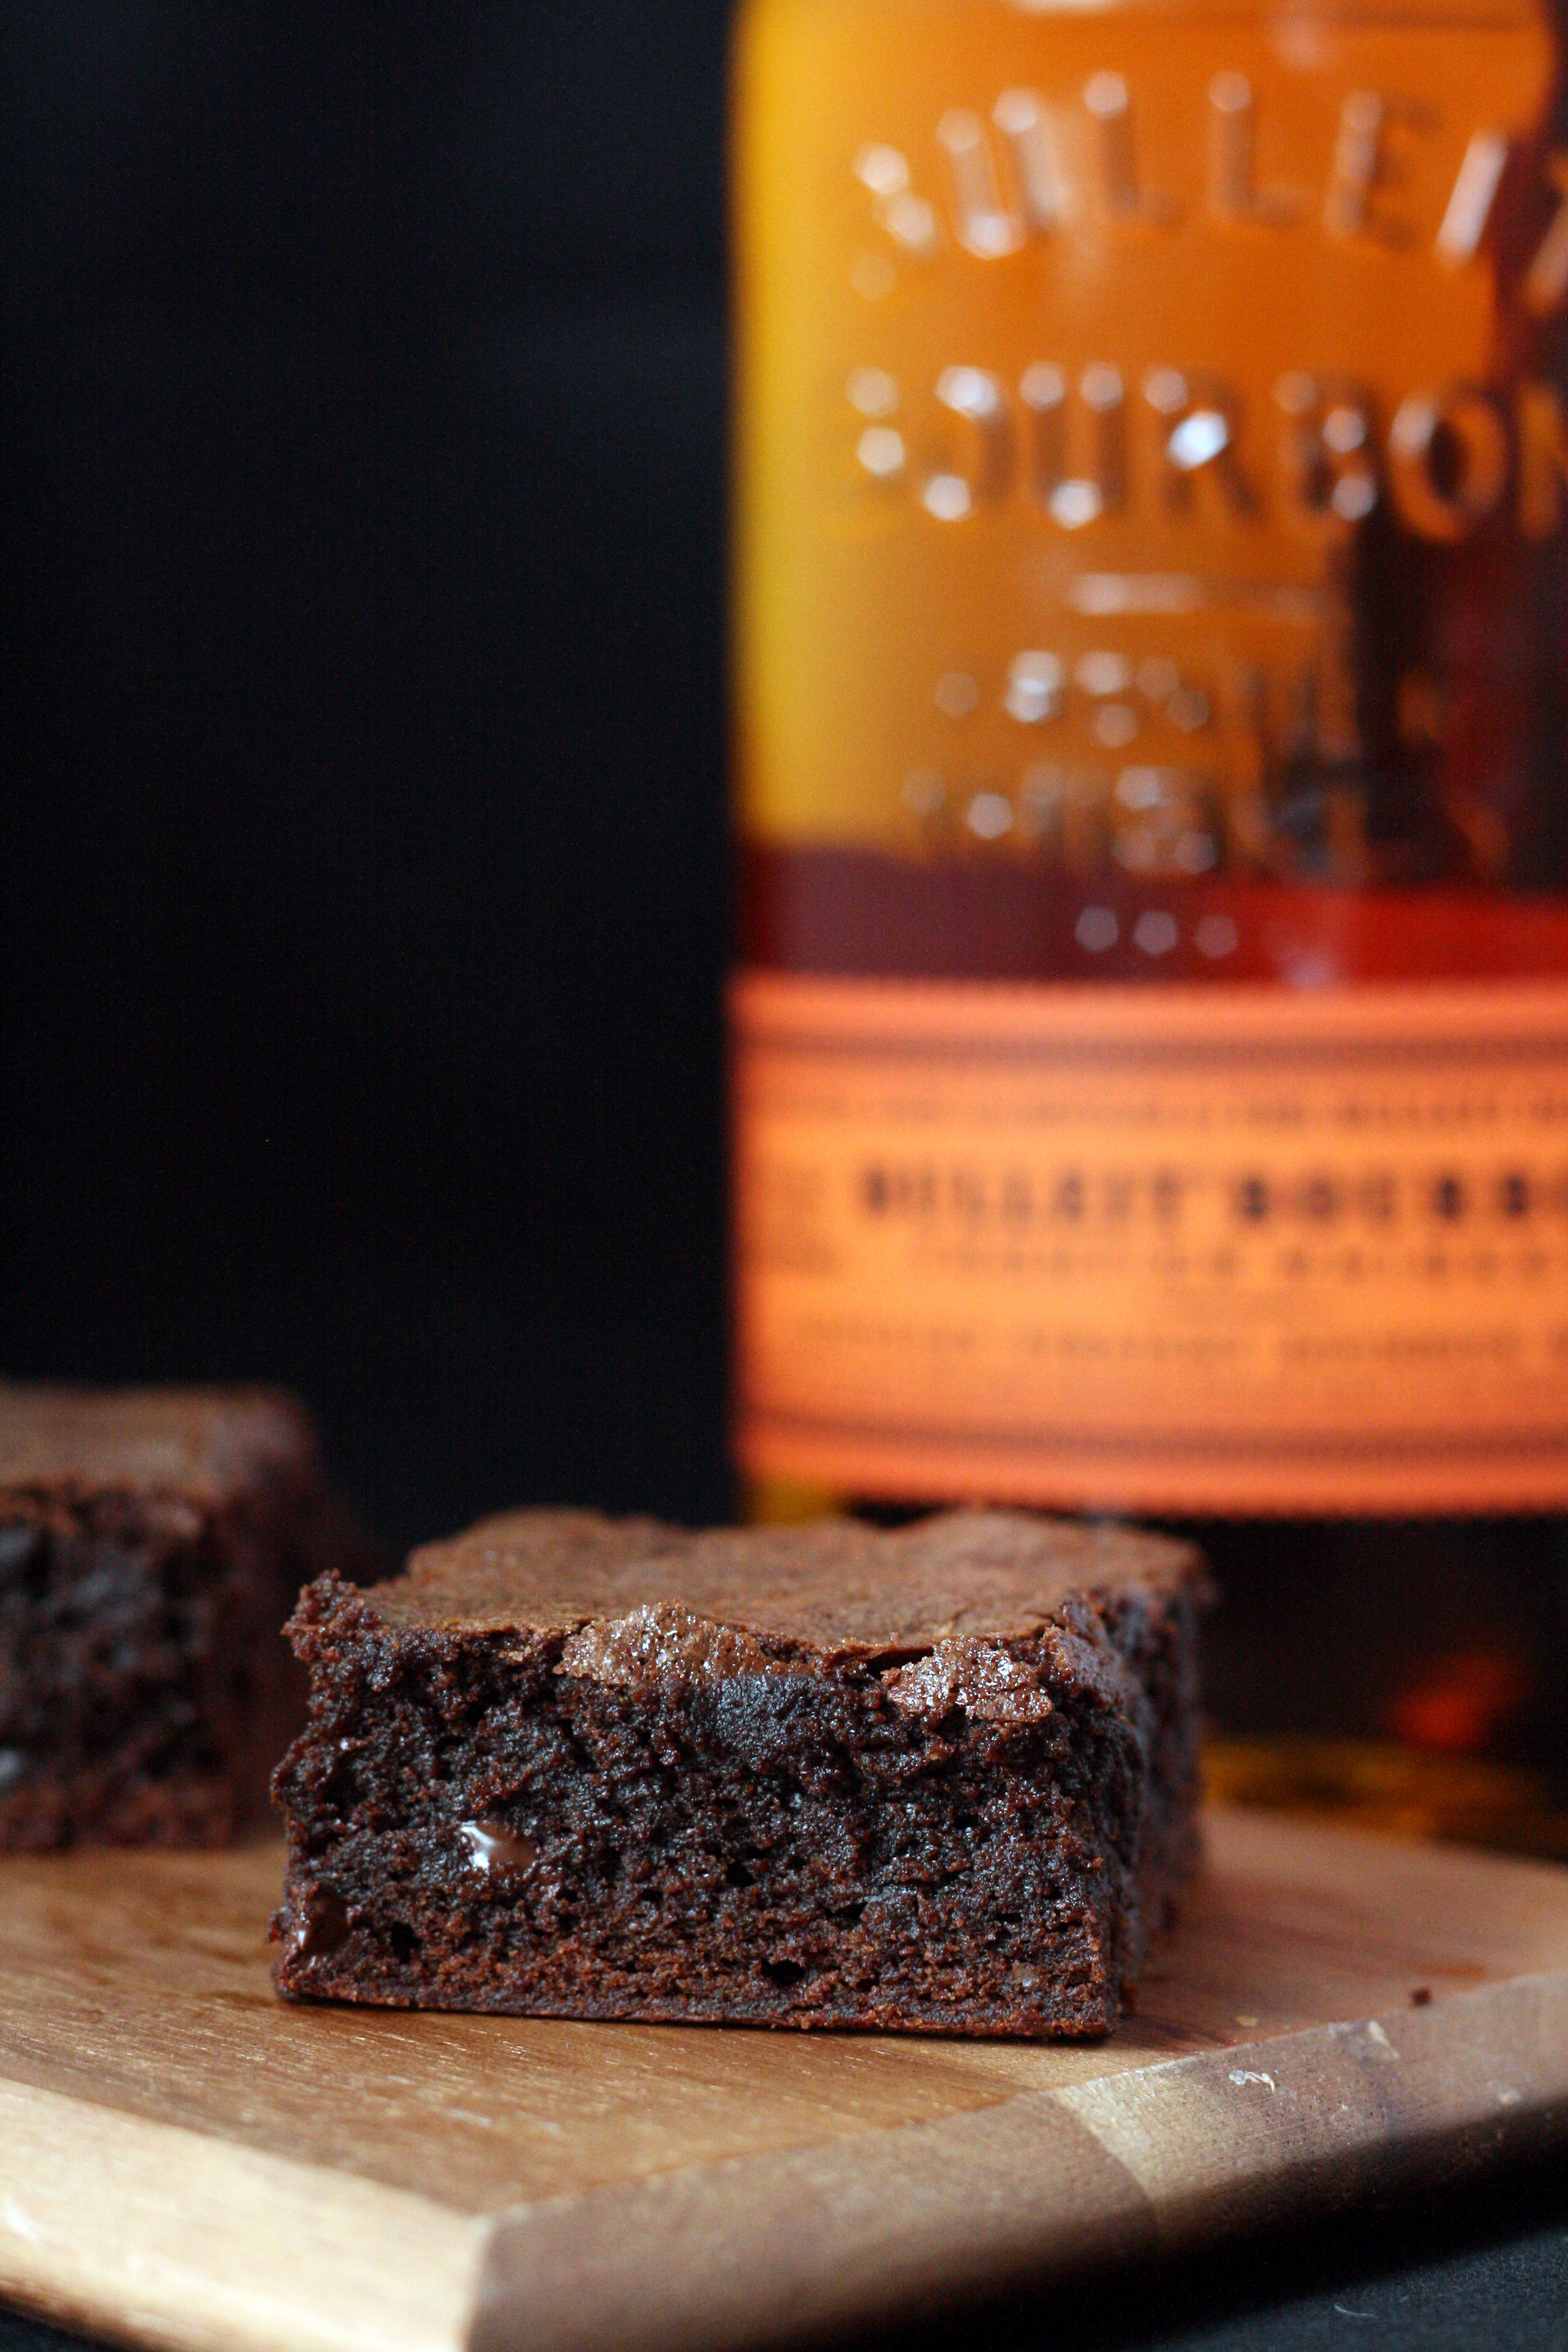
So, you know your favorite morning pick-me-up? (Yes, I’m talking about coffee). How do you make it better? Add bourbon, duh. And how do you make that better? Turn it into a brownie!
The bourbon taste in this is definitely prominent, so make sure you make it with something drinkable. Another tip: if you like these, hide them. I left mine out and they were completely gone a couple days later. Mike inhaled these at an alarming rate.
Espresso Bourbon Brownies makes 16 brownies
1/2 cup unsalted butter
3 ounces unsweetened chocolate, roughly chopped
1 cup granulated sugar
2 large eggs
1 teaspoon vanilla
1/4 cup bourbon
2 tablespoons espresso granules
3/4 cup all purpose flour
1/2 teaspoon baking soda
1/3 cup semisweet chocolate chips
Preheat oven to 350°F. Line an 8×8 baking pan with parchment paper and set aside.
Place butter and unsweetened chocolate into a small saucepan over medium-low heat. Cook, stirring frequently, until chocolate is melted. Remove from heat and let cool slightly.
In a small bowl, combine bourbon and espresso until espresso has dissolved. Set aside.
Stir sugar into slightly cooled chocolate mixture until incorporated. Add eggs one at a time, stirring after each addition. Stir bourbon-espresso mixture into the batter. Mix in flour and baking soda until just combined and then fold in the chocolate chips.
Pour batter into the prepared baking pan. Use a spatula to make sure batter is evenly distributed and smooth on top. Bake in preheated oven for 30 minutes or until a toothpick inserted into the center comes out with moist crumbs.
Allow brownies to cool completely in the pan on a wire rack. Remove brownies from the pan and cut into 16 pieces.
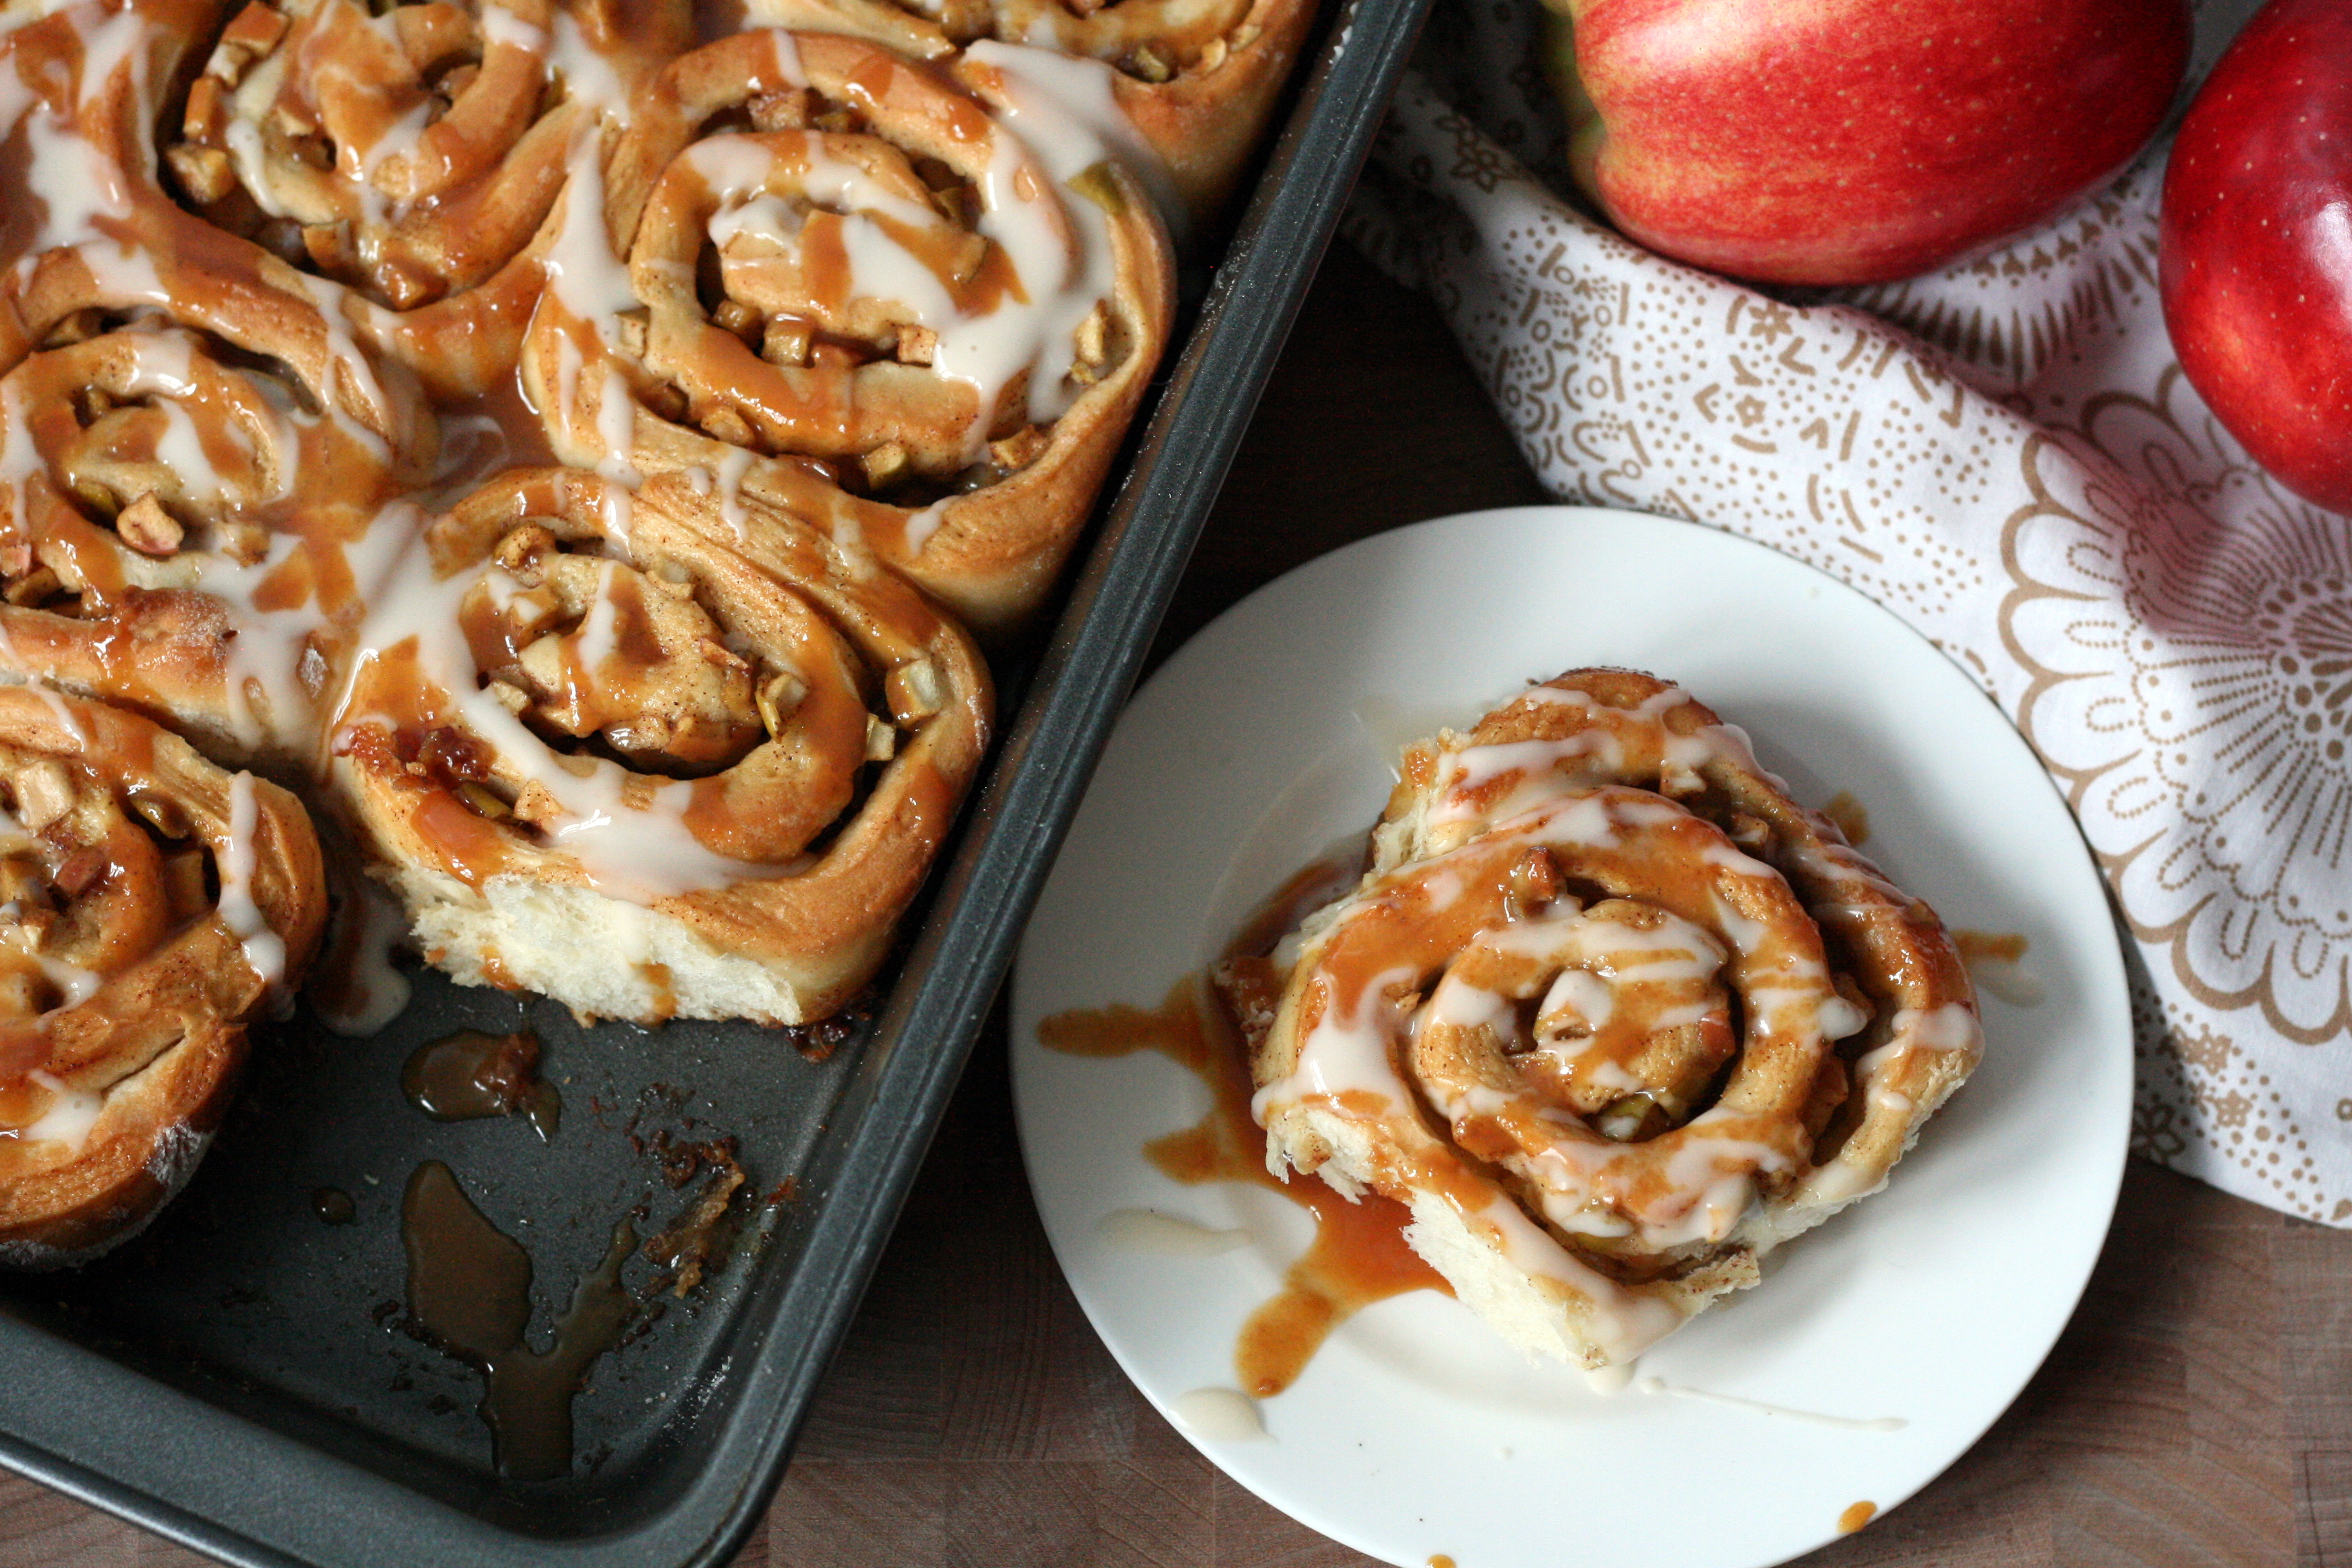
Long ago, in my college years, I loved drinking gin (and got the nickname Ginni). Now, I’m loving whiskey. Whiskey sours, whiskey Cokes and most recently I’ve been diggin’ it with some root beer. You know the saying “don’t cook with alcohol you won’t drink?” Well, I prefer Kessler in my drinks (flame away, people), but I used Bulleit in these cinnamon rolls.
I used my cinnamon roll dough (but used dairy ingredients compared to non-dairy) as the starting point and made three batches of caramel before I finally got it right.
These bourbon-glazed cinnamon rolls are a decadent morning pick-me-up. Some people like coffee in the morning. Some people like tea. Everybody likes boozy cinnamon rolls. So, go into your kitchen, whip up a batch of these bad boys, and present them to someone who has a case of the morning grumpies.
Caramel Apple Cinnamon Rolls with Bourbon Glaze makes 12 cinnamon rolls
for the dough:
3/4 cup 1% milk
1/4 cup unsalted butter
1 teaspoon vanilla extract
2 1/4 teaspoon active dry yeast
1/4 cup warm water (110°F)
3 1/2 cups all-purpose flour, divided
1/4 cup granulated sugar
1/2 teaspoon salt
1 large egg
for the filling:
4 cups diced crisp, tart apples (3 – 4 apples) – I used a combination of gala and granny smith
1 cup granulated sugar
1 1/4 cup 1% milk, warmed
1/4 teaspoon salt
1/2 teaspoon vanilla extract
2 tablespoons butter, melted
3/4 cup brown sugar
1 tablespoon ground cinnamon
for the glaze:
1 cup powdered sugar
1 tablespoon bourbon (I used Bulleit)
2 teaspoons 1% milk
1/2 teaspoon vanilla extract
to make the dough:
Heat milk in a small saucepan over low heat. Add in butter and vanilla and stir until melted. Remove from heat and allow to cool.
Meanwhile, combine yeast with warm water in a small bowl. Let sit for 10 minutes or until mixture is foamy.
In the bowl of a stand mixer fitted with a dough hook or in a large mixing bowl, combine 2 1/4 cups of the flour, sugar, and salt.
Whisk egg into the milk mixture until well combined. Pour milk and yeast mixture into the dry ingredients and mix until dough forms a sticky ball. Add in remaining flour 1/4 cup at a time, kneading well after each addition, until dough turns smooth and soft but still slightly sticky. The amount of flour you use will vary, but I usually use about 3 1/4 cups.
Lightly oil a large bowl. Form dough into a ball and place in bowl, turning to coat in oil. Cover and let rise in a warm place for 45 minutes.
to make the filling:
Place apples in a pan over medium heat and cook until softened, about 3 – 5 minutes. Remove from heat and set aside.
Next, prepare the caramel. Place granulated sugar in an even layer in a large pot over medium heat. Let cook, undisturbed, until sugar just starts to melt. Then, start stirring occasionally until sugar turns golden brown. Remove pot from heat and slowly (and carefully!) stir in warmed milk. Stir until well combined. If sugar hardens, don’t fret! Return the pot to the burner and cook slowly over medium-low heat. Stir constantly until the hardened sugar melts. This could take 15 minutes or longer. Continue to cook until caramel reaches desired consistency. Stir in salt and remove from heat to let cool.
Stir 1/3 cup of the caramel sauce in with the cooked apples and set aside. Reserve the remainder of the caramel to drizzle over the cooked cinnamon rolls.
Combine brown sugar with the cinnamon and set aside.
to assemble the cinnamon rolls:
Lightly flour your work surface. Turn dough out onto floured surface and cover with plastic wrap. Let rest for 10 minutes.
Roll dough out into a 20×13-inch rectangle. Spread butter onto the surface. Sprinkle with brown sugar and spread apple mixture evenly onto the surface, making sure to get it all the way to the edges.
Starting at the long end closest to you, tightly roll the cinnamon roll up. Gently pinch the end to seal and turn the roll seam-side down. Cut into 12 even pieces. Place rolls cut-side down into a lightly greased 9×12-inch baking pan. Cover with plastic wrap and let sit for 45 minutes.
Preheat oven to 350F.. Remove plastic wrap from the cinnamon rolls and bake in preheated oven for 25 – 30 minutes, or until golden brown. Allow the cinnamon rolls to cool slightly before icing so they have a chance to soak up the caramel and cinnamon sugar.
While the rolls are cooling, prepare the glaze. In a medium bowl, combine powdered sugar, bourbon, milk, and vanilla and whisk until smooth.
Drizzle glaze and caramel over the cinnamon rolls and serve.
I’ve been making this caramel corn for years now, and it still hasn’t let me down. The results are consistently good and it couldn’t be easier. My step-dad loves this popcorn so much that I started making it for him for Christmas. This past holiday, I stuffed a 3-foot tall stocking full of caramel corn… and included some gift certificates for more batches of it throughout the year. He cashed in one of the gift certificates recently and here are the results. It was so irresistible that I ended up making two batches – one for him, and one for Mike and me. We may or may not have eaten the entire batch in just a few short days.
Feel free to use more or less popcorn. I’ve started to use closer to 8 quarts of popcorn so that the caramel is a bit lighter and you get the occasional piece that isn’t 100% coated in caramel. Use just 6 quarts for a very in-your-face sweet, sweet caramel corn.
Crunchy Caramel Popcorn makes 6 – 8 quarts
3/4 cup butter 2 cups brown sugar 1/2 cup corn syrup 1 teaspoon salt 1/2 teaspoon baking soda 1 teaspoon vanilla extract 6 – 8 quarts air-popped popcorn
Preheat oven to 250°F. Line three baking pans with foil or spray with cooking spray.
In a medium saucepan over medium heat, melt butter. Stir in brown sugar, corn syrup and salt. Bring to a boil, stirring constantly. Allow to boil, unstirred, for 4 minutes. Remove from heat and stir in soda and vanilla.
Pour popcorn onto baking pans, dividing evenly between three pans.
Pour caramel in a thin stream over popcorn, stirring to coat.
Bake in preheated oven for one hour, stirring every 15 minutes. Remove from oven and let cool completely. Stir gently, breaking up large pieces. Serve immediately or store in air-tight container.
Tips for clean up – soak the pot and utensils in hot water. The sticky caramel will melt right off and there will be minimal scrubbing required. The foil in the pans will give you a quick, easy clean up. Just crumple up and toss!
Still here? You didn’t run away at the mention of chickpea + chocolate + blondie? Good. Trust me – these are delicious. They don’t taste anything like beans. All you get is a chewy, delicious peanut buttery blondie studded with chocolate chips.
The weird thing is, I actually found the unbaked batter to be tastier than the baked product. So you choose – bake it or just eat the batter by the spoonful. I won’t judge.
Chocolate Chip Chickpea Blondies
15 ounce can low-sodium chickpeas (garbanzo beans)
3/4 teaspoon baking powder
1/8 teaspoon baking soda
1/4 teaspoon salt
3/4 cup brown sugar
2 teaspoons vanilla extract
1/4 cup old fashioned oats
1/4 cup natural creamy peanut butter
1/2 cup mini chocolate chips, divided
Preheat oven to 350ºF. Grease an 8×8 square pan and set aside.
Drain and rinse the chickpeas well. Remove and discard the skins from the chickpeas. Place the skinned chickpeas into the bowl of a food processor and blend until smooth. Add in baking powder, baking soda, salt, sugar, vanilla, oats, and peanut butter. Blend until very smooth.
Mix in 1/4 cup of the mini chocolate chips and spread into prepared pan. Sprinkle remaining 1/4 cup chocolate chips on top. Bake for 30 – 35 minutes, or until golden brown on top, being careful not to overcook. The blondies will appear to be undercooked, but they will firm as they cool.
Allow to cool completely before cutting into 16 pieces and serving.
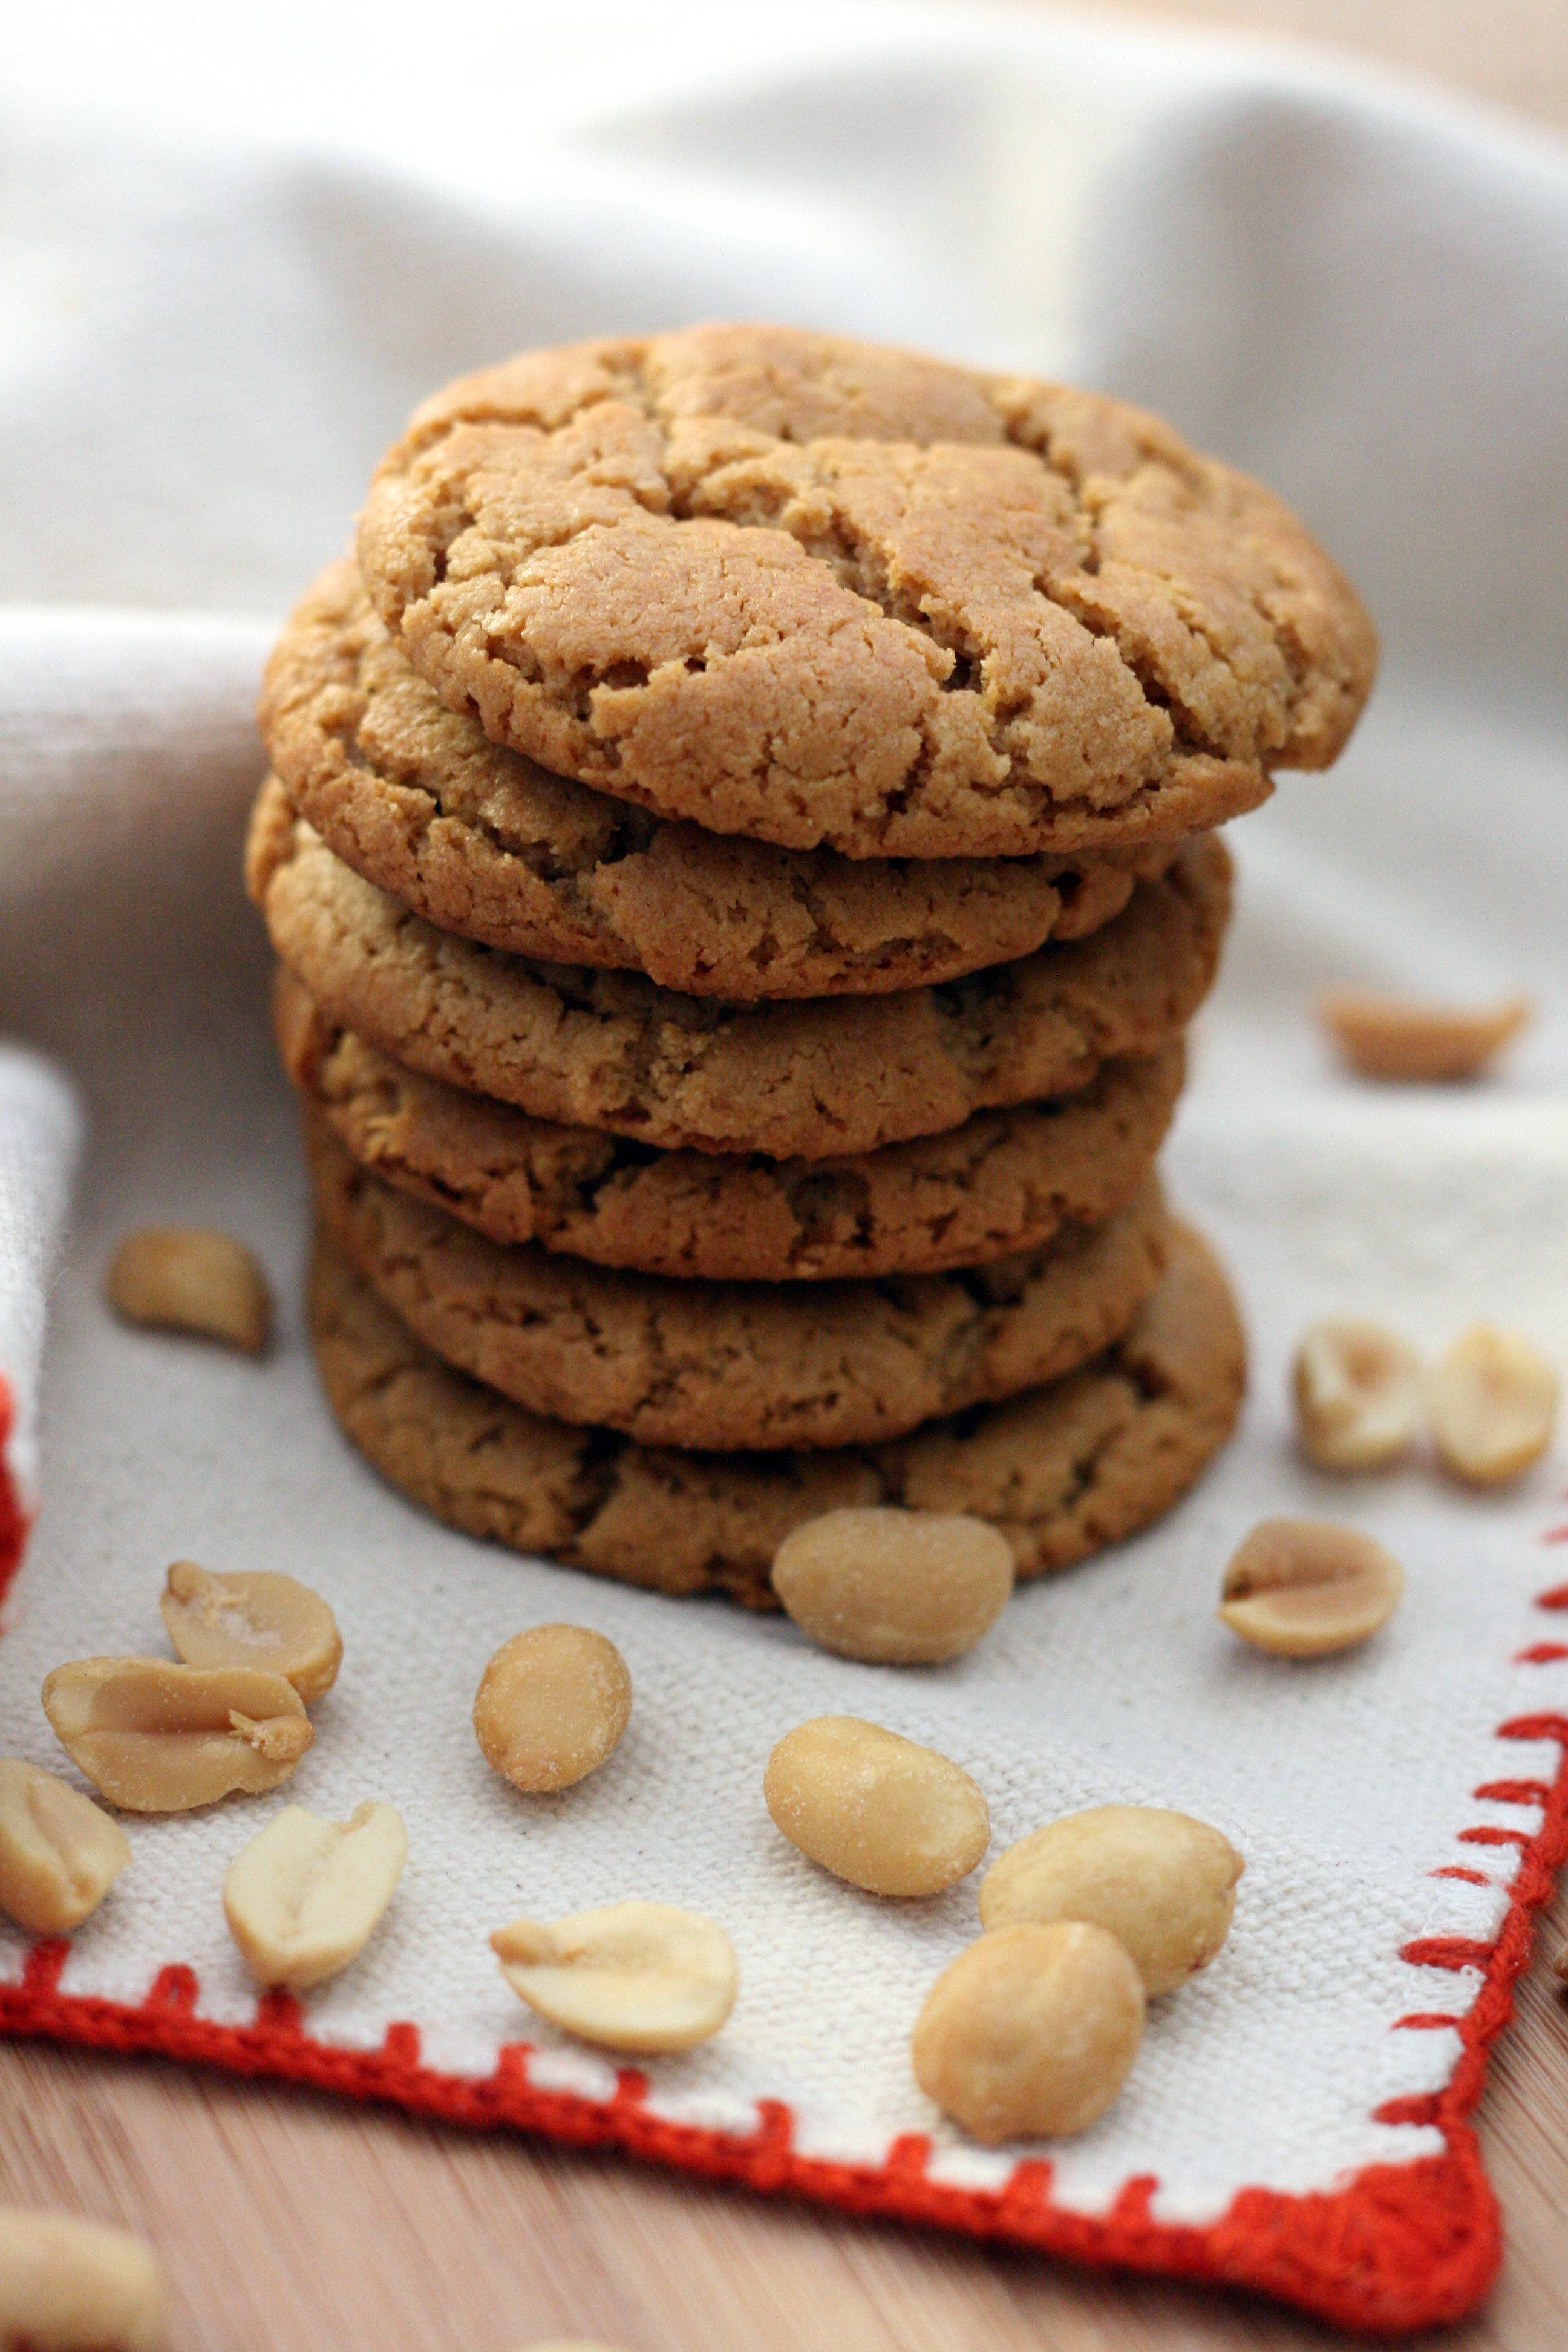
I’ve been on a peanut butter kick lately. The rate at which I’m whipping through jars of peanut butter is kind of alarming. Peanut butter on toast with bananas or with some orange marmalade is a daily occurrence. Sometimes, I just eat a spoonful of peanut butter. I made these cookies because I needed another way to get peanut butter into my mouth. These peanut butter cookies are amazing. Soft and chewy and oh-so-addictive. They also happen to be the perfect Wisco to St. Louis road trip snack. Portable peanut buttery goodness.
I kind of regret not making more. Because the drive back home from STL is going to be very, very sad 😉 Do yourself a favor and make a double batch right away.
Vegan Peanut Butter Cookies
3/4 teaspoon baking soda
1/4 cup all purpose flour
1/4 cup sugar
2 tablespoons brown sugar
1/2 cup natural creamy peanut butter
2 tablespoons unsweetened applesauce
1/2 teaspoon vanilla extract
pinch of salt
Preheat oven to 350ºF.
In a large bowl, whisk together baking flour, baking soda, sugar, and brown sugar. Stir in peanut butter, applesauce, and vanilla extract and mix until well combined. Sprinkle with salt to taste.
Roll dough into balls about one inch in diameter and place two inches apart on a baking sheet. Bake for 8 minutes or until cookies are golden brown and cracked on top. Let cool completely on baking sheet.
I’ve been adapting fairly well to the dairy-free life, but there are some things that I just can’t get over. I’ve been craving cheese like crazy lately – cheeseburgers, pizza, cheesy bread. I’ve also been craving candy. Sour candy is good, but it can’t replace chocolate. I love Almond Joy candy bars. I can still remember when Mike got some for our trick-or-treaters and I had to hate-watch him eat the leftovers. Yes, I’m still upset about that over 4 months later.
Thankfully, Nicole from Cookies on Friday could fix at least one of my cravings. I was able to easily adapt her Almond Joy Bread recipe to be dairy-free. This bread was so good that I almost didn’t want to share. But, I did share because I’m a kind and loving wife. I even left over half the leftovers with him in Appleton. (Actually, I kind of regret doing that now). This bread is definitely on my make-again-asap list and it should be on your must-make-immediately list. Just sayin’.
Dairy-Free Almond Joy Bread
2 eggs
1/2 cup sugar
1/2 cup stevia
1/2 cup coconut oil, melted and slightly cooled
½ teaspoon vanilla
½ teaspoon coconut extract
1 1/2 cups all-purpose flour
¼ teaspoon baking soda
¼ teaspoon baking powder
¼ teaspoon salt
½ tablespoon lemon juice
1/2 cup soy milk
½ cup shredded unsweetened coconut, lightly toasted
½ cup almonds, chopped
½ cup dairy-free mini chocolate chips
for the coconut glaze
½ cup sugar
¼ cup water
½ tablespoon coconut oil
½ teaspoon coconut extract
for the chocolate ganache
1/2 cup soy milk
1/3 cup dairy-free semisweet chocolate chips
Preheat oven to 350. Lightly grease a 4.5″x8.5″x2.5″ loaf pan and set aside.
Combine lemon juice and soy milk in a small bowl. Let sit for 10 minutes.
In a large mixing bowl, beat together eggs, sugar, stevia, coconut oil, vanilla and coconut extract until smooth and creamy, about 2 minutes.
In a separate bowl, whisk together flour, baking soda, baking powder, and salt. Mix 1/3 of the dry ingredients into the wet ingredients. Mix in 1/2 of the soy milk. Mix in 1/3 of the dry ingredients. Mix in remaining 1/2 of the wet ingredients, followed by the last of the dry ingredients. Mix until just combined.
Fold in coconut, almonds, and chocolate chips. Pour batter into the prepared on, smoothing out the top. Bake for 50-55 minutes, or until top is golden brown and a toothpick inserted into the center comes out clean. Let cool for 10 minutes in the pan.
While bread is cooling, make the glaze. In a small pot, whisk together sugar, water, coconut oil and coconut extract.
Using a toothpick or skewer, poke holes into the top of the bread. Move bread onto a cooling rack and place a plate underneath. Brush or spoon the glaze on top, letting the glaze soak in.
While cake sets, make the ganache: Place chocolate chips into a small bowl. Heat soy milk to a simmer over medium-high heat. Remove from heat and pour over chocolate chips. Whisk until smooth. Drizzle over bread.
Hello there, muffins! These little lemony bites are a good reminder that spring is right around the corner. It’s just hiding under piles and piles of snow. Piles that keep getting bigger and bigger… but eventually the snow will melt. Until then, keep dreaming of sunshine and happiness and cram your face full of these delicious lemon poppy seed muffins.
They’re whole wheat, but they’re not heavy. And the little sub of applesauce makes them just a teeeensy bit healthier. These are great to share, but they’re also great to keep for yourself. I made a double batch and shared a little and froze the rest. I now have a stash of these bad boys sitting next to my dairy-free cinnamon rolls.
Vegan Lemon Poppy SeedMuffins makes 12 muffins
2 cups whole wheat pastry flour
2/3 cup sugar
1 tablespoon baking powder
1 1/2 tablespoons poppy seeds
1/2 teaspoon salt
3/4 cup plain soy milk
1/4 cup freshly squeezed lemon juice
2 tablespoons canola oil
2 tablespoons melted coconut oil, slightly cooled
2 tablespoons unsweetened applesauce
3 lemons, zested
2 teaspoons pure vanilla extract
Preheat oven to 375°F. Place liners into a muffin tin and set aside.
In a large bowl, whisk together flour, sugar, baking powder, poppy seeds, and salt. Make a well in the center of the dry ingredients and add in soy milk, lemon juice, canola oil, coconut oil, applesauce, zest, and vanilla extract. Mix until ingredients are just moistened, being careful not to over-mix.
Fill prepared muffin tin three-quarters full. Bake for 20 – 25 minutes, or until muffins are lightly browned on top and a toothpick inserted into the center comes out clean. Let cool in tin for 5 minutes before transferring to a wire rack to cool completely.
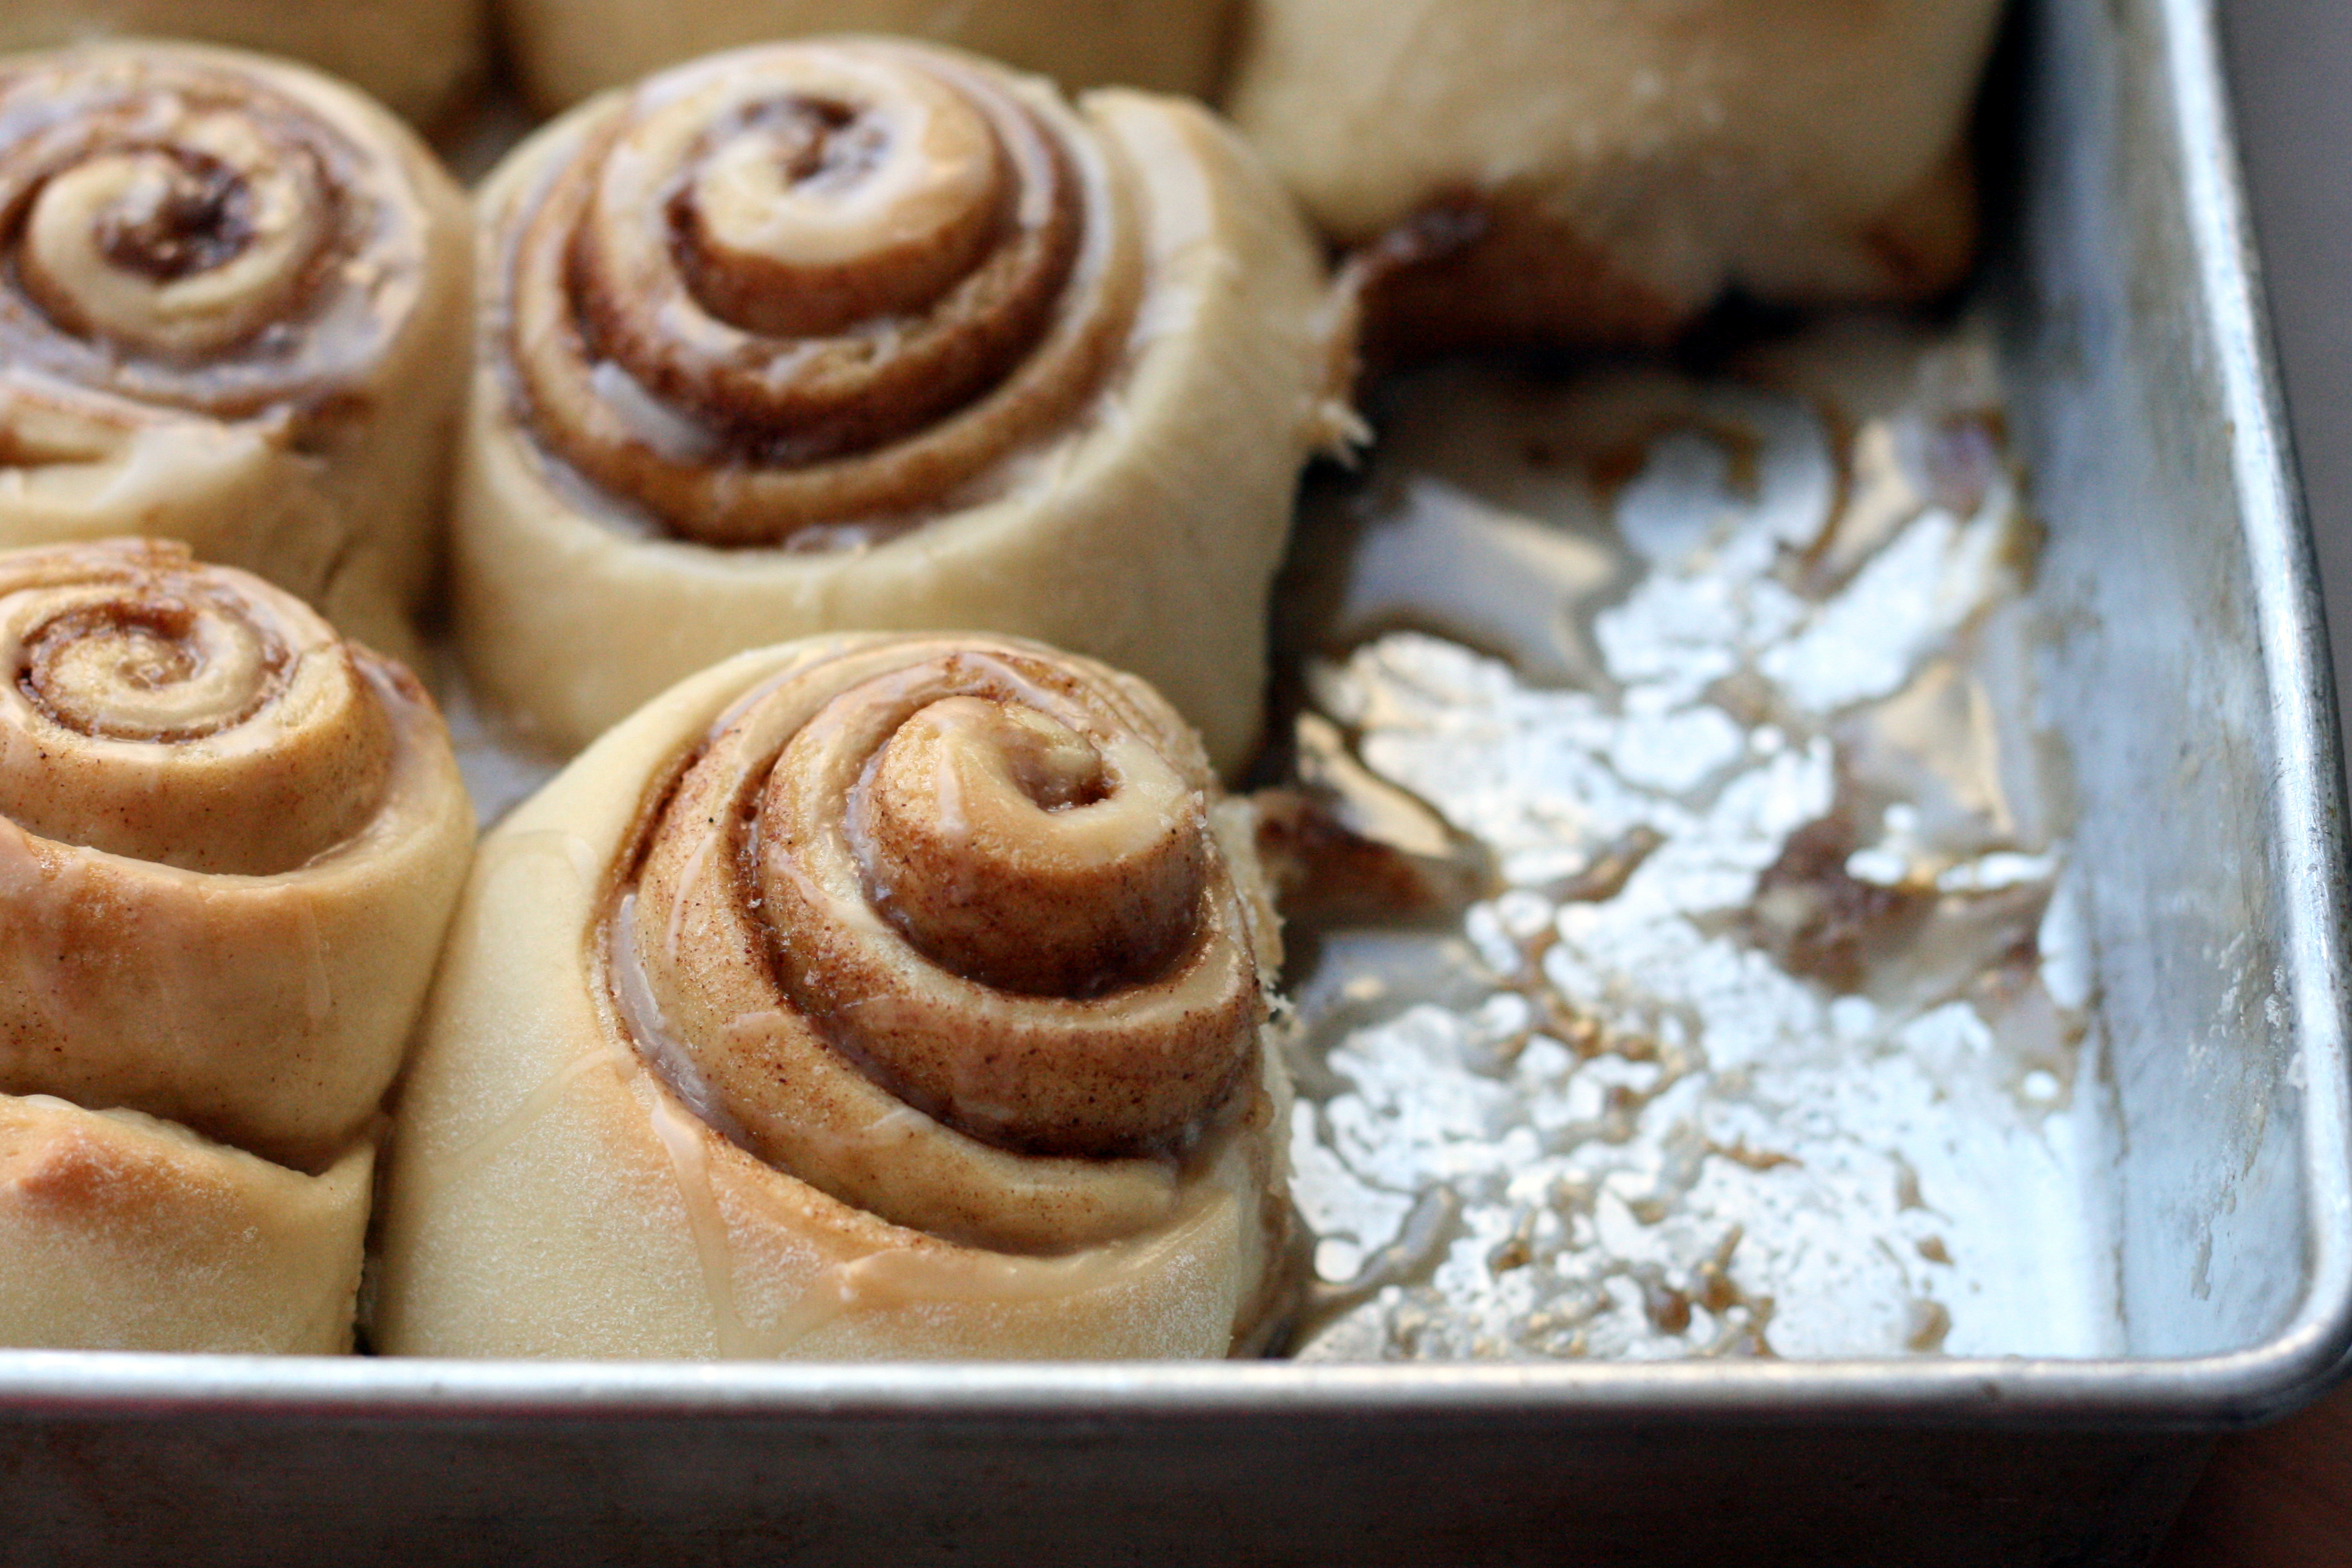
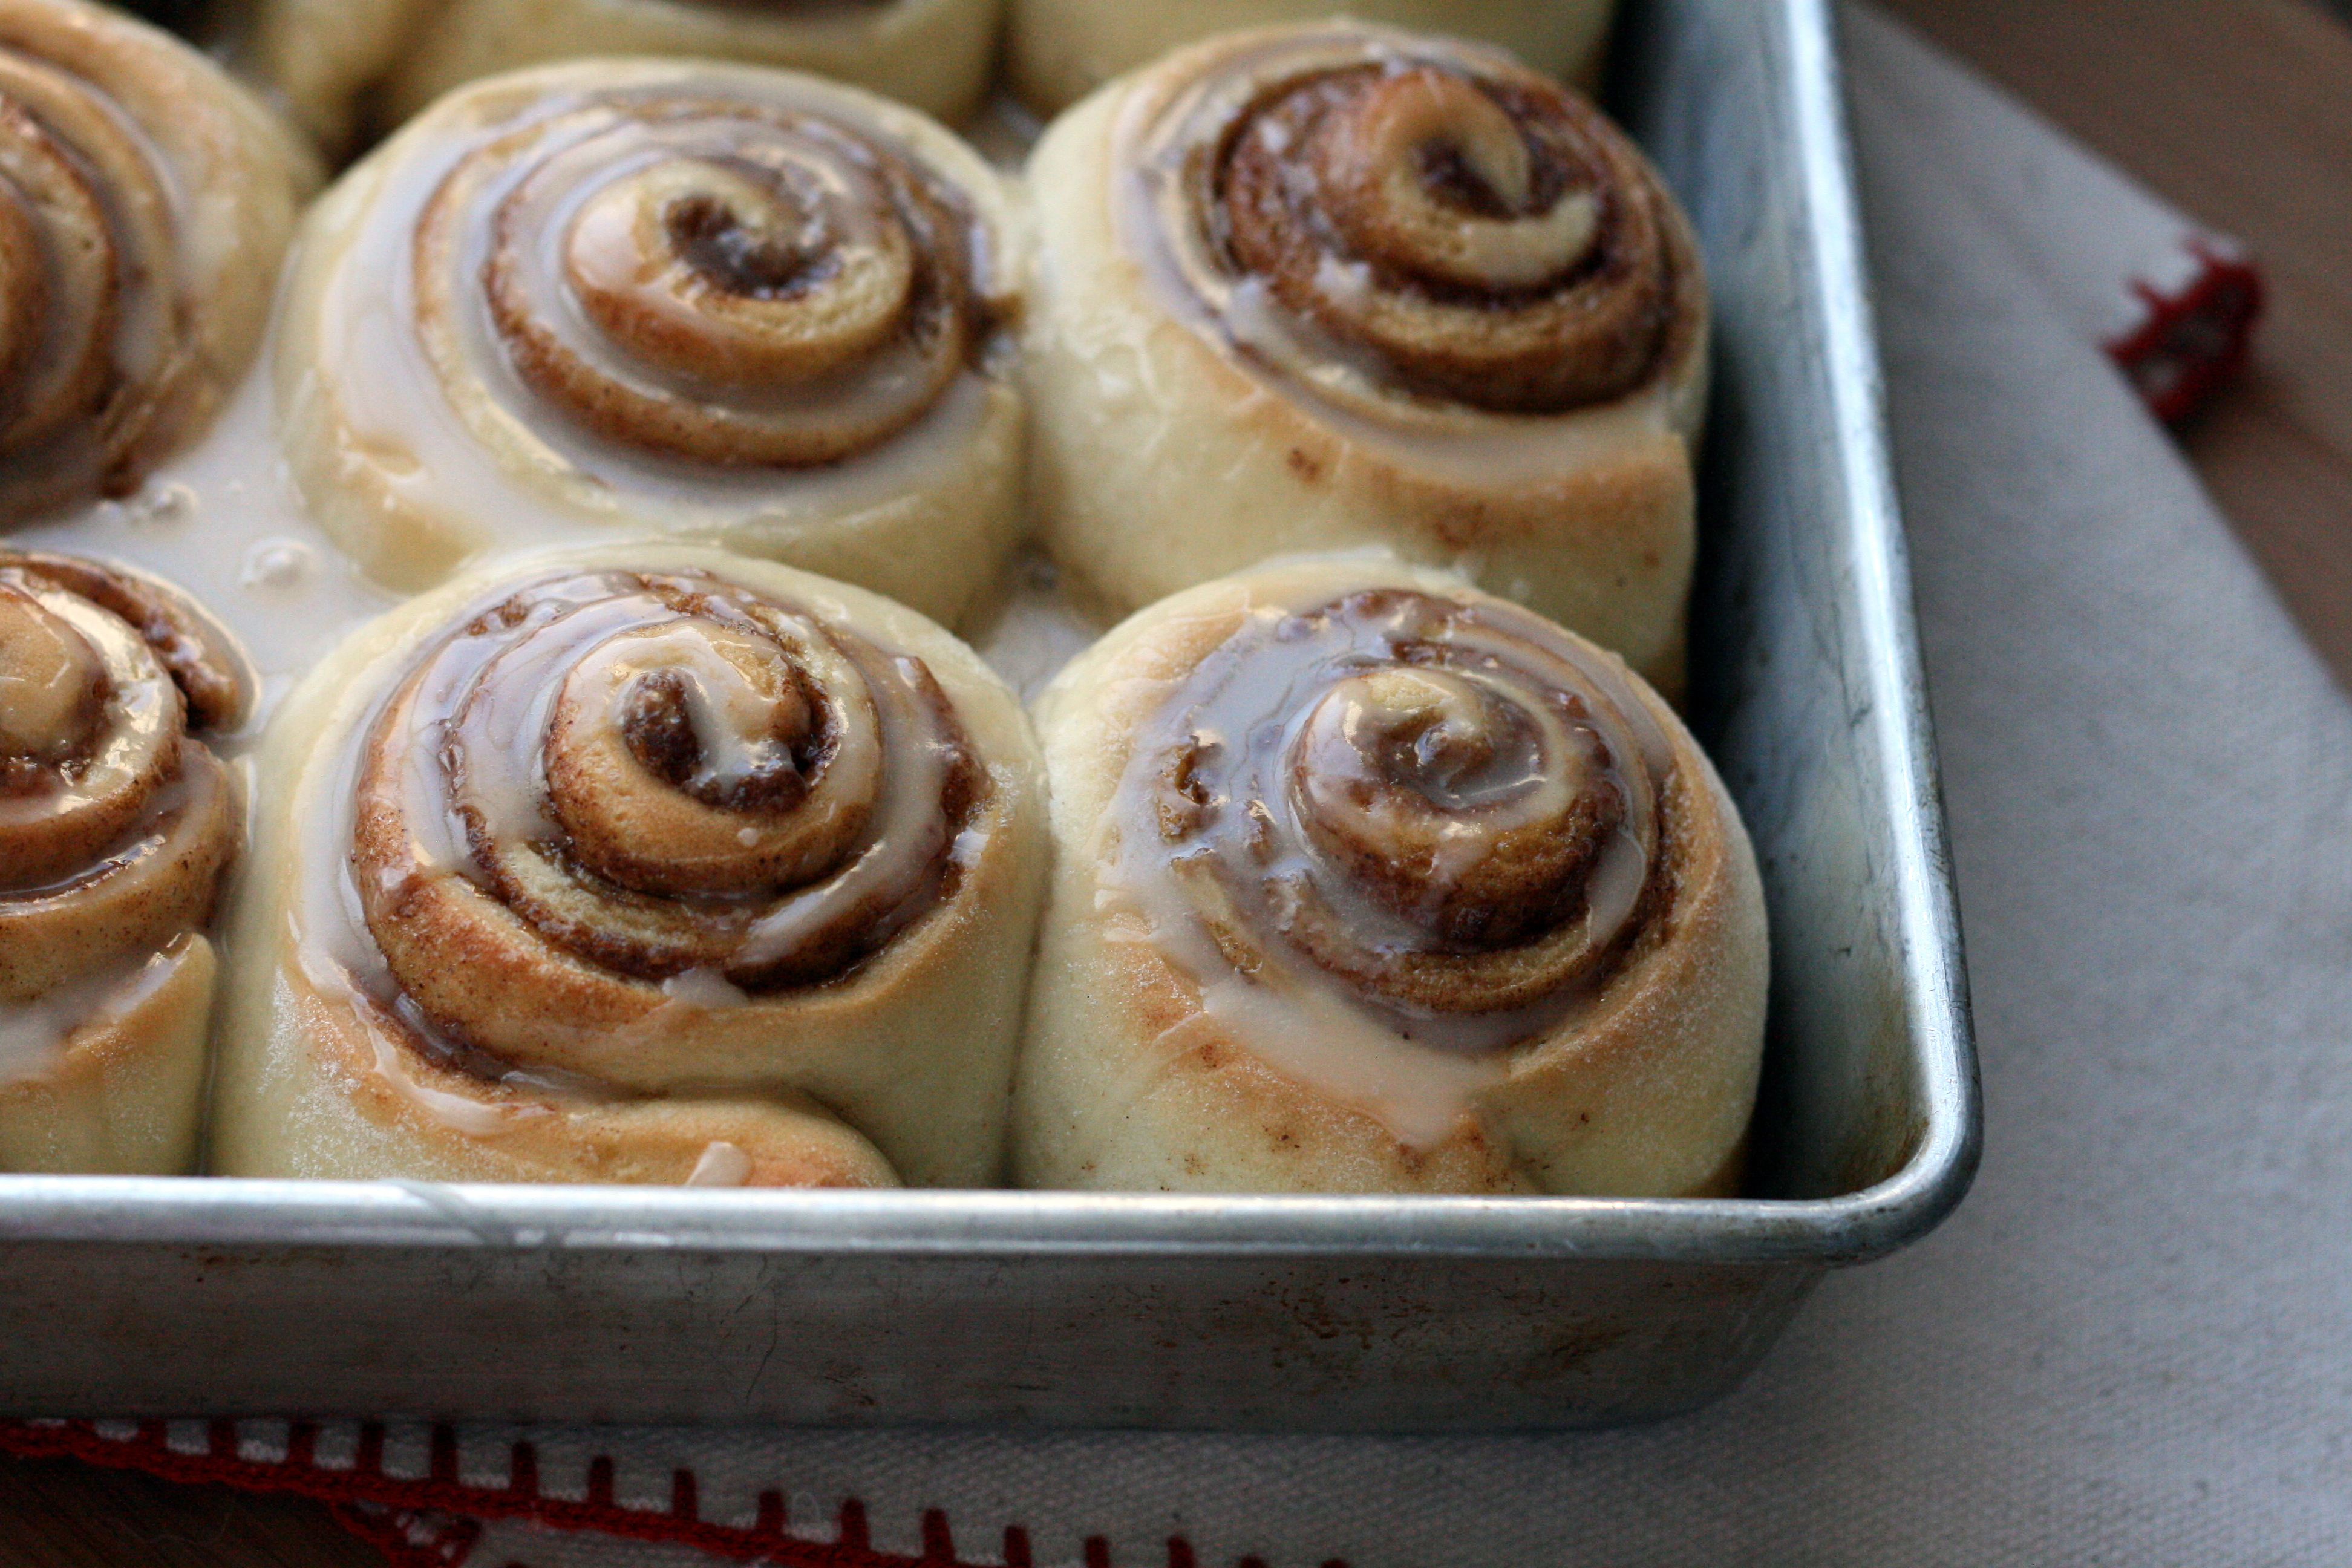
I wish I could sleep in a bed of these cinnamon rolls – warm, fluffy, gooey deliciousness. I swoon a little every time I walk past a bakery and smell cinnamon rolls baking away. And then I cry a little because I can’t eat the dairy-laden treats.
So here’s my solution to my cinnamon roll problem. This isn’t a quick recipe, but the recipe is simple and the results are so worth it. I need to make a mental note to always make a double batch of these bad boys because they freeze beautifully. I let them cool and then individually wrap them in plastic wrap and store them in freezer bags. Then when I’m craving some cinnamony goodness for breakfast (or for a snack), I just pull one out and microwave it for a minute and ::bam!!:: (Almost) freshly baked cinnamon rolls.
The icing is probably unnecessary, but it makes the cinnamon roll real pretty 🙂
Ooey Gooey Dairy-Free CinnamonRolls makes 1 dozen
for the dough:
3/4 cup unsweetened almond milk
1/4 cup vegan margarine (I used Earth Balance)
1 teaspoon vanilla extract
2 1/4 teaspoon active dry yeast
1/4 cup warm water (110°F)
3 1/2 cups all-purpose flour, divided
1/4 cup granulated sugar
1/2 teaspoon salt
1 large egg
for the filling: 2 1/2 tablespoons vegan margarine, melted 3/4 cup brown sugar 2 tablespoons granulated sugar
1 1/2 teaspoon ground cinnamon
for the icing: 1 cup powdered sugar
1 tablespoon unsweetened almond milk
1/2 teaspoon vanilla extract
to make the dough:
Heat milk in a small saucepan over low heat. Add in margarine and vanilla and stir until melted. Remove from heat and allow to cool.
Meanwhile, combine yeast with warm water in a small bowl. Let sit for 10 minutes or until mixture is foamy.
In the bowl of a stand mixer fitted with a dough hook or in a large mixing bowl, combine 2 1/4 cups of the flour, sugar, and salt.
Whisk egg into the milk mixture until well combined. Pour milk and yeast mixture into the dry ingredients and mix until dough forms a sticky ball. Add in remaining flour 1/4 cup at a time, kneading well after each addition, until dough turns smooth and soft but still slightly sticky. The amount of flour you use will vary, but I usually use about 3 1/4 cups.
Lightly oil a large bowl. Form dough into a ball and place in bowl, turning to coat in oil. Cover and let rise in a warm place for 45 minutes.
to assemble the cinnamon rolls:
Lightly grease a large baking pan. A 9×13-inch pan works well, or a large pie or cake pan.
Punch dough down and turn onto a lightly floured surface. Cover with plastic wrap and let sit for 10 minutes.
Roll dough out into a 20×13-inch rectangle. Spread melted margarine evenly over the dough.
Whisk together brown sugar, granulated sugar, and cinnamon. Sprinkle cinnamon sugar mixture onto dough, making sure to get it all the way to the edges.
With the long end facing you, roll dough up evenly. Gently pinch the edge to seal. With the seam-side down, cut the dough in half. Cut each half into 6 equal pieces for a total of 12 cinnamon rolls.
Place rolls cut-side down in prepared baking dish, making sure to leave a little space between the rolls to allow them room to expand. Cover with plastic wrap and let rise for 45 minutes.
Preheat oven to 350°F. Remove plastic wrap and bake cinnamon rolls for 25 – 30 minutes, or until lightly browned.
Allow cinnamon rolls to cool slightly in the pan to soak up the cinnamon sugar before icing them.
Whisk together powdered sugar, almond milk, and vanilla extract until smooth. Drizzle over slightly cooled cinnamon rolls.