I’m a bit of a cheater. This month’s What’s Baking theme was “Baking with Fresh Fruit”. Rhubarb is a veg, but I’m going to go and act like it’s a fruit. Because rhubarb is seriously one of my favorite things to bake with in the summer. Over the years, I’ve drifted towards a preference of rhubarb dishes that are a bit more in-your-face tart. The tartness of rhubarb is one of the reasons I love it so much. I’ve mentioned that I’m obsessed with sour candy, right? Rhubarb is nature’s sour candy and I can’t get enough of the stuff.
Want to know how much I loved this? I served this during dinner with Mike’s family and instantly regretted it. I selfishly kept the leftovers to myself and managed to eat them before I crawled into bed. So, do yourself a favor and just make a double batch: one to share and one to keep for yourself. Or just keep both for yourself. Good food is meant to be shared, but really good food is meant to be hoarded and eaten in secret without the threat of someone swooping in to take a bite.
Rhubarb Ginger Crisp
for the filling:
5 cups chopped rhubarb (about 2 pounds)
1/3 cup finely chopped crystallized ginger
1/3 cup sugar
2 tablespoons oat flour
zest and juice of 1 orange
for the topping: 1 cup oat flour
1 cup old fashioned oats
1/2 teaspoon salt
1 teaspoon cinnamon
1/2 cup brown sugar
1 tablespoon freshly grated ginger
7 tablespoons Earth Balance, softened
Preheat oven to 350°F. Butter a 2 quart baking dish and set aside.
To make the filling: In a large bowl, combine the rhubarb, crystallized ginger, sugar, 2 tablespoons oat flour, orange zest and juice. Stir until well combined. Spread filling into the bottom of the prepared dish.
To make the topping: In a separate bowl, stir together the oat flour, oats, salt, cinnamon, brown sugar, and grated ginger. Using your clean hands, work in the softened butter until the mixture coarse crumbs the size of a pea. Spread topping evenly over rhubarb filling.
Bake for 45 minutes to 1 hour in preheated oven or until filling is tender and bubbling and topping is golden brown.
Is it cold where you live? Do you have mountains of snow outside your window? Are you short on time? Do you hate doing dishes? Do you love comfort food that warms you up? If you answered yes to any or all of those questions, this chili is for you. Tossing everything into the slow cooker means you don’t have to spend hours standing over the stovetop, stirring and tending to your chili. Plus, who doesn’t love coming home after a long day to a house that smells amazing?
Slow Cooker Beef & Veggie Chili
1 tablespoon olive oil
1 pound 93% lean ground beef
2 medium onions, diced
8 cloves garlic, minced
1/3 cup chili powder
1 tablespoon ground cumin
2 bell peppers, diced
8 ounces cremini mushrooms, chopped
16 ounces tomato sauce
2 (15-ounce) cans diced tomatoes
2 (15-ounce) cans kidney beans, drained and rinsed
1 jalapeno, seeds removed and minced (optional)
for serving (optional): cooked macaroni noodles
fat free Greek yogurt or sour cream
shredded cheese
thinly sliced green onions
jalapeno slices
hot sauce
diced onions
Heat oil in a large skillet over medium-high heat. Add beef, onions, and garlic and cook until beef is no longer pink, about 7 minutes; stir with a spoon to break beef up into smaller pieces. Add chili powder and cumin and stir to coat. Cook for 1 – 2 minutes or until fragrant, stirring frequently. Transfer mixture to a slow cooker.
Stir in bell peppers, mushrooms, tomato sauce, diced tomatoes, and kidney beans. Cover slow cooker and cook for 6 hours on high or 8 hours on low. Season with salt and pepper to taste before serving toppings of your choice.
I’m spending more time than ever just cooking for one. The weekdays Mike and I spend together are rare, and when we do get the chance to enjoy each other’s company during the week, the last thing I want to do is spend hours cooking. My cooking style has evolved. I’m focusing more on super quick and easy dishes now more often than not. I don’t see this changing in the near future, either. I’ll be going back to school for my master’s in January (!!!) which means even less time in the kitchen.
For this recipe swap I was assigned Angie’s blog, My Chicago Kitchen. I looked through a bunch of her recipes before settling on this pepper steak dish. Quick and easy? Check. Delicious? Check!
1 pound flank steak, cut against the grain into thin strips
3 tablespoons low sodium soy sauce, divided
1/2 teaspoon ground white pepper
1 tablespoon cornstarch
1/3 cup beef broth
1/2 teaspoon red pepper flakes
1 tablespoon olive oil
1 onion, sliced
1 red pepper, sliced
1 green pepper, sliced
3 cloves garlic, minced
8 ounces mushrooms, sliced
salt & pepper, to taste
cooked brown rice, for serving
In a shallow bowl, marinate the flank steak in 2 tablespoons of the soy sauce for 15 minutes. Season with a touch of ground white pepper.
While the beef is marinating, make the sauce. Mix the remaining tablespoon of soy sauce with cornstarch. Add beef broth and whisk until corn starch is dissolved. Mix in red pepper flakes. Season to taste with salt and pepper.
Heat oil over medium-high heat. Add the onion and garlic and cook until onions are tender-crisp. Increase heat and add beef and cook until no longer pink in the center. Add peppers and mushrooms to the pan and cook until peppers are tender-crisp.
Pour in the sauce and stir to combine. Bring sauce to a simmer; it will thicken as it warms. Serve hot over brown rice.
I’ve realized that some dishes are just better when my mom makes it. My mission this time was to replicate the delicious beef noodle dish I ate growing up – niu rou mien. I asked her for a recipe, and she told me to just come over and watch her make it and take notes. She ended up sending me an email with a rough draft of a recipe; I’ve done my best to assign amounts to the various ingredients.
This recipe is long. It has many, many ingredients. I thought about finding shortcuts, but I honestly don’t think there are any. This recipe is truly a labor of love and it’s not something you can cheat and simplify without sacrificing taste.
One thing I noticed from pouring over niu rou mien recipes is that most of them instructed you to boil the beef to get rid of the impurities. If you have bone-in meat, you’ll want to make sure you boil it or you will end up with a film of gunk on your finished product. And that would be a major bummer after you spent all that time prepping and cooking, right?
This dish is my childhood in a bowl. And I’m so happy that I have been able to recreate it in my kitchen.
3 pounds beef shank and/or chuck roast (I used 1 1/2 pounds each)
2 tablespoons canola oil
2 medium onions, chopped
10 cloves garlic, peeled and smashed
2-inch piece ginger, thinly sliced
2 tablespoons fermented black beans 2 teaspoons five spice powder
2 tablespoons Sichuan bean sauce 1 tablespoon hot chili sauce 1/2 cup Shaoxing wine (vodka, vermouth, or sherry will also work)
1/3 cup low-sodium soy sauce
1/3 cup dark soy sauce
1 tablespoon rock sugar 2 cups beef broth
2 tomatoes, quartered
5 green onions, cut into thirds
3 dried chili peppers, optional
8 hard boiled eggs, peeled
1 tablespoon Sichuan peppercorns
5 star anise
2 cinnamon sticks
2 bay leaves
5 large carrots, sliced
for serving: baby bok choy, blanched
noodles of choice, cooked (I prefer medium-width Chinese noodles)
green onions, thinly sliced
rice wine vinegar
pickled mustard greens, recipe below
Bring a large pot of water to a boil. Add beef and reduce to a simmer. Cook until beef is cooked all the way through. Skim off the impurities floating on top of the water. Remove beef and reserve the cooking water.
Heat a large pot over medium-high heat and add the oil. Brown the beef on all sides. Remove beef from pot and place into the bottom of a slow cooker.
Add the onion, garlic, and ginger into the pot and cook, stirring frequently, for 2 minutes. Add the black beans, five spice powder, Sichuan bean sauce, and hot chili sauce and stir to combine. Stir in the Shaoxing wine, both types of soy sauce, and rock sugar and cook until the sugar has dissolved. Pour mixture on top of the beef.
Add in the beef stock, tomatoes, green onions, chili peppers, and hardboiled eggs. Add the Sichuan peppercorns, star anise, cinnamon sticks, and bay leaves (optional: combine these ingredients in a cheesecloth and tie it up to make removing all the little pieces a bit easier at the end.) Top everything off with stock and six cups of the reserved cooking water (or use 8 cups of beef stock). Cover and cook on low for 5 – 6 hours or until the meat is tender. Add carrots and cook for an additional 30 minutes or until carrots are tender. Taste and add more soy sauce if necessary.
To serve, place noodles in a bowl and top with bok choy. Ladle scoops of the beef stew on top. Garnish with green onions and the pickled mustard greens relish. Top with a splash of rice wine vinegar, if desired.
Pickled Mustard Greens Relish
10.5 ounce package mustard greens
2 hot chili peppers
2 tablespoons sugar
Rinse the pickled mustard greens and soak in water for 30 minutes. Change the water twice during this time period to get rid of excess salt.
Dice the mustard greens into pea-sized pieces.
Heat a nonstick pan over medium heat and add the mustard greens. Cook for 2 minutes. Add in chili peppers and sugar and stir until sugar is evenly distributed. Continue to cook, stirring frequently, until water has evaporated.
Allow to cool and store in the refrigerator in an air-tight jar.
The last outdoor farmers’ market is this Saturday in Madison. The last Wednesday market was yesterday and my heart broke a little. What am I going to do on my Wednesday lunches now? I can’t believe it’s November. I can’t believe it’s already snowed. I’m looking forward to visiting the indoor market for the first time this winter. I can’t believe I’ve lived in Madison for 5+ years and have never been to the indoor farmers’ market.
I have one thing that I’m looking forward to buying – kale. Lots and lots of kale. Sometimes I forget that good food doesn’t need to be time-consuming. It doesn’t need to be complicated. This kale & apple salad is the perfect example of that.
Kale & Apple Salad with Poppy Seed Dressing
3 tablespoons apple cider vinegar
2 tablespoons honey
2 teaspoons Dijon mustard
1 1/2 teaspoons poppy seeds
1/4 teaspoon salt
freshly ground black pepper
1 tablespoon olive oil
1/4 red onion, cut into a small dice
2 bunches kale (about 1 pound)
2 medium honey crisp apples
In a large bowl, whisk together vinegar, honey, mustard, poppy seeds, salt, and pepper until well combined. Drizzle in oil while whisking continuously. Stir in onion and set dressing aside.
Remove fibrous stem from kale discard. Slice leaves crosswise into 1/4-inch thick ribbons and place in bowl with dressing.
Slice apples into matchstick pieces and add to bowl. Toss to combine. Allow salad to sit for 15 minutes before serving. Salad can be prepared up to one day ahead of time; toss again before serving.
This pumpkin pie granola is a million times better than actual pumpkin pie. It packs all the delicious flavors of pumpkin pie without that baby food texture. Carrie over at Carrie’s Sweet Life hosted this month’s What’s Baking challenge and the theme was pumpkin or squash.
This granola recipe is crazy easy and since the pumpkin craze is in full swing, you probably have all the ingredients you need to make this in your kitchen already. I skipped out on using added fats in this recipe and instead used pumpkin to bind everything together to make a delicious, crunchy, slightly healthier granola.
Pumpkin Pie Granola
5 cups old fashioned oats
2 teaspoons pumpkin pie spice
1 ½ teaspoon ground cinnamon
¼ teaspoon ground nutmeg
½ teaspoon salt
¾ cup brown sugar
¾ cup pumpkin puree
¼ cup maple syrup
1 teaspoon vanilla
⅔ cup pepitas
⅔ cup pecans
⅔ cup dried cranberries
Preheat oven to 325°F. Line a large baking sheet with parchment paper and set aside.
In a large bowl, mix together oats, pumpkin pie spice, cinnamon, nutmeg, and salt. Set aside.
In another large bowl, mix together brown sugar, pumpkin puree, maple syrup, and vanilla until well combined. Pour the wet mixture into the oat mixture and stir until everything is evenly coated. Stir in pepitas and pecans.
Place granola onto prepared baking sheet. Bake in preheated oven for 30 minutes or until golden brown, stirring halfway through. Remove and sprinkle cranberries on top and stir in. Let granola cool complete; it will crisp as it cools.
Mike and I were out running errands today and ended up at the mall around lunch time. We had been out all morning running from store to store looking at flooring. By the time we got to the mall to look at some clothes for Mike, we were hungry and tired. Mostly hungry. As we walked around, the smells from the food court, the samples from the pretzel shops and coffee shops tempted us.
It was so hard to walk past everything. I was speed walking as fast as I could manage to get away from whatever tempting food was lurking in the area. The chicken taco soup we had for lunch was so good after spending two hours in that Sbarro-Panda Express-Auntie Anne’s haze.
For the soup, I used farmers’ market sweet corn and just barely cooked it so that it still retained its delicious crunch. If you don’t have any fresh corn on hand, 1 1/2 cups of frozen corn will work just fine. But nothing will ever beat good ol’ Wisconsin sweet corn!
Today we ate:
Breakfast: oatmeal with egg (me), oatmeal with agave (Mike)
Lunch: chicken taco soup
Snack: peanut butter toast
Dinner: spaghetti with zucchini and tomatoes in a creamy lemon-yogurt sauce (check back Monday for the recipe!)
Snack: peanut butter toast with banana
Preheat oven to 375°F. Spray a baking pan with olive oil.
In a small bowl, combine chili powder, cumin, garlic powder, onion powder, salt and pepper. Sprinkle a little bit of the mixture of the chicken breasts and set the rest of the spice mixture aside. Bake chicken in preheated oven for 20 – 25 minutes or until cooked through. Shred chicken with two forks.
Meanwhile, heat a large pot over medium heat and spray with olive oil. Add in onions, garlic, and jalapenos. Cook for 3 minutes. Stir in the remaining spice mixture and stir to evenly distribute. Stir in tomato sauce, bell pepper, diced tomatoes, and beans. Stir in chicken broth and bring mixture to a boil. Reduce heat to a simmer and cook for 20 minutes. Stir in shredded chicken and corn and cook for an additional 2 minutes to heat chicken through.
Day two is done. For me, it was just as weird as the first day. I wasn’t feeling 100% like myself due to the obnoxious cold I get hit with. Here’s what I ended up eating:
Breakfast: oatmeal with raisins
Lunch: peanut noodles with shredded chicken and veggies
Snack: cottage cheese
Dinner: peanut noodles with shredded chicken and veggies
Snack: apple
To drink: crazy amounts of peppermint tea sweetened with a bit of agave, water with lemon
So let’s move on to what I’ve been eating the past few days: peanut butter noodles with chicken and veggies!
This dish was crazy easy and it’s super customizable. I used bell pepper and carrots as my veg in this dish, but just about anything you have on hand will work. Feel free add more soy sauce, if desired. I only used 2 teaspoons because I ran out and didn’t budget for it in my SNAP Challenge budget. The most time-consuming part was cutting all the dang carrots up. I didn’t have my mandoline or grater with me, but I highly suggest you use one to make prep a little easier. Alternately, just chop the carrots up. A little less pretty, but just as tasty.
Another bonus? The noodles taste stellar hot or cold. I opted to eat mine mostly hot since it made my throat feel better, but you just follow your heart (stomach? taste buds?) and do as you wish!
Peanut Noodles with Shredded Chicken and Vegetables
2/3 cup natural creamy peanut butter
2 teaspoons low sodium soy sauce
1/2 teaspoon sesame oil
2 teaspoons sriracha, more or less to taste
2 teaspoons minced garlic
2 teaspoons minced ginger
1/2 cup cilantro, roughly chopped
Place chicken in a large saucepan and cover with water. Bring to a boil, reduce to a simmer, and cook until no longer pink in the middle and internal temperature reaches 165°F, about 12 minutes. Remove to a cutting board and let cool. Once cool enough to handle, shred with two forks.
Cook pasta according to package directions. Drain pasta, reserving 2/3 cup of the pasta water. Set aside.
While pasta is cooking, whisk together peanut butter, soy sauce, sesame oil, sriracha, garlic, and ginger. Whisk in 2/3 cup of hot pasta water to thin sauce. Taste, and add more soy sauce and sriracha if desired.
Toss pasta, bell peppers, and carrots with peanut sauce. Garnish with cilantro and serve.
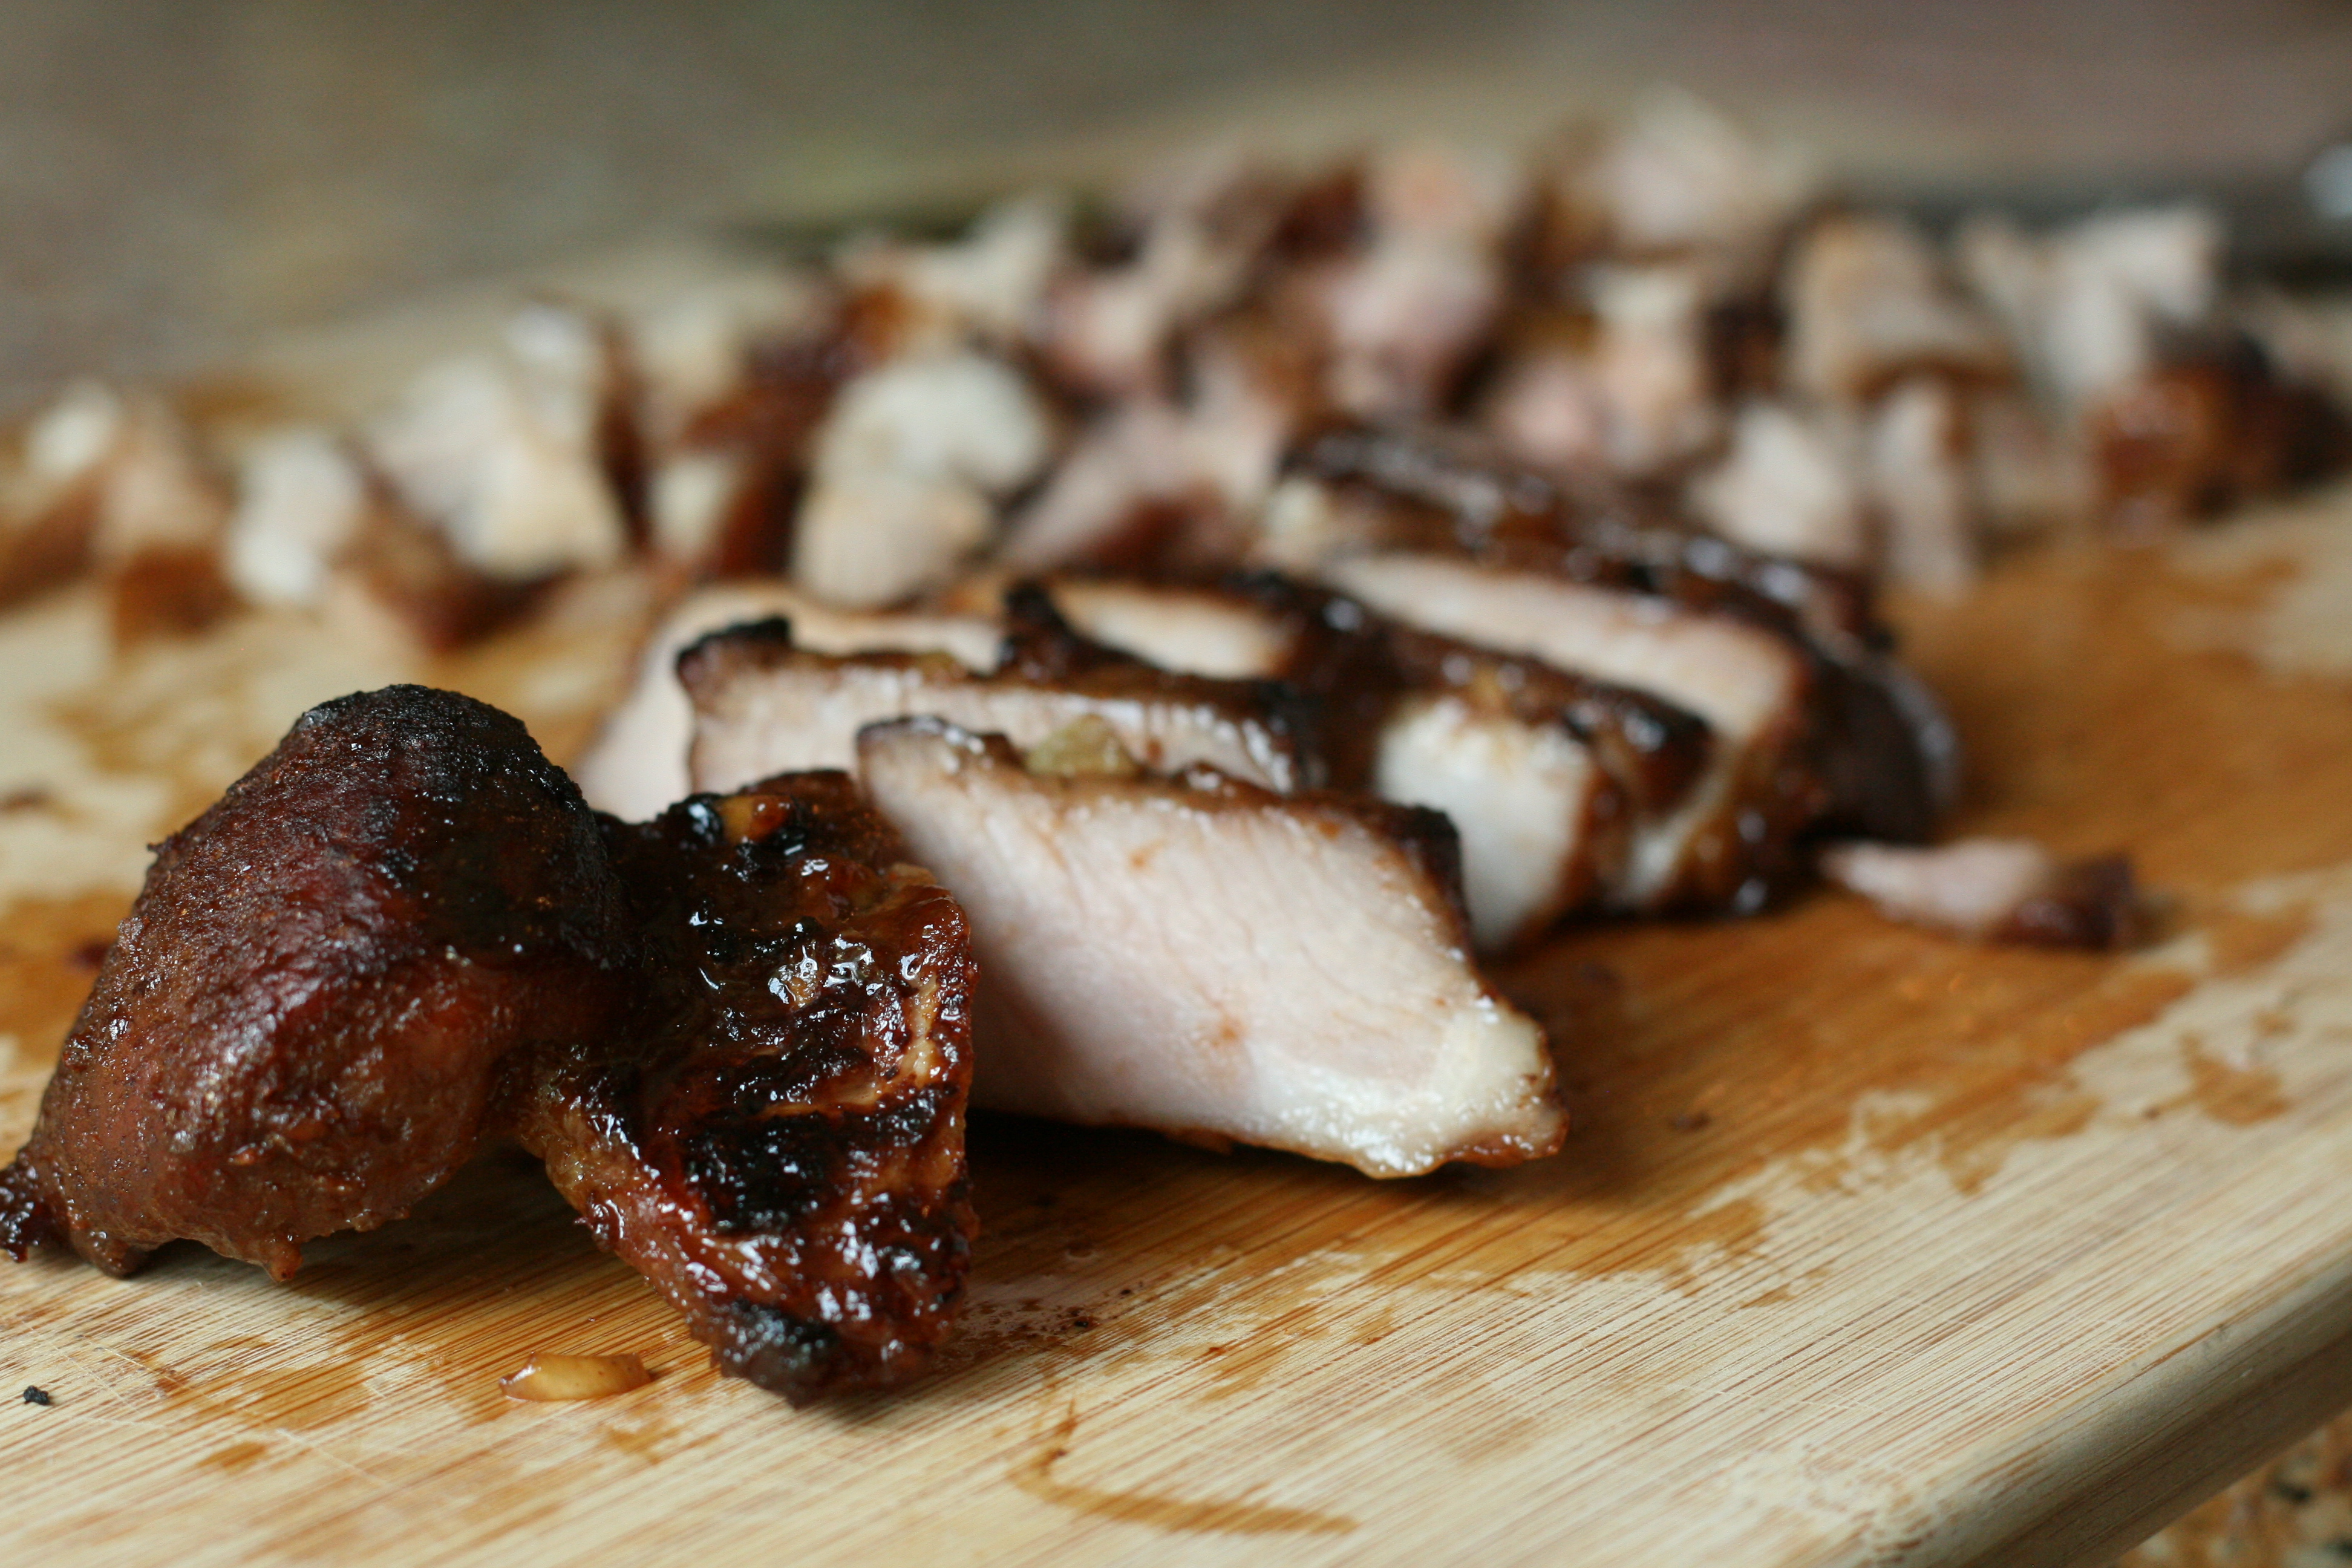
Char siu, or Chinese BBQ roast pork, brings back really fond memories for me. I remember seeing huge slabs of roast pork hanging from windows in restaurants or at grocery stores. I remember stuffing my face full of buns filled with the sweet-salty succulent pork.
I can’t even begin to tell you how awesome this pork smelled as it was roasting away in the oven. I might go so far as to say that it beat any cookie, cake, or pie smell that I’ve ever created in my kitchen. Seriously. It was that good.
I think I spent the majority of the cook time staring all googly-eyed into the little oven window, watching this pork cook up into what I can only describe as heavenly. If you’re looking for a little happiness in your life, you’re in luck. I’m bringing it to you in the form of some Chinese roast pork.
This little piggy… turned out awesome. Stay tuned for part two when this little piggy gets turned into some char siu bao (Chinese roast pork buns). Yeehaw!
Cut pork into 3-inch thick strips lengthwise. Place pork into a large zip-top bag and set aside.
Combine the remaining ingredients in a medium bowl. Whisk until well combined. Remove 1/2 cup of the marinade into a container. Cover and refrigerate for later use.
Pour the remaining marinade into the zip-top bag. Make sure pork is evenly coated with the marinade. Squeeze excess air out of the bag and seal it. Place bag into a baking dish and refrigerate overnight (at least 12 hours).
Preheat oven to 375°F. Line a sheet pan with foil and place a metal baking rack on top. Remove pork from marinade, letting excess marinade drip off. Place pork on rack, making sure the pieces don’t touch. Bake the pork for 20 – 25 minutes on each side, or until pork reaches an internal temperature of 145°F. Baste pork with half of the reserved marinade. Move the oven rack to the top third and turn the broiler on. Return the pork to the oven and cook for a few minutes on each side or until the pork is slightly charred.
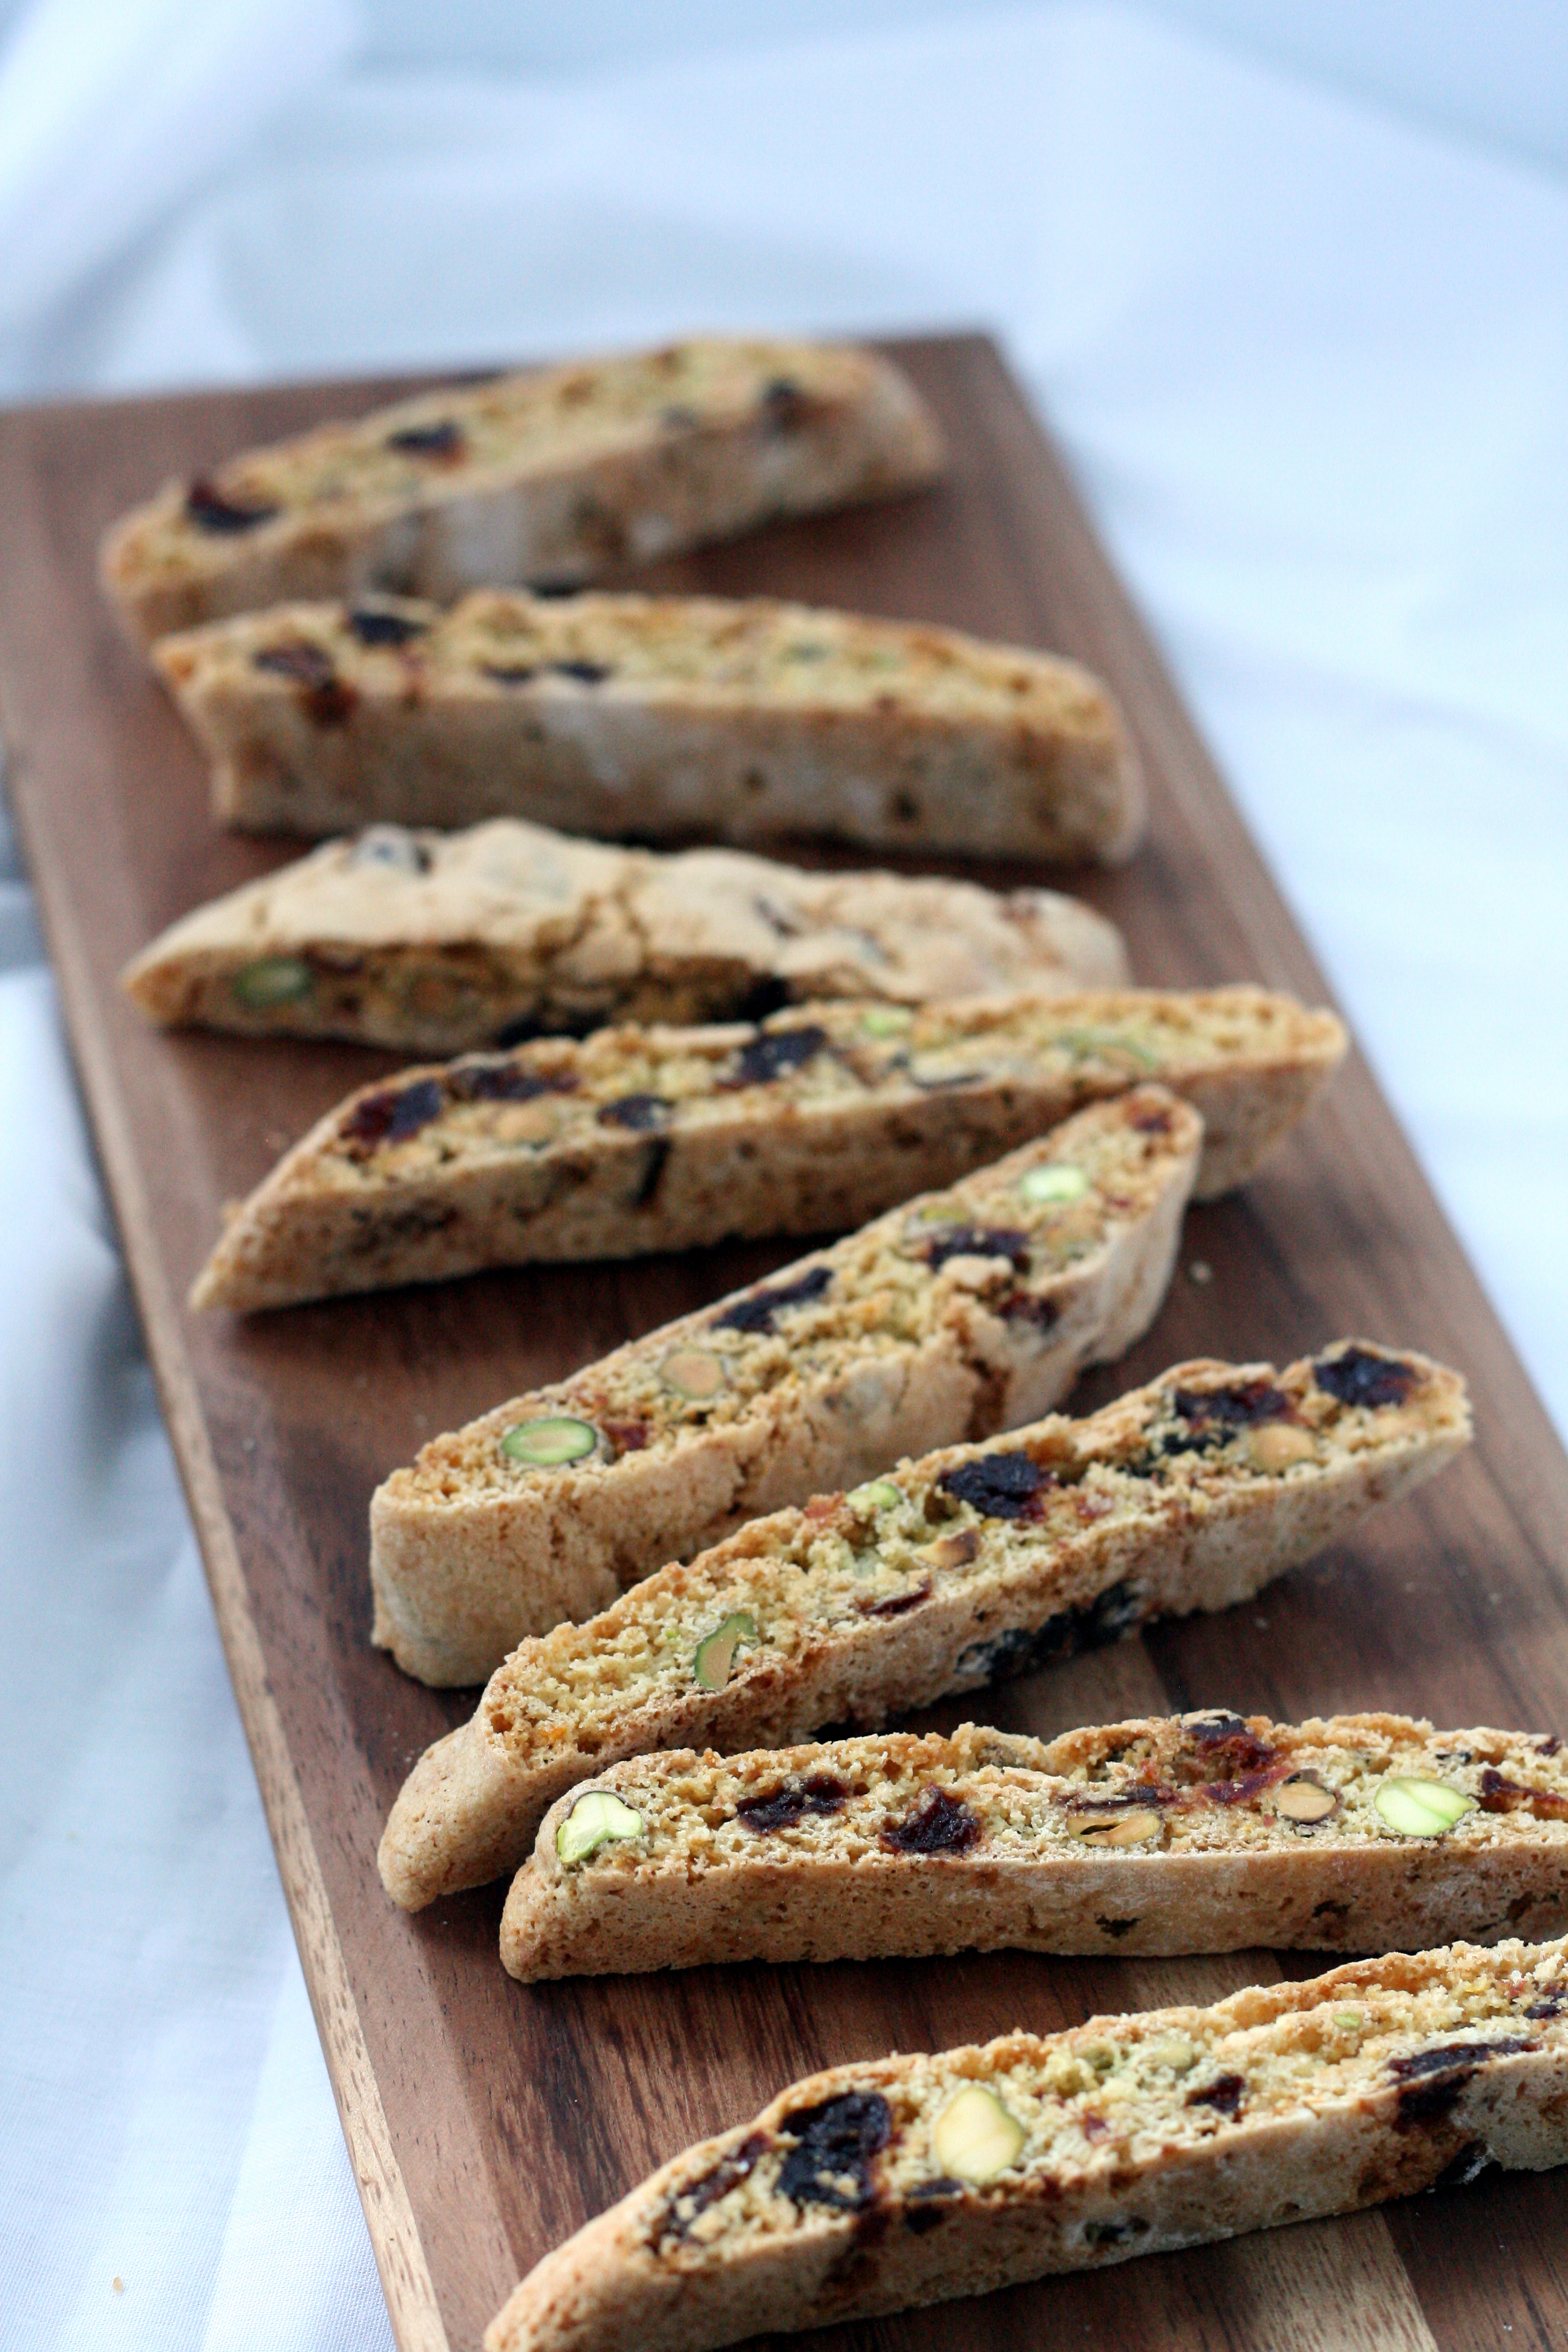
I can’t really remember how (or why) I started making biscotti. But for as long as I can recall, my mom has always requested biscotti as her gift for just about everything – birthday, Mother’s Day, Christmas… Thanksgiving?
I usually make some sort of chocolate biscotti, but this time I opted for something new – pistachios + dried cherries. How did it turn out? Amazing. Better than any of the chocolate-based biscotti I’ve ever made or tasted. Better than any biscotti I’ve ever had, period. I’m dreaming of the day that I can make these again – I’m hoping to get my hands on some delicious Door County cherries!
Pistachio and Dried Cherry Biscotti
1 3/4 cups all-purpose flour
1 cup sugar
1/2 cup old-fashioned oats
1 teaspoon baking powder
1/2 teaspoon baking soda
1/2 teaspoon kosher salt
2 large eggs
3 tablespoons canola oil
1 tablespoon orange zest
2 teaspoons lemon zest
1 1/2 teaspoon vanilla extract
1/2 teaspoon almond extract
1 cup dried cherries, roughly chopped
1 cup unsalted, shelled pistachios
Preheat oven to 350°F. Line a baking sheet with parchment paper and set aside.
In the bowl of a stand mixer or in a large mixing bowl, combine flour, sugar, oats, baking powder, baking soda, and salt. Mix for 30 seconds to combine.
In a separate bowl, whisk together eggs, oil, orange zest, lemon zest, vanilla extract and almond extract. Add egg mixture to flour mixture and beat on low speed until dough is crumbly and just combined, about 1 minute. Knead dough with your hands for another minute until dough comes together. Fold in cherries and pistachios.
Transfer dough to a lightly floured surface and divide in half. Dust hands with flour and shape each piece of dough into a 16-inch long log. Transfer logs to prepared baking sheet and use your palm to flatten into a 2-inch wide strip.
Bake until biscotti is lightly browned and set, about 30 minutes, rotating pans halfway through. Allow cookies to cool slightly on the baking sheet for 15 minutes.
Turn oven down to 250°F. Line a second baking sheet with parchment paper and set aside.
Transfer biscotti logs to a cutting board and slice diagonally into 2/3-inch thick slices*. Arrange pieces, cut side down, on prepared baking sheets.
Bake biscotti for 20 minutes. Flip biscotti and bake for an additional 20 minutes or until cookies are crisp. Carefully transfer cookies cooling rack and let cool completely. Store in an air-tight container until ready to serve.
*Most recipes call for cutting biscotti with a serrated knife, but I’ve had better luck with my super-sharp Santoku. Do as you wish!