DoughSeeDough

a balanced plate with room for dessert


2 Comments

Lightened-Up Cheesy Chicken & Rice Casserole

When I hear the word casserole, images of cheesy, fatty, not-so-great-for-you comfort food comes to mind. What if I told you that you could have all the comfort food flavor without all the bad stuff? This dish is loaded to the top with veggies and whole grains. It’s a dish you can feel great about eating.

Lightened Up Cheesy Chicken & Rice Casserole

Lightened-Up Cheesy Chicken & Rice Casserole

3 cups cooked brown rice
3 boneless, skinless chicken breasts
1/2 large onion, chopped
3 cloves garlic, minced
8 ounces mushrooms, sliced
1 green bell pepper, chopped
1 jalapeno, seeded and chopped (optional)
1 head broccoli, cut into florets and steamed (about 4 cups)
10.75 ounce can fat-free cream of mushroom soup
1 cup low-sodium chicken broth
2 tablespoons light mayo
1 tablespoon Dijon mustard
1 1/2 cups shredded cheddar cheese

  1. Preheat oven to 350°F. Spread cooked rice in the bottom of a 9×13 baking dish.
  2. Heat a large pan over medium-high heat. Spray with cooking spray. Add chicken and cook until cooked through and no longer pink in the middle. Remove chicken from pan to a separate bowl.
  3. Add onion, garlic, mushrooms, bell pepper, and jalapeno to pan. Cook until vegetables just begin to soften. Stir in soup, broth, mayo, and mustard until well combined. Mix in broccoli, 3/4 cup of the cheese, and the cooked chicken. Scoop mixture on top of rice in baking dish and sprinkle remaining cheese on top.
  4. Bake in preheated oven for 20 minutes or until cheese is bubbly. Allow to cool 5 minutes before serving.


1 Comment

Turkey & Rice Taco Skillet

Before I dive into our weekend adventures and the recipe,  I want to explain why I haven’t been posting as much (and why I’m eating dairy again). I’m unable to complete even a simple 5 mile run without almost collapsing. I can’t eat without being sick. Two of the most important things in my life: running and food, are now what frustrate me the most.  I’m taking it a day at a time, praying that my doctors can figure out what’s wrong with me soon so I can go back to being normal. Until then, I’ll be posting a bit less; it’s hard to post new recipes when you don’t each much of anything besides cereal and salads 🙂

But onto happier things… Mike and I went on our first camping trip of the season this past weekend with our pups. It rained Friday, but Saturday was picture-perfect and we were able to get in a nice long hike. Really long hike. Because we got lost. But hey, what’s the point of life without a little adventure? I’ve got two camping meals to share with you this week. For our Friday night dinner, I made a Turkey and Rice Taco Skillet. It was pouring, but we huddled under the tarp with the dogs and ate our dinner. It was the perfect meal to keep us warm in the cold, wet weather. I figured I would share this recipe first since it kind of works with the whole Cinco de Mayo thing, too.

Though this was made over a campfire, it is easily adaptable to be made at home on the stove top. That’s the beauty of cast iron – it can be used inside and outside. I’ve finally gotten my “inside use” Dutch oven and skillet to where they are pretty darn well seasoned. The skillet I used while we were camping, though, has been on hundreds of camping trips with Mike when he was growing up. The skillet is so perfectly seasoned that it puts my pieces to shame. I guess I have something to work on, eh?

Turkey & Rice Taco Skillet {camping meal} | doughseedough.net

Turkey and Rice Taco Skillet
serves 4 – 6

2 cloves garlic, minced
1/2 red onion, diced
1 jalapeno, minced (seeded if desired)
1.25 pounds lean ground turkey
1 packet hot taco seasoning mix
4 cups water, divided
3 cups Minute Brown Rice
1 – 15 ounce can corn
1 – 15 ounce can black beans, rinsed and drained
1 – 14.5 ounce can chopped tomatoes with jalapenos
1 cup shredded extra sharp cheddar cheese
2 cups shredded romaine lettuce
sour cream to garnish
olive oil spray

  1. Spray a large 12″ cast iron skillet with olive oil. Add garlic, onion, and jalapeno and cook over the fire (or medium-high heat) until onions are tender. Add the turkey and cook until browned, about 5 minutes. Stir in taco seasoning and two cups of water. Bring to a simmer and stir in rice and remaining two cups of water. Let simmer for 10 minutes, stirring occasionally. Stir in tomatoes, beans, and corn and continue to cook, stirring occasionally, until liquid is absorbed.
  2. To serve, divide between 4 – 6 bowls. Sprinkle with lettuce, cheese and top off with sour cream.


Leave a comment

Healthy Orange Sesame Chicken

This dinner might be my new go-to meal when I’m short on time and too tired to think. It was ready in about 40 minutes – and that’s only because brown rice takes forever to cook! If I were to make pasta or prepare the rice ahead of time this would be easily be a 30 minute fridge-to-table meal.
Though this dish has bell peppers as the main veggie, I bet it would be tasty with just about anything you might have on hand. I think next time I’ll try it with some broccoli. If you’re looking for a Chinese takeout version of orange chicken or sesame chicken, look elsewhere. This dish isn’t all that comparable to the sticky, overly sweet, deep fried abomination you find at the restaurant. It’s a light, easy meal that’s packed with good-for-you lean proteins and veggies.
Healthy Orange Sesame Chicken | doughseedough.net

Orange Sesame Chicken

2 tablespoons sesame seeds, toasted
2 large oranges, juiced (2/3 cup juice)
3 tablespoons low sodium soy sauce
1 tablespoon extra virgin olive oil
1 tablespoon corn starch

1-3 dried red chile peppers, minced
3 large bell peppers

1 large red onion, chopped
3 cloves garlic, minced
2 chicken breasts, sliced into 1/4-inch pieces
2 green onions, thinly sliced

cooked brown rice or whole wheat pasta for serving
  1. Prepare rice or pasta according to package directions. While rice/pasta is cooking, prepare the rest of the meal.
  2. In a small bowl, whisk together orange juice, soy sauce, and corn starch. Set aside.
  3. Heat oil over medium-high heat in a large saute pan or wok. Add in chile peppers and bell peppers and cook for 30 seconds, stirring constantly. Add in onion and garlic and cook for another 30 seconds, stirring constantly.
  4. Add in chicken and cook for 5 minutes, stirring occasionally, until chicken is cooked through. Pour in orange juice mixture and bring to a boil. Reduce heat to a simmer and let cook until sauce is thickened.
  5. Serve over prepared rice or pasta. Sprinkle with sesame seeds and green onions before serving.
adapted from Clean Eating Magazine


Leave a comment

Mushroom Barley and Wild Rice Risotto

Mushroom Barley & Wild Rice Risotto | doughseedough.net

This dish is definitely a labor of love. Much like a traditional risotto, you need to spend time at the stove, stirring, adding liquid, stirring… But the results are so worth it –  it’s rich and filling and well, my perfect comfort food. The bonus is that this seriously makes a huge pot of food – enough for lunch leftovers. There are days where I start to despise the leftovers I bring for lunch, but I ate this risotto for a week straight and never got sick of it.

I can’t wait to make it again – maybe this time with another type of mushroom!

Mushroom Barley & Wild Rice Risotto | doughseedough.net

Mushroom Barley and Wild Rice Risotto

6 cups low-sodium beef broth
3 cups water
8 slices bacon, chopped
1/2 onion, chopped
1 tablespoon fresh thyme, minced
6 garlic cloves, minced
1 pound cremini mushrooms, sliced
1/2 teaspoon salt
2 cups uncooked pearl barley
1/2 cup wild rice
1/3 cup dry red wine
1/2 cup sun-dried tomatoes, re-hydrated and chopped
2 teaspoons low-sodium soy sauce
1/4 teaspoon freshly ground black pepper
1 – 10 ounce package frozen chopped spinach, thawed and squeezed dry

  1. Bring stock and water to a simmer in a large saucepan. Cover and keep warm over low heat – do not boil.
  2. Meanwhile, heat a large Dutch oven over medium-high heat. Add bacon and cook until crisp. Remove bacon to a plate and set aside; reserve 2 teaspoons of bacon drippings in pan and discard the rest.
  3. Return the Dutch oven to medium-high heat and add in onion, thyme and garlic. Saute for 3 minutes or until onions are tender. Add in mushrooms and salt and cook for 10 minutes or until browned, stirring occasionally. Stir in tomatoes, soy sauce, pepper, spinach, and cooked bacon. Cook until heated through. Serve immediately.
  4. Stir in barley and wild rice. Cook, stirring frequently, for 1 minute. Add in wine and cook until liquid is absorbed, about 2 – 3  minutes. Reduce heat to medium. Stir in 2 cups of the broth mixture and cook until liquid is absorbed, stirring frequently. Continue with the remaining broth mixture: add in 1 cup at a time, stirring frequently. Make sure liquid is absorbed before adding the next cup.

recipe adapted from Prevention RD


3 Comments

Spicy Coconut Shrimp with Coconut Rice

Spicy Coconut Shrimp with Rice | doughseedough.net

We eat a lot of chicken in our house. A lot of chicken. So, when we do have some red meat or seafood, Mike is pretty darn excited! I was assigned Jaida’s blog Sweet Beginnings for this recipe swap. I was on her blog for hours. She has no shortage of recipes – whether you’re looking for a dessert, main entree, appetizer or drink, her blog has got it all. It took me a really long time to settle on this shrimp dish. I loved how easily this came together, Mike loved that he got to eat something other than chicken, and I’m sure you will love this dish, too 🙂

Spicy Coconut Shrimp with Rice | doughseedough.net

Spicy Coconut Shrimp with Coconut Rice

1 – 13.5 ounce can light coconut milk
1 jalapeno pepper, halved
3 cloves garlic
1-inch piece fresh ginger, skin removed and chopped
1/4 cup fresh parsley
1 lime, juiced
2 tablespoons extra virgin olive oil
1/2 pound shrimp, peeled and deveined, tails left on
1 cup uncooked white rice
salt and freshly ground black pepper

  1. Prepare the marinade: In the bowl of a food processor, combine 1/2 cup of the coconut milk, jalapeno, garlic, ginger, parsley, lime, and olive oil. Blend until smooth. Season with salt and pepper, to taste.
  2. Place shrimp in a small bowl and pour the marinade over it, tossing to coat. Cover and refrigerate for 1 to 2 hours.
  3. Rice can be prepared in a rice cooker or medium pot over medium high heat. Combine remaining coconut milk with rice and stir to combine. Cook according to package directions. If using brown rice, add in 1 cup of water.
  4. When rice is almost done cooking (white rice will take about 15 – 20 minutes and brown rice about 40 – 45 minutes, in my experience), start cooking the shrimp.
  5. Heat a medium skillet over medium high heat. Remove shrimp from the marinade and place in the skillet in a single layer. Cook the shrimp for 2 minutes on one side. Flip and cook for an additional minute, or until shrimp are fully cooked.
  6. Pour the marinade into small saucepan and bring to a boil. Reduce heat to a simmer and let cook for 3 minutes.
  7. Serve shrimp over prepared rice and drizzle with reduced sauce.

recipe slightly adapted from Sweet Beginnings, originally from Bev Cooks

A big thanks to Sarah at Taste of Home Cooking for hosting! Click on the link below to check out the other delicious swap recipes!


Leave a comment

California Rice and Beans

My favorite part of traveling for work is getting to eat at different restaurants. My first business trip meal was at Mona Lisa’s in Eau Claire. I had their gnocchi with sausage and peppers, and it was phenomenal. The downside to all this eating out is… well, it’s a lot of eating out. I got home and just needed an easy, home cooked meal. I saw this recipe in the most recent issue of Food Network Magazine and knew it would be perfect after being on the road.

I’m still trying to find a balance between my new work life, working out, and cooking. Before, I was able to run before work. I opted to work 7 – 3:30 at this new job, so running before work just isn’t going to happen! I’m a morning person, but waking up at 5:15 is as early as I can manage. Running before work would mean getting up an hour or more earlier than 5:15, depending on my distance. Nope, no thanks!  So, now I’m running after work and racing the clock to get dinner on the table at a decent time. Simple dishes are good right now since I don’t have a fully stocked pantry like I’m used to and I’m limited with my cooking tools as well.

California Rice & Beans | doughseedough.net

California Rice and Beans
adapted from Food Network Magazine, September 2013

1 pound cremini mushrooms, sliced
2 bell peppers, sliced into strips
1 yellow summer squash, halved lengthwise and sliced
2 cloves garlic, minced
3 tablespoons extra virgin olive oil
kosher salt
freshly ground black pepper
1 – 15 ounce can great northern beans, drained and rinsed
1 lemon, juiced
1/2 cup parsley, chopped
5 cups cooked brown rice
1/4 cup sliced almonds, toasted
3 green onions, sliced

  1. In a large bowl, combine the mushrooms, bell peppers, squash, garlic, olive oil, salt, and pepper. Toss until evenly coated.
  2. Heat a large pan over medium-high heat. Place vegetables into pan and cook, stirring occasionally, until vegetables are tender-crisp, about 10 minutes.
  3. Meanwhile, place beans in a bowl and mash with a fork or potato masher. Stir in lemon juice and parsley and season with salt and pepper to taste.
  4. Place hot rice on 4 plates and top with vegetables and mashed beans. Top beans with sliced almonds and green onions. Serve immediately.


Leave a comment

Sweet & Sour Meatballs with Peppers

There are some days where I just don’t have the time (or energy) to cook an elaborate meal. I’ve come to love quick, easy dinners that I can throw together in a half hour.

There are some sweet & sour meatball recipes that use only 3 ingredients: frozen meatballs, grape jelly, and chili sauce. I couldn’t even bring myself to consider making it. Instead, I opted to make meatballs from scratch (easy!) and sauce from scratch (easier!). Sure, it took a little longer to whip together than the 3 ingredient meatballs, but it’s well worth it to me! The meatballs are super tender and I love the sauce. I also love the fact that I can pour a healthy dose of Sriracha on top.

The only part that beats the fact that it is so simple to make is that this made a LOT of food. That means that Mike and I were able to eat it for breakfast, lunch, and dinner for a couple days 😉 If you’re cooking for a small group, you may want to cut the recipe in half.

Sweet & Sour Meatballs | doughseedough.net

Sweet & Sour Meatballs with Peppers
adapted from All Recipes

for the meatballs:
2 pounds 90% lean ground beef
2 eggs
1 cup dry bread crumbs
1/2 cup finely chopped or grated onion
1-inch piece of ginger, grated
1 teaspoon seasoning salt
1 teaspoon ground black pepper
1 tablespoon Worcestershire sauce

for the sauce:
2 – 20 ounce cans pineapple chunks, drained and juice reserved
1 cup water
1/4 cup cider vinegar
2 tablespoons low sodium soy sauce
1/3 cup packed brown sugar
3 tablespoons corn starch
1/2 teaspoon seasoning salt
1 large onion, chopped
2 red or yellow bell peppers, sliced

white or brown rice, for serving

  1. Preheat oven to 400°F. Line a baking sheet with parchment paper and set aside.
  2. To make the meatballs: combine all ingredients in a large bowl. Mix by hand until just combined, being careful not to overmix. Shape into 1 – 1 1/2 inch balls and place on prepared baking sheet. Bake for 10 – 15 minutes or until lightly browned. Set aside.
  3. Meanwhile, make the sauce. Pour reserved pineapple juice into a large pot over medium heat. Whisk in water, vinegar, soy sauce, brown sugar, corn starch, and salt. Cook, stirring occasionally, until thickened.
  4. Stir in pineapple chunks, onion, bell peppers, and meatballs into the sauce. Gently stir to combine and simmer for 15 – 20 minutes or until meatballs are cooked through.
  5. Serve immediately with rice.


3 Comments

Brown Rice California Roll

It’s crazy how fast time flies when you’re running on fumes. I cannot wait for the dietetic internship to be over. Working, homework, and trying to find time to work out and cook is leaving me with very little time to sleep. What has been keeping me so busy? On top of the work we have to do in rotations 8 hours a day, we have additional projects, homework, readings, etc. to keep us busy. I had the great honor to be one of the managers for cooking demos we held in late January and early February.

The interns presented 6 dishes total; I had a blast making this Brown Rice California Roll with a fellow intern for our audiences! It’s so simple and so good that I just couldn’t resist sharing the recipe that we came up with!

Sushi is one of my favorite foods in the world. No lie – I could eat it for every meal, every day and not get sick of it. As much as I love going out for sushi, it can get a little pricey. So while it’s nice to dine out once in a while, it makes a lot more sense to just make it at home! I can’t recall how long I’ve been making sushi. I do remember my mom making rolls for parties growing up, and I’m fairly certain I just picked up the skill from observing her. I still think observation is the best way to learn how to roll sushi, but I had Mike document the process and I hope that these pictures will help!

Brown Rice California Roll
makes 4 rolls 

2 cups brown rice
4 teaspoons low sodium soy sauce
4 tablespoons seasoned rice vinegar
4 sheets nori*
1 kirby cucumber, cut into 1/16 matchsticks
1/2 large carrot, cut into 1/16 matchsticks
1 ripe avocado, thinly sliced
3 sticks imitation crab meat, shredded
1/2 cup + 2 tablespoons fat free mayonnaise, divided
2 tablespoons Sriracha chile sauce
1/4 teaspoon roasted sesame oil

Special Equipment:
Bamboo sushi mat*

  1. Cook rice in rice cooker and medium pot with 4 cups water and 2 teaspoons of the soy sauce.
  2. When rice is cooked, transfer to a flat, non-metal bowl. Sprinkle remaining soy sauce and seasoned rice wine vinegar on top and toss to coat. Cool rice about 15 minutes, tossing occasionally.
  3. Add 2 tablespoon mayo to imitation crab and stir to combine.To roll the sushi:
  4. Set bamboo mat on flat surface with slats running crosswise.
  5. Arrange nori shiny-side down on mat.

  6. Using damp fingers, press 3/4 cup rice onto nori in 1 layer, leaving a 1 3/4″ border on the side of farthest from you.
  7. Arrange 1/4 of the carrots in an even strip horizontally across rice, about 1″ from the side closest to you.
  8. Arrange 1/4 of the cucumber in the manner, just above the carrots.
  9. Arrange 1/4 of the avocado slices just above the cucumber.
  10. Evenly distribute 1/4 of the crab on top of the carrot, cucumber, and avocado.
  11. Beginning with the edge closest to you, lift mat up with thumbs, holding filling in place with your fingers.
  12. Fold the mat over the filling and gently squeeze firmly along the length of the roll, tugging on the edge of the mat farthest from you to tighten.
  13. Continue to roll, by lifting up the mat, rolling the sushi forward, and squeezing. Be careful not to roll the mat into the sushi!
  14. Open mat and roll log forward to seal completely.
  15. Transfer roll, seam side down, to a cutting board. Slice into 9 pieces with a wet serrated knife.
  16. To make the dynamite sauce, mix together 1/2 cup mayo, Sriracha, and sesame oil together in a small bowl.

*You can find these items at an Asian grocery store. Larger grocery stores may carry these as well.


8 Comments

Copy Cat Burrito Bowls

TGIF!! Even though I’m loving my rotation in school food service, I’m still so so so very happy that it’s Friday. So, here are my Friday Favorites for this week.

Favorite Fitness Must Have: Garmin Forerunner 910XT with HRM. Ok, calling this $450 fancy watch a “must have” is a bit of a stretch. Maybe I should say it’s a “Lust Have” instead. The watch is seriously awesome. The price is a little steep for a student budget, though. Eh, maybe when I get out of school and find a job I can reward myself with one of these babies with my first paycheck.

image from runningwarehouse.com

Favorite Cold Treat: Kemp’s Java Chip Ice Cream. Oh boy. I can’t even begin to tell you how much I love this stuff. A bowl full of this + some espresso chocolate chip cookies = the best dinner ever.

image from kemps.com

Favorite Make-Me-Smile Read: 10 Reasons Running Doesn’t Suck As Much As You Think on Hello Giggles. Part of me really wants to print this out and stick it on my fridge.

Favorite Restaurant Meal Copy Cat: Burrito Bowls! I made these on a night where I had a craving for burritos. They were so good that we made them again the next night with different toppings. The best part? They were SO easy to make! Seriously, we put them together in the time it would have taken us to drive across town, wait in line, and drive back home. It’s an added bonus that they were so cheap to make, too! Now that’s my kind of meal – delicious, quick, and cheap.

Copy Cat Burrito Bowl

3 cups brown rice
1 lime, zested and juiced
1/2 cup cilantro, roughly chopped, divided
3 boneless, skinless chicken breasts
1/2 teaspoon chili powder
1/2 teaspoon onion powder
1/2 teaspoon garlic powder
1/2 teaspoon cumin
1/2 teaspoon oregano
1 teaspoon olive oil
2 roma tomatoes, chopped
1/2 red onion, diced
salt and pepper, to taste
1 can black beans, drained and rinsed
1/2 cup reduced fat cheddar cheese, shredded

Other optional toppings:
Sour cream
Jalapeños
Avocado
Queso
Hot sauce

  1. Cook brown rice according to package directions. I use a rice cooker and use a 1 cup brown rice: 2 cups water ratio. When rice is cooked, mix with 1/4 cup cilantro, lime zest and lime juice.
  2. Meanwhile, mix chili powder, onion powder, garlic powder, cumin, and oregano together and sprinkle generously over chicken breasts.
  3.  Heat olive oil in a medium-sized skillet over high heat. Cook chicken until cooked through. Remove to cutting board and chop.
  4. In a separate bowl, make the pico de gallo. Combine tomatoes, 1/4 cup cilantro, red onion, salt and pepper. Toss to combine.
  5. To assemble: place rice in bowl and top with black beans, chicken, pico de gallo, shredded cheese, and any other toppings you desire. Enjoy!


1 Comment

Mushroom Risotto

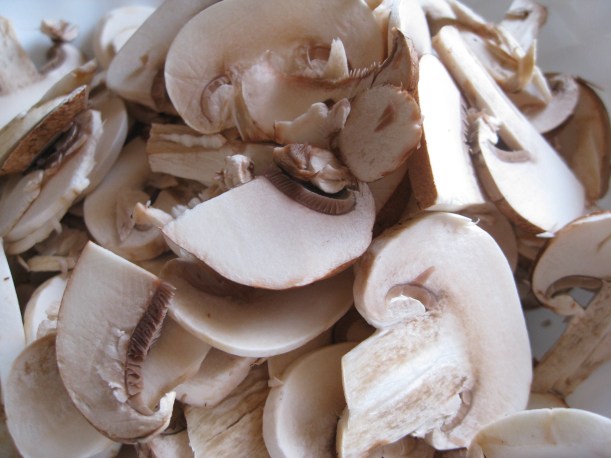
I order risotto at restaurants whenever I can, but I’ve never made it before. I came across this risotto recipe that featured one of my favorite ingredients ever – mushrooms.

Look how delicious they are. I love cremini, white button, portabella, shiitake, oyster, all the funky ones in Chinese cuisine… I could never tire of them.

I figured that this recipe just couldn’t go wrong. Risotto and mushrooms, oh heck yes. I spent a good half hour in front of the stove, stirring constantly and it was so worth it.

Mushroom Risotto
adapted from allrecipes.com

6 cups chicken or beef broth
3 tablespoons olive oil, divided
8 ounces cremini mushrooms, finely sliced
8 ounces white button mushrooms, finely sliced
2 shallots, finely diced
1 1/2 cups Arborio rice
1/2 cup dry white wine
salt and freshly ground pepper, to taste
3 tablespoons finely chopped chives or green onions
3 tablespoons butter
1/3 cup freshly grated Parmesan cheese

  1. In a saucepan, warm broth over medium heat. Keep at just below simmering level.
  2. Warm 2 tablespoons olive oil in a medium saucepan. Cook mushrooms until soft, 3 – 5 minutes. Transfer mushrooms and juices to a bowl and set aside.
  3. Heat remaining 1 tablespoon olive oil in pan. Cook shallots for 1 minute. Add rice and cook, stirring to coat with oil. Cook until rice is a toasted golden color.
  4. While stirring rice, pour in wine. Stir constantly until all liquid is absorbed.
  5. Add broth 1/2 cup at a time, stirring constantly until liquid is fully absorbed before adding more. Continue until all broth is gone and rice is al dente, about 25 minutes.
  6. Remove from heat and stir in mushrooms with their liquid, butter, cheese, and chives. Add salt and pepper to taste. Serve immediately with more Parmesan and chives as garnish.