DoughSeeDough

a balanced plate with room for dessert


3 Comments

Curried Mussels in White Ale

Curried Mussels in White Ale | doughseedough.net

I still remember when I made this dish – I had invited my mom over for dinner after she found out I was making mussels. I figured that since she fed them to us a couple weeks ago, it was my turn to host. She declined since they had some guests. Turns out, I am dang happy that she didn’t end up coming over (does that make me a bad daughter?). Mike and I devoured this entire dish by ourselves and were wishing we had more. We couldn’t get enough of how flavorful the curry ale sauce was. Seriously out of this world. Next time, I’m going to whip up a triple batch and force my mom to join us.

Curried Mussels in White Ale | doughseedough.net

Curried Mussels in White Ale

1 teaspoon canola oil
1 tablespoon Thai red curry paste
6 garlic cloves, chopped
1 1/2 tablespoon finely grated fresh ginger
1 large fresh lemongrass stalk, bottom two-thirds of the bulb smashed and chopped
2/3 cup Shaoxing wine
15 ounce can low fat coconut milk
1/4 cup low-sodium soy sauce
3 tablespoons Asian fish sauce
1/2 cup Thai basil leaves, plus 1/4 cup chopped
2 12-ounce bottles Belgian white ale
2 pounds mussels, scrubbed and debearded; toss any that do not close tightly when tapped
1/4 cup cilantro, chopped

crusty bread for serving

  1. Heat the oil in a large saucepan over medium heat. Add curry paste, garlic, ginger, and lemongrass and cook, stirring frequently, for 2 minutes or until fragrant. Add the Shaoxing wine, coconut milk, soy sauce, fish sauce and basil leaves. Reduce to a simmer and cook for 15 minutes. Strain the sauce into a bowl; discard the solids.
  2. Rinse the saucepan out and then bring the ale to a boil over high heat. Add the mussels, cover and cook for 5 minutes. Using a slotted spoon, transfer the mussels to four bowls, discarding any that are not open.
  3. Add the red curry sauce to the ale and bring to a boil. Let cook for 1 minute and spoon over the mussels. Sprinkle with the remaining chopped Thai basil and cilantro and serve.


recipe slightly adapted from Food & Wine


1 Comment

Baked Fish and Chips

baked fish and chips {dairy free} | doughseedough.net

I don’t know about you, but I love fried food. My dairy-free lifestyle has significantly decreased my fried food consumption, but I still get crazy cravings for it. This baked version of fish and chips (or for my fellow Wisconsinites, a good ol’ fish fry) is delicious and completely satisfied my craving for greasy, fried fish and potatoes.

The best thing was that I didn’t have that heavy, gross feeling I usually get after indulging in fish and chips. Another bonus: I could inspect all the ingredients to make sure they were 100% dairy-free. I mean, it’s not that I don’t trust restaurants, but… OK, I don’t really trust (most) restaurants 😉

baked fish and chips {dairy free} | doughseedough.net

Baked Fish and Chips

for the chips:
1 1/4 pounds russet potatoes (about 3 – 4 medium)
olive oil spray
salt and freshly ground black pepper

for the fish:
olive oil spray
2 1/2 cups crispy rice cereal
salt and freshly ground black pepper
3 egg whites
1 1/2 pounds skinless, boneless perch cut into 2×4-inch pieces

optional:
tartar sauce
malt vinegar
lemon wedges

  1. Arrange oven racks in upper and lower third of oven and preheat to 450°F.
  2. To prepare the chips: Slice potatoes into 1/4-inch thick sticks. Spread potatoes out on in a single layer on a lightly greased baking sheet and spray with olive oil. Place on top rack and bake, flipping fries once or twice, until fries are browned and crisp, about 30 minutes. Remove fries from oven and season with salt and pepper, to taste.
  3. While fries are baking, prepare the fish: Coat a baking sheet with cooking spray.  Whisk egg whites and a pinch of salt in a shallow bowl until frothy; set aside. Place cereal in a shallow bowl and crush with fingers. Season cereal with salt and pepper, to taste.
  4. Dip fish pieces into egg whites, then roll in cereal to coat. Place fish on prepared baking sheet, thin side down and mist with olive oil spray.
  5. Place fish onto lower rack and bake until crisp and cooked through, about 12 – 15 minutes. Season fish with salt and pepper, to taste.
  6. Serve fish and chips immediately with tartar sauce, malt vinegar, and lemon wedges.

recipe from Food Network


3 Comments

Spicy Coconut Shrimp with Coconut Rice

Spicy Coconut Shrimp with Rice | doughseedough.net

We eat a lot of chicken in our house. A lot of chicken. So, when we do have some red meat or seafood, Mike is pretty darn excited! I was assigned Jaida’s blog Sweet Beginnings for this recipe swap. I was on her blog for hours. She has no shortage of recipes – whether you’re looking for a dessert, main entree, appetizer or drink, her blog has got it all. It took me a really long time to settle on this shrimp dish. I loved how easily this came together, Mike loved that he got to eat something other than chicken, and I’m sure you will love this dish, too 🙂

Spicy Coconut Shrimp with Rice | doughseedough.net

Spicy Coconut Shrimp with Coconut Rice

1 – 13.5 ounce can light coconut milk
1 jalapeno pepper, halved
3 cloves garlic
1-inch piece fresh ginger, skin removed and chopped
1/4 cup fresh parsley
1 lime, juiced
2 tablespoons extra virgin olive oil
1/2 pound shrimp, peeled and deveined, tails left on
1 cup uncooked white rice
salt and freshly ground black pepper

  1. Prepare the marinade: In the bowl of a food processor, combine 1/2 cup of the coconut milk, jalapeno, garlic, ginger, parsley, lime, and olive oil. Blend until smooth. Season with salt and pepper, to taste.
  2. Place shrimp in a small bowl and pour the marinade over it, tossing to coat. Cover and refrigerate for 1 to 2 hours.
  3. Rice can be prepared in a rice cooker or medium pot over medium high heat. Combine remaining coconut milk with rice and stir to combine. Cook according to package directions. If using brown rice, add in 1 cup of water.
  4. When rice is almost done cooking (white rice will take about 15 – 20 minutes and brown rice about 40 – 45 minutes, in my experience), start cooking the shrimp.
  5. Heat a medium skillet over medium high heat. Remove shrimp from the marinade and place in the skillet in a single layer. Cook the shrimp for 2 minutes on one side. Flip and cook for an additional minute, or until shrimp are fully cooked.
  6. Pour the marinade into small saucepan and bring to a boil. Reduce heat to a simmer and let cook for 3 minutes.
  7. Serve shrimp over prepared rice and drizzle with reduced sauce.

recipe slightly adapted from Sweet Beginnings, originally from Bev Cooks

A big thanks to Sarah at Taste of Home Cooking for hosting! Click on the link below to check out the other delicious swap recipes!


Leave a comment

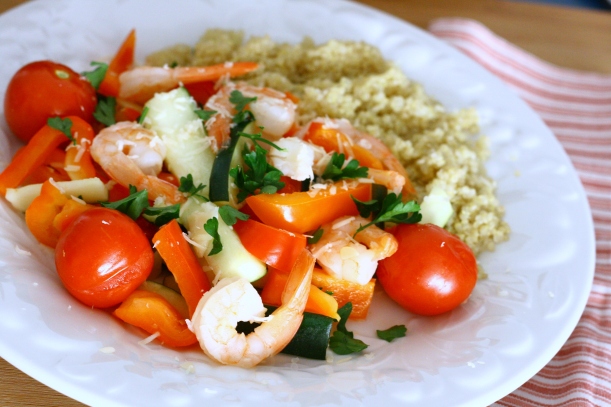
Shrimp and Vegetables in Lemon-Garlic Sauce

Surprise, another recipe with tomatoes!  I really shouldn’t complain about our abundance, because I know in a few short weeks winter will be here and a beautiful, tasty tomato will be pretty much impossible to find. Sigh. Wisconsin winters, I love you and hate you all at the same time.

I love fresh, easy dishes like this one. It makes me feel like I’m doing something good for my body. In my mind it cancels out all the Sour Skittles I eat and all the booze I drink. So, go for it – do your body some good and eat a dish with some super-grain quinoa and fresh summer veggies.

Shrimp and Vegetables in Lemon-Garlic Sauce | doughseedough.net

Shrimp and Vegetables in Lemon-Garlic Sauce

3 cups low sodium chicken broth, divided
1 cup quinoa
2 teaspoons olive oil, divided
2 large bell peppers, chopped
2 medium zucchini, seeded and chopped
2 lemons, zested and juiced
5 cloves garlic, minced
1 pound medium shrimp, peeled and deveined
chopped parsley to garnish, optional

  1. In a medium pot, bring 2 cups of chicken broth to a boil. Add in quinoa and reduce to a simmer. Cover and cook, stirring occasionally, until all the liquid has been absorbed and quinoa is cooked through.
  2. While quinoa is cooking, heat 1 teaspoon olive oil in a large pan over medium heat. Add bell peppers, zucchini, and lemon zest and cook until vegetables are tender-crisp, about 4 – 5 minutes. Transfer vegetables to a bowl and keep warm.
  3. Heat remaining teaspoon of olive oil in pan. Add garlic and cook until fragrant, about 30 seconds. Add in shrimp and cook for 1 minute. Stir in remaining 1 cup broth and lemon juice and cook until shrimp are pink and cooked through, about 2 more minutes. Remove from heat and serve over cooked quinoa. Garnish with parsley, if desired.


1 Comment

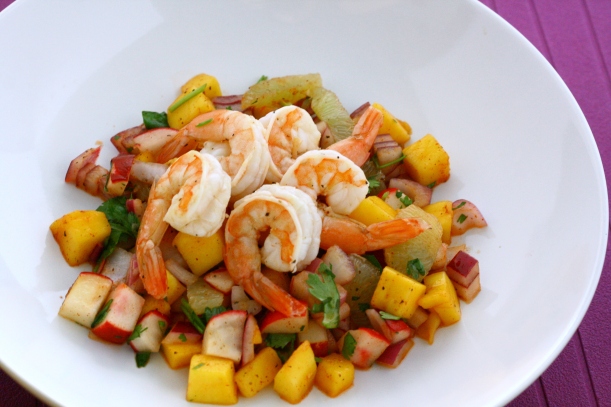
Shrimp with Mango, Lime and Radish Salsa

I’m happy to say that I survived my first week of work. The best part is that I really, really like my job so far and I think it’s only going to get better!

I am also happy to report that we are 90% moved in. Madison is finally starting to feel like home. We have a bed, our laptops, and most importantly – internet. The hardest part of having two homes is not having access to all of my cooking gadgets all the time. I had a difficult time deciding if I wanted to bring my stand mixer or my hand mixer (hand mixer won, due to space), a blender or a food processor (blender… but I think that I might end up getting the food processor anyway), what pots and pans to bring… I’m still not 100% satisfied with my decisions, but that will eventually get figured out, too.

The downside to this move is I haven’t been cooking a lot. We’ve been living off of sandwiches, salads, and pasta mixed with ground turkey and the tomato sauce I canned last summer. Nothing too exciting. I do have a shrimp dish that I made pre-move, though! The whole time I was eating this I was thinking about Scott Conant, a judge on Chopped, who hates raw onion. If you haven’t seen him on the show before, you will just have to trust me when I say that this man hates raw onion with a passion. He tears apart every.single.chef that uses it in their dish. If you are like Scott and hate raw onion, this dish probably isn’t for you. If you do like raw onions, then continue on!

Shrimp with Mango, Lime and Radish Salsa | doughseedough.net

Shrimp with Mango, Lime and Radish Salsa
slightly adapted from Food Network

1 1/2 pounds large uncooked shrimp, peeled
1/4 cup extra virgin olive oil, divided
1 lemon, juiced
kosher salt
freshly ground black pepper

for the salsa:
3 limes
2 mangoes, diced
4 radishes, diced
1 red onion, diced
1 tablespoon chili powder
1/2 cup cilantro leaves, chopped
2 tablespoons extra virgin olive oil
kosher salt
freshly ground black pepper

  1. In a large bowl, whisk together 2 tablespoons olive oil, lemon, salt and pepper. Toss with shrimp until well combined. Cover and place in the refrigerator and let marinate for 45 minutes. Heat remaining olive oil in a large pan over medium-high heat. Cook shrimp until they turn pink, turning once.
  2. Remove segments from the limes by cutting off both ends. Place lime on one cut end and with a small, sharp knife, cut off the pith and peel. When all peel and pith is removed, carefully cut between the membrane to remove the lime segments.
  3. Place lime segments in a large bowl. squeeze juice from the lime membranes into the bowl. Add remaining ingredients and toss to combine. Place cooked shrimp on top and serve immediately.


4 Comments

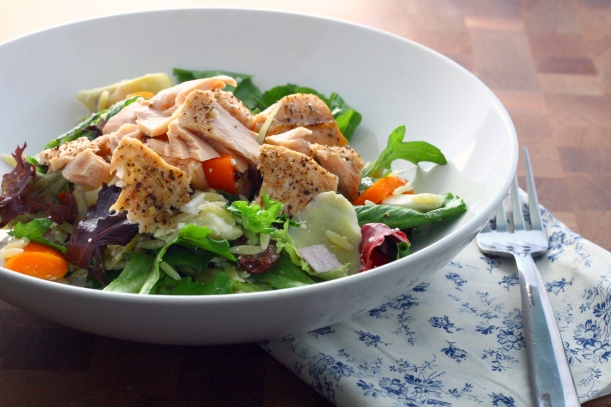
Mediterranean Salmon Salad

Mediterranean Salmon Salad with Feta, Artichoke Hearts and Orzo | doughseedough.net

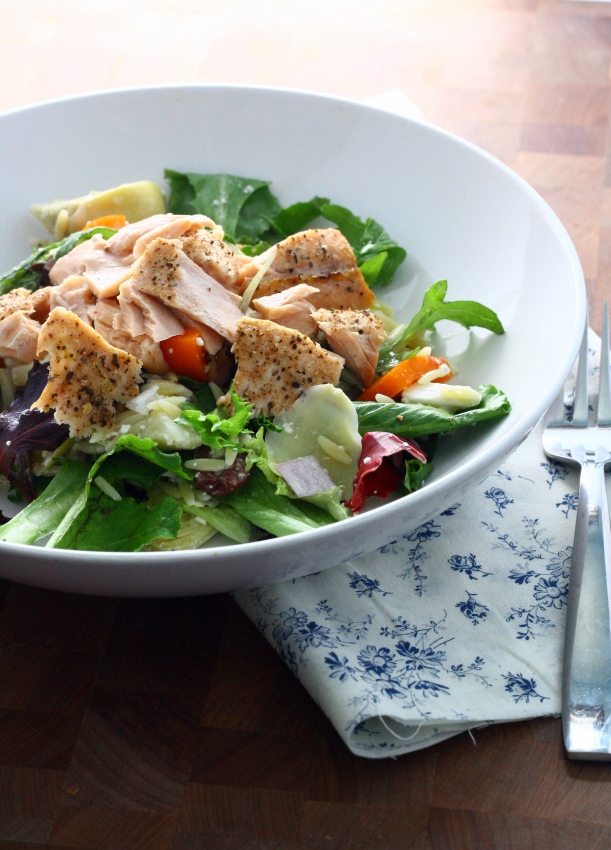
Okay, so I’m a bit of a bad dietitian. I don’t eat fish once a week. Or even once a month, honestly. I can’t really tell you why. I like it, but it just never seems to make it into my menu plan. I almost always have a salmon and tilapia in my freezer, but I very rarely reach for it when I’m putting dinner together. Hmm. Something’s gotta change. To start us off? This delicious salad. This salad isn’t your traditional mostly-lettuce salad. Don’t get me wrong – I love my mostly veggie salads. I eat one for lunch every day during the work week.  But sometimes a basic veg salad just doesn’t hit the spot. But this salad most definitely does. It is chock-full of all sorts of goodies from salmon to artichoke hearts to feta to…  well, everything I love. I made this again a couple weeks later and forgot the feta and it still tasted great. Best of all, it was super easy to put together. From start to finish, it only took about 20 minutes.

Mediterranean Salmon Salad with Artichokes, Feta, and Orzo | doughseedough.net

Mediterranean Salmon Salad
slightly adapted from Weekly Bite via Prevention RD

for the dressing:
1/2 cup olive oil
1/2 cup red wine vinegar
1 1/4 teaspoon dried oregano
1 1/4 teaspoon dried basil
1 1/4 teaspoon garlic powder
1 teaspoon onion powder
1 teaspoon salt
1 teaspoon freshly ground pepper
1 teaspoon Dijon mustard

for the salad:
1 pound salmon filet
1/4 teaspoon salt
1/2 teaspoon freshly ground black pepper
1/4 teaspoon dried oregano
1 cup orzo
1/2 cup kalamata olives, halved
1 bell pepper, chopped (~3/4 cup)
1/2 red onion, chopped (~3/4 cup)
5 ounces feta, crumbled
14 ounce can of artichoke hearts, quartered
2 cups spring salad mix
dressing (see above)

  1. To make the dressing: whisk all ingredients together and set aside. 
  2. To make the salad: Preheat broiler to high. Sprinkle salmon with salt, pepper, and oregano. Place under broiler and cook for 5 minutes, or until center is cooked.
  3. Cook orzo according to package directions. Drain and place into a large bowl. Pour 1/4 cup dressing over pasta and gently toss. Add in olives, bell pepper, red onion, feta, artichoke hearts, and salad mix to orzo and toss to combine.
  4. Flake salmon with two forks and place on top of salad. Serve with additional dressing on the side.


2 Comments

Salt & Pepper Shrimp

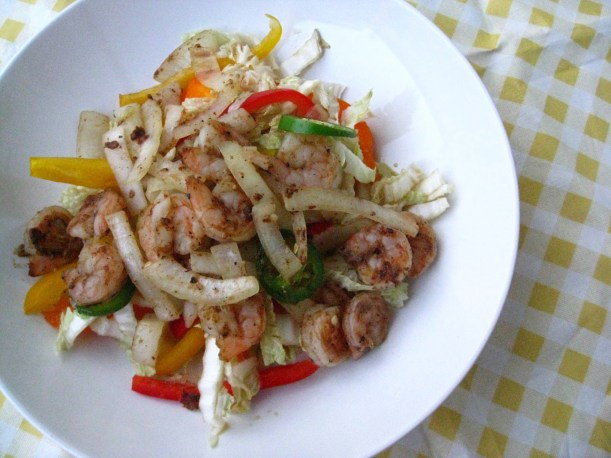
I make a lot of food that I love, but I try not to make repeat dishes. This dish is an exception. I keep shrimp in my freezer for one reason – salt and pepper shrimp that I can whip up in n a half hour. It’s delicious with the cabbage or served with plain steamed rice. I choose the rice-only route when I’m running short on time. I just add some extra bell peppers into the shrimp itself to boost up the veggie count in the dish.

Salt and Pepper Shrimp

1/4 cup lime juice
1 tablespoon reduced-sodium soy sauce
1 tablespoon toasted sesame oil
1 teaspoon sugar
1 small head napa cabbage, thinly sliced
1 red bell pepper, thinly sliced
1 orange bell pepper, thinly sliced
2 tablespoons cornstarch
1/4 teaspoon salt
1/2 teaspoon freshly ground pepper
1/2 teaspoon white pepper
1/2 teaspoon five-spice powder
1 pound raw shrimp, peeled and deveined
1 tablespoon canola oil
1 large onion, sliced
1 jalapeno pepper, thinly sliced
steamed white or brown rice, optional

  1. Whisk lime juice, soy sauce, sesame oil, and sugar in a large bowl until sugar is dissolved. Add cabbage and bell peppers and toss to combine. Refrigerate until ready to serve.
  2. Combine cornstarch, salt, pepper, white pepper, and five spice powder in a medium bowl. Add shrimp and toss to coat.
  3. Heat oil in a large nonstick skillet over medium-high heat. Add onion and cook 3 minutes. Add the shrimp and cook, stirring often, until pink and curled, 3 – 4 minutes.
  4. Add jalapenos and cook until shrimp are cooked through, about 1 more minute.
  5. Serve immediately with the slaw and rice if desired.

recipe adapted from eatingwell.com


3 Comments

Brown Rice California Roll

It’s crazy how fast time flies when you’re running on fumes. I cannot wait for the dietetic internship to be over. Working, homework, and trying to find time to work out and cook is leaving me with very little time to sleep. What has been keeping me so busy? On top of the work we have to do in rotations 8 hours a day, we have additional projects, homework, readings, etc. to keep us busy. I had the great honor to be one of the managers for cooking demos we held in late January and early February.

The interns presented 6 dishes total; I had a blast making this Brown Rice California Roll with a fellow intern for our audiences! It’s so simple and so good that I just couldn’t resist sharing the recipe that we came up with!

Sushi is one of my favorite foods in the world. No lie – I could eat it for every meal, every day and not get sick of it. As much as I love going out for sushi, it can get a little pricey. So while it’s nice to dine out once in a while, it makes a lot more sense to just make it at home! I can’t recall how long I’ve been making sushi. I do remember my mom making rolls for parties growing up, and I’m fairly certain I just picked up the skill from observing her. I still think observation is the best way to learn how to roll sushi, but I had Mike document the process and I hope that these pictures will help!

Brown Rice California Roll
makes 4 rolls 

2 cups brown rice
4 teaspoons low sodium soy sauce
4 tablespoons seasoned rice vinegar
4 sheets nori*
1 kirby cucumber, cut into 1/16 matchsticks
1/2 large carrot, cut into 1/16 matchsticks
1 ripe avocado, thinly sliced
3 sticks imitation crab meat, shredded
1/2 cup + 2 tablespoons fat free mayonnaise, divided
2 tablespoons Sriracha chile sauce
1/4 teaspoon roasted sesame oil

Special Equipment:
Bamboo sushi mat*

  1. Cook rice in rice cooker and medium pot with 4 cups water and 2 teaspoons of the soy sauce.
  2. When rice is cooked, transfer to a flat, non-metal bowl. Sprinkle remaining soy sauce and seasoned rice wine vinegar on top and toss to coat. Cool rice about 15 minutes, tossing occasionally.
  3. Add 2 tablespoon mayo to imitation crab and stir to combine.To roll the sushi:
  4. Set bamboo mat on flat surface with slats running crosswise.
  5. Arrange nori shiny-side down on mat.

  6. Using damp fingers, press 3/4 cup rice onto nori in 1 layer, leaving a 1 3/4″ border on the side of farthest from you.
  7. Arrange 1/4 of the carrots in an even strip horizontally across rice, about 1″ from the side closest to you.
  8. Arrange 1/4 of the cucumber in the manner, just above the carrots.
  9. Arrange 1/4 of the avocado slices just above the cucumber.
  10. Evenly distribute 1/4 of the crab on top of the carrot, cucumber, and avocado.
  11. Beginning with the edge closest to you, lift mat up with thumbs, holding filling in place with your fingers.
  12. Fold the mat over the filling and gently squeeze firmly along the length of the roll, tugging on the edge of the mat farthest from you to tighten.
  13. Continue to roll, by lifting up the mat, rolling the sushi forward, and squeezing. Be careful not to roll the mat into the sushi!
  14. Open mat and roll log forward to seal completely.
  15. Transfer roll, seam side down, to a cutting board. Slice into 9 pieces with a wet serrated knife.
  16. To make the dynamite sauce, mix together 1/2 cup mayo, Sriracha, and sesame oil together in a small bowl.

*You can find these items at an Asian grocery store. Larger grocery stores may carry these as well.


3 Comments

Shrimp Fra Diavolo

This was a week of “firsts” for me.

  • I tried boxing for the first time. Loved it! What a great stress reliever. I thought I was in shape since I work out 6 days a week between running, biking, strength, and Pilates, but I was not prepared for the oh-man-kill-me-now feeling I got during the boxing workout with Mike. Bring on the pain!
  • I did my first speedwork run. I ditched the half marathon training schedule I painstakingly wrote for myself and decided to try the FIRST program instead. I re-wrote my runs and incorporated my data from the McMillan Running Calculator to give me a training plan that spells out my training paces.
  • I drove in snow for the first time this winter. Ok, maybe it wasn’t the first time, but the other snowfalls didn’t count because they didn’t even stick for longer than a day. What’s up with that, WI?
  • I watched my first episode of Dance Moms: Season 2. I love bad TV.
  • My last “first”? I participated in my first recipe swap! Read on for more info about it…

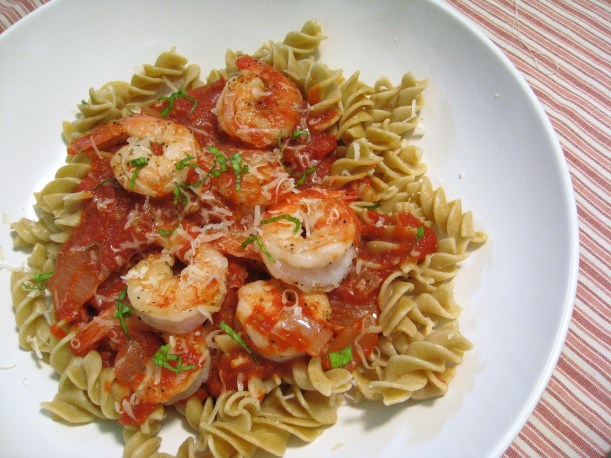
Usually the participants just gets another blogger’s recipe, but they shook it up a little this week: we each got a blog and had the freedom to make whatever we wanted from that blog! I got Fried Ice and Donut Holes and she has so many great recipes to choose from!! I spent over an hour looking at her blog before finally deciding on the dish I wanted to try. The luck recipe? Shrimp fra diavolo! It’s been on my “must cook” list for a while and I figured this was the perfect time to try it.

The dish turned out pretty darn good. Mike loved it; I think it could have been a little (ok, a lot) spicier. But hey, I’m weird and I love major heat in my food. Next time I’ll be crankin’ up the spiciness by adding a few more sprinkles of red pepper flakes to my portion!

Shrimp Fra Diavolo
recipe slightly modified from Fried Ice and Donut Holes

1 pound whole wheat pasta
1 pound large, uncooked shrimp, peeled and deveined
1 tablespoon olive oil
Salt and pepper, to taste
5 garlic cloves, minced
1 medium onion, chopped
1 cup dry white wine
1-28 ounce can crushed tomatoes
2 teaspoons red pepper flakes
1/4 teaspoon dried oregano
Fresh basil, for garnish
Grated Parmesan cheese, for garnish

  1. Cook pasta according to package directions.
  2. Meanwhile, heat olive on in a large skillet over medium heat.
  3. Season shrimp with  salt and pepper. Add to skillet and saute for 1 minute. Turn shrimp and saute the other side until shrimp are cooked through and no longer translucent. Transfer shrimp to a separate plate.
  4. Add onions to pan and saute until translucent, about 5 minutes. Add garlic and saute for an additional minute. Add wine to pan to deglaze and allow to simmer for 1 minute.
  5. Add tomatoes, red pepper, and oregano. Reduce heat to medium-low and let sauce simmer for 10 – 15 minutes, until reduced to your desired consistency.
  6. Return shrimp to sauce and stir to coat.
  7. Toss cooked pasta with sauce and shrimp. Garnish with basil and Parmesan cheese, if desired.


12 Comments

Pad Thai

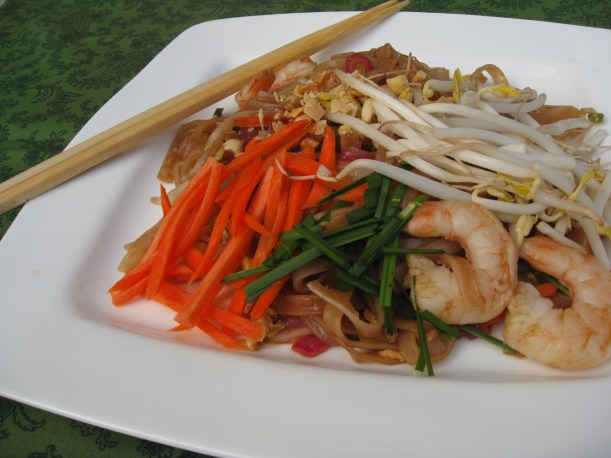
It’s just like take-out. But better. I seriously can’t get enough of this stuff. I never bothered making it at home because I thought Mike hated it. Boy, was I wrong. I’m not sure why I ever thought that, but I tentatively brought up making Pad Thai for dinner and he enthusiastically agreed to it. I was thrilled. And disappointed that I hadn’t brought this up sooner. Like, 4 years sooner.

I purchased a large portion of these ingredients at the local Asian grocery store. I was able to find the tamarind concentrate, palm sugar, fish sauce, rice stick noodles, cilantro and mung bean sprouts there. I love the Asian grocery store because everything is so dang cheap. I can buy bean sprouts at the normal store for $2 or pay $1 at the Asian store for 3 times as much.

I opted to use shrimp for this, but I think I’m going to try chicken or tofu next time. Feel free to use whatever protein you want!!

The best part (other than the leftovers, that is)… I was able to cross of the first dish on my 11 for ’11 list!!

Pad Thai
serves 4

For the sauce:
1/3 cup fish sauce
1/2 cup palm sugar
1/2 cup tamarind juice concentrate
4 cloves garlic, minced

For the noodles:
14 ounces dried rice stick noodles
3 tablespoons vegetable oil
4 cloves garlic, minced
1 cup red onion, thinly sliced
2 cups shrimp
2 eggs
2 cups carrots, match stick
1 cup green onion cut into 1/2 inch pieces
2 cups mung bean sprouts
1 cup dry roasted peanuts, chopped
1 cup cilantro, optional
1 lime, cut into 4 wedges, optional

  1. Combine sauce ingredients in small saucepan over medium high heat. Cook until sugar has dissolved. Taste, and add more sugar if you would like. Remove from heat and set aside.
  2. Boil noodles 5 minutes, or until al dente. Drain and immediately run around cold water. Cut noodles in half with scissors.
  3. Heat 1 tablespoons oil in wok or large pan and cook shrimp. Remove to small bowl.
  4. Heat 1 tablespoon oil to pan and scramble eggs. Remove to small bowl.
  5. Heat remaining  oil and add garlic and onion to pan. Stir fry for 1 minute, stirring constantly. Add noodles and cook for an additional minute. Add 5 tablespoons Pad Thai sauce, stirring mixture until noodles are well coated.
  6. Add shrimp to pan and cook for 2 minutes. Add egg and 3/4 of the following: carrots, green onion, and sprouts to pan and cook for an additional 2 minutes.
  7. Taste noodles and add more sauce, if desired. Cook until all additional sauce has been absorbed.
  8. Remove from heat and plate. Garnish with remaining carrots, green onion, and sprouts. Sprinkle with chopped peanuts and garnish with lime wedge and cilantro, if desired.
Recipe adapted from savory sweet life.