DoughSeeDough

a balanced plate with room for dessert


1 Comment

Sweet Potato Shepherd’s Pie

sweet potato shepherd's pie

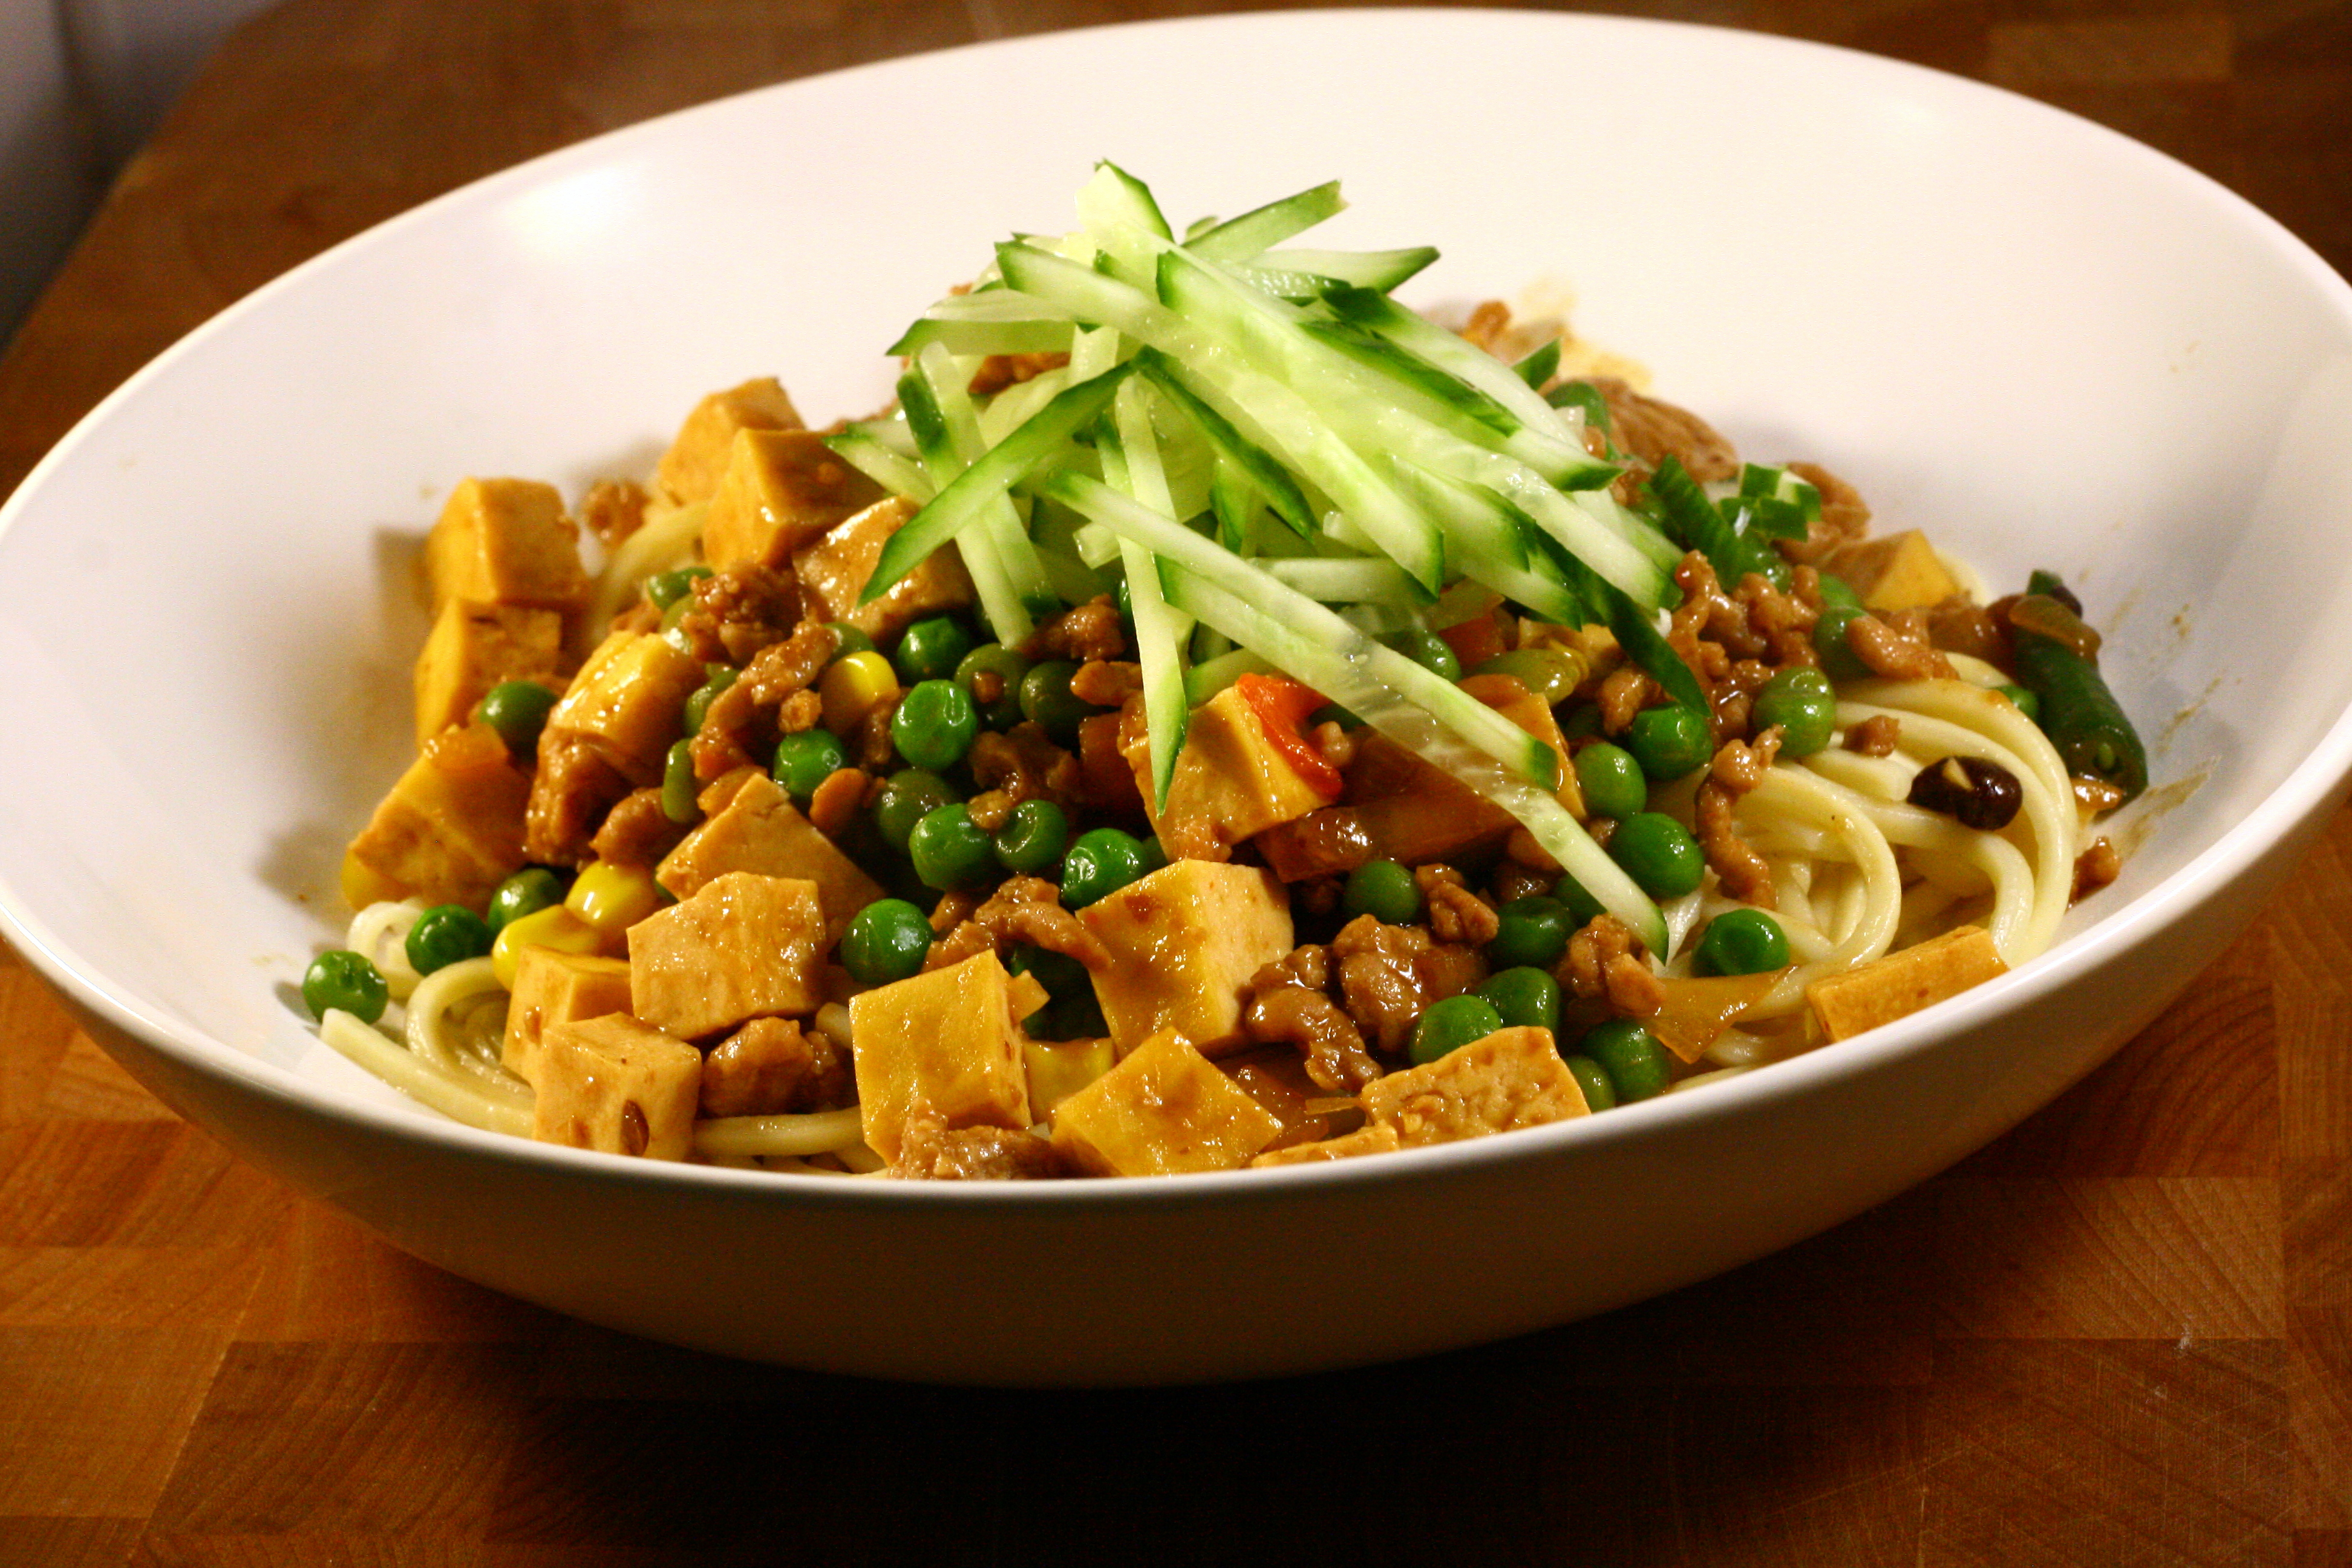
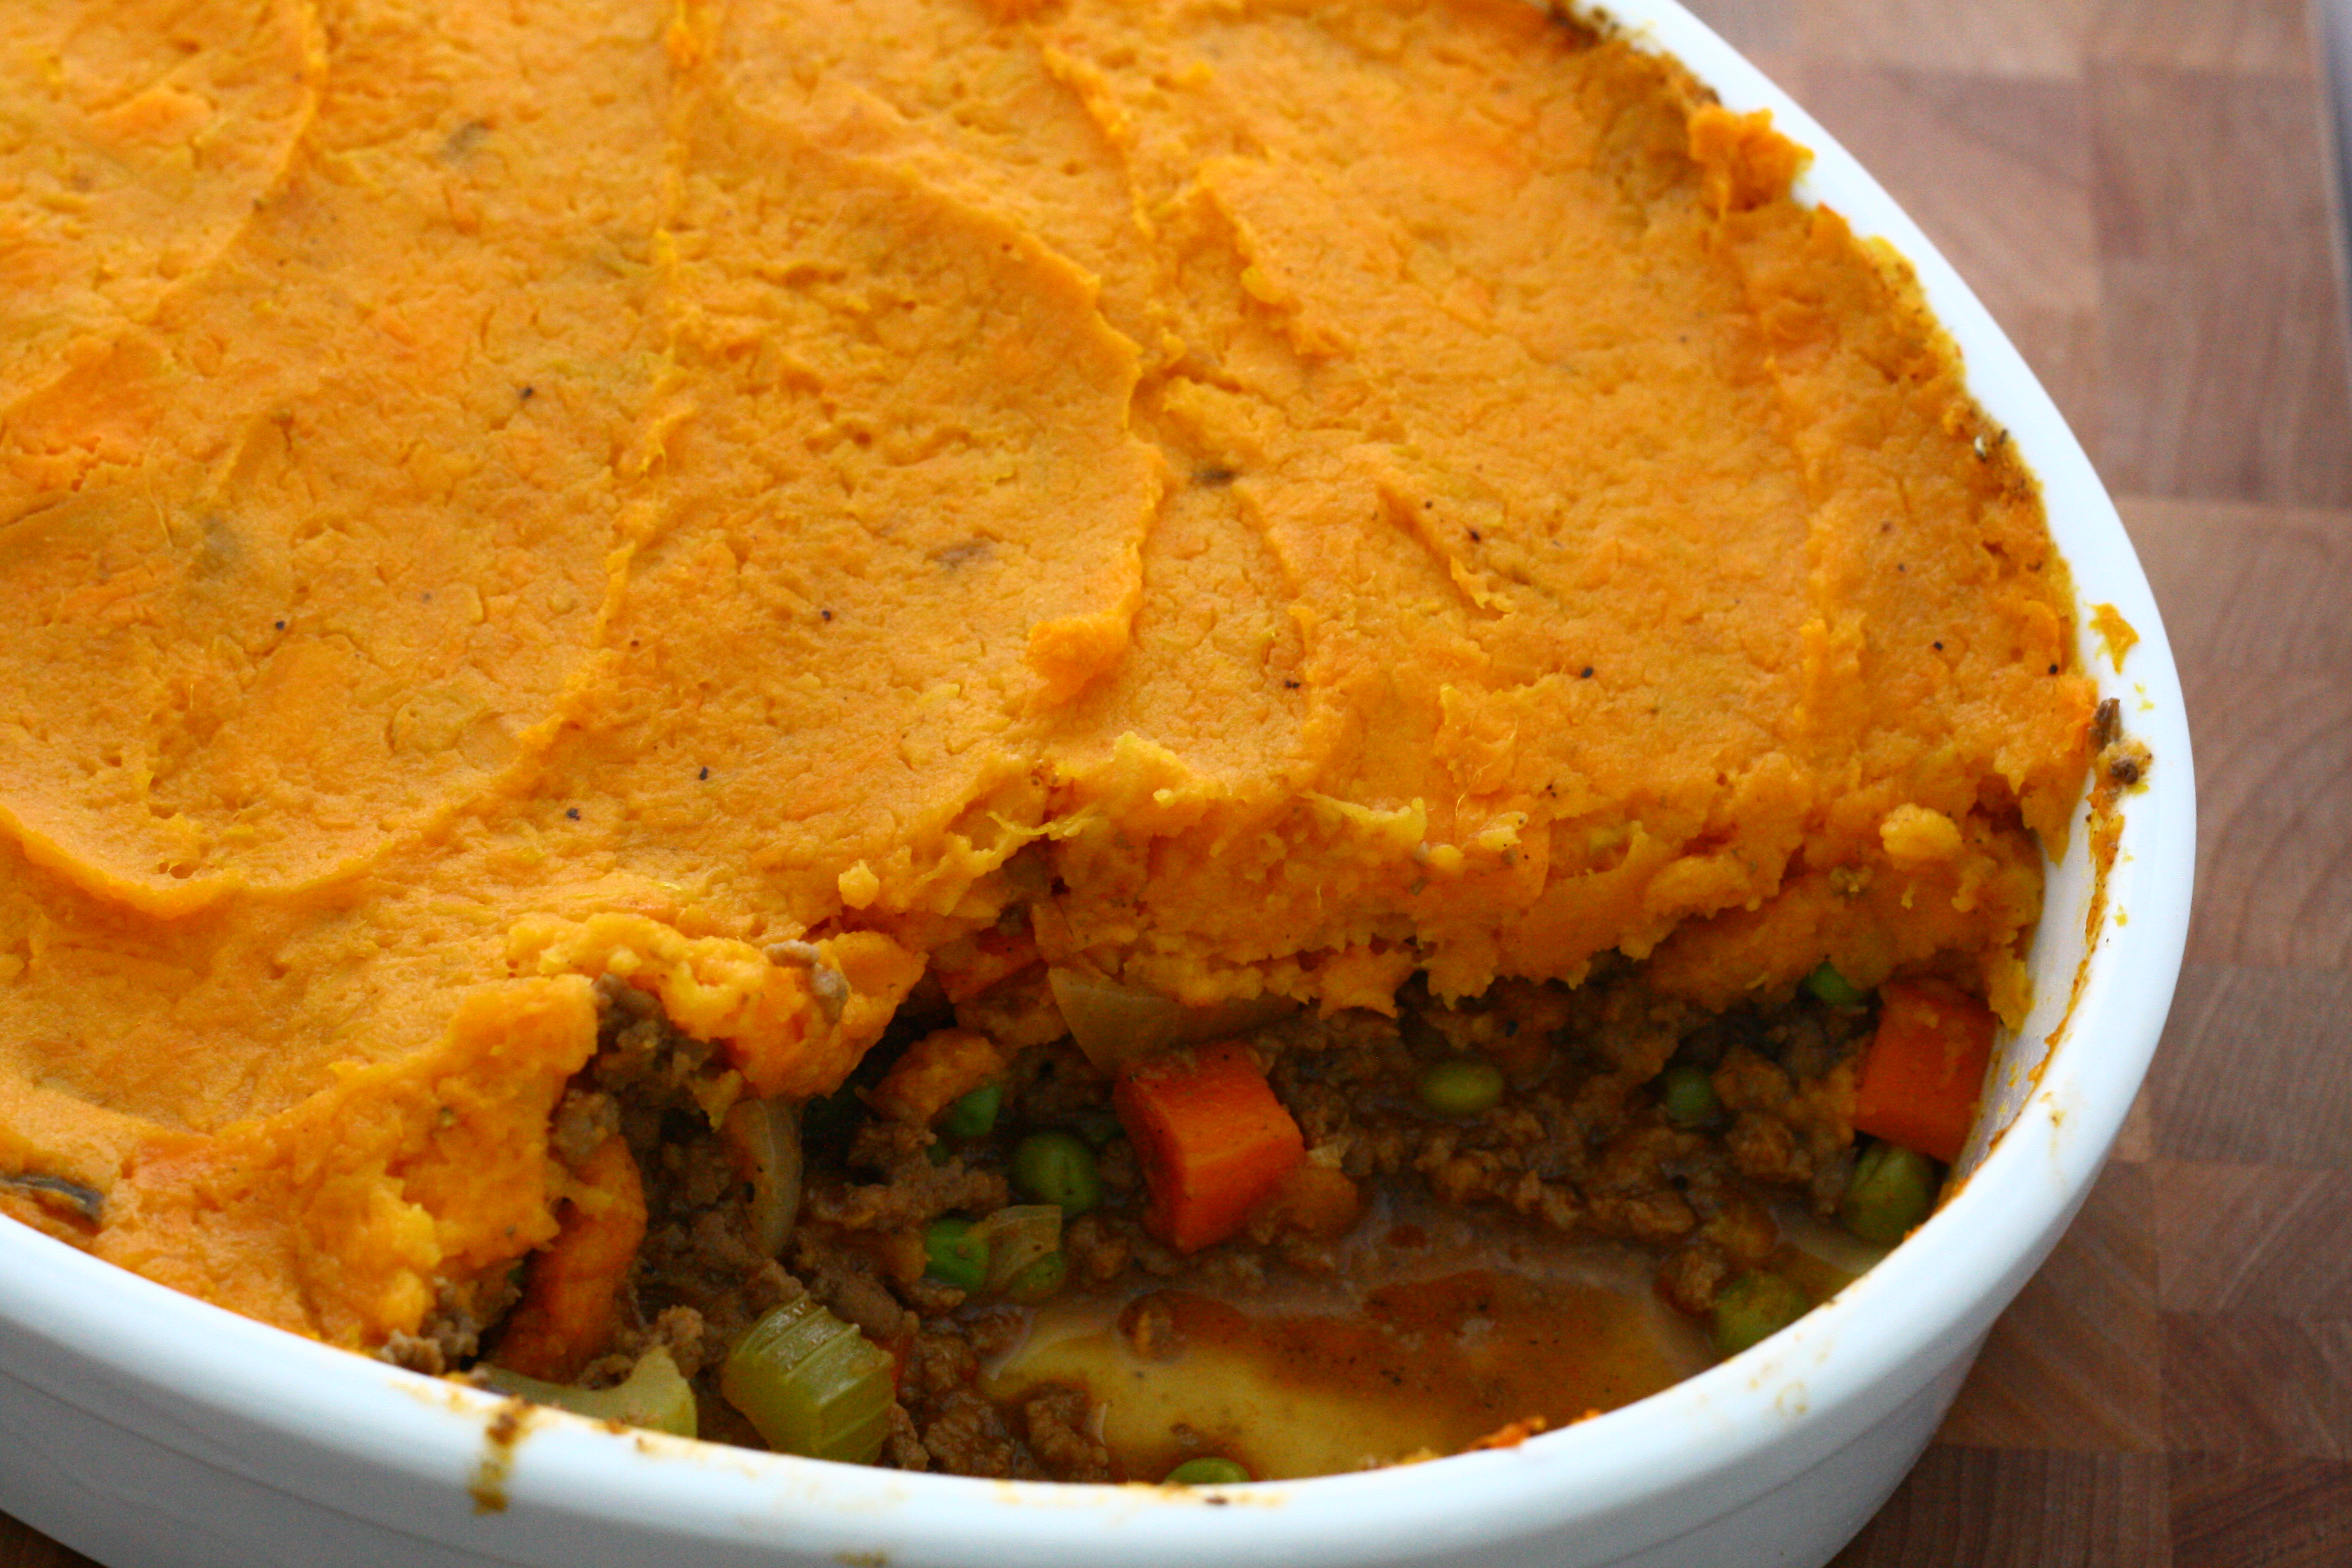
Shepherd’s pie is one of my favorite foods. Sweet potatoes? Not so much. I like the color, but that’s pretty much it. I do, however, love regular ol’ mashed potatoes chock full of butter, salt, and pepper. As much as I love indulging, not every meal can be an indulgence. There’s only so much exercise I can fit into a day after all!

So I took the classic shepherd’s pie recipe and trimmed it down to something a bit lighter, yet every bit as fulfilling. And surprisingly, I actually liked the sweet potatoes on top! So, give this dish a try for St. Paddy’s Day instead of the traditional shepherd’s pie!

sweet potato shepherd's pie

Sweet Potato Shepherd’s Pie
inspired by Alton Brown’s recipe on Food Network

3 pounds sweet potatoes
1 tablespoon unsalted butter
1/2 teaspoon salt
1/2 teaspoon freshly ground pepper
1/4 cup skim milk

2 pounds lean ground beef
1 medium onion, diced
2 carrots, diced
2 celery ribs, diced
1 clove garlic, minced
2 tablespoons flour
2 tablespoons tomato paste
2 cups low-sodium beef broth
1 teaspoon Worcestershire sauce
1 cup frozen peas
1/2 teaspoon dried rosemary
3/4 teaspoon dried thyme
salt and pepper, to taste

  1. Preheat oven to 375°F.
  2. Peel and cut sweet potatoes into 1/2-inch pieces and place into a large pot. Cover with 1 inch of water and bring to a boil. Reduce to a simmer and cook for 10 minutes, or until fork-tender. Drain and return to pot. Add in butter, salt, pepper and milk and mash until smooth.
  3. Meanwhile, heat a large skillet over medium-high heat. Add in ground beef and cook until no longer pink. Remove to a separate bowl and set aside. To the same skillet, add in onion, carrots, celery, and garlic. Cook until onions are translucent, about 3 minutes. Stir in flour until well distributed. Stir in tomato paste, broth, and Worcestershire sauce. Add beef back to skillet. Bring to a simmer and cook until slightly thickened, about 10 minutes. Stir in peas, rosemary, thyme, salt and pepper. Continue cooking for another 3 minutes.
  4. Spread beef and vegetable mixture into an 13×9 casserole dish. Top with mashed sweet potatoes. Spread potatoes out to edge of dish with a spatula. Bake in preheated oven for 30 minutes, or until potatoes are lightly browned and filling is bubbling.
  5. Let rest for 5 minutes before serving.


5 Comments

Chicken Pot Pie Soup

I love pie crust.

Love it.

LOVE IT.

I don’t even like pie that much, but I will take a slice of it just to eat the crust. Then I’ll mash the rest of it around on my plate to make it seem like I ate it. Or I’ll shovel it onto my husband’s plate (while at the same time stealing his crust).

I’m that crazy person that will sit and stare at your piece of pie and then creepily ask if I can eat your crust.

Needless to say, this is my kind of soup. It’s filling and creamy and flavorful and… Real talk though. This dish is mainly about the crust. This soup is what makes it acceptable for me to eat massive amounts of pie crust for dinner. As an added bonus, this was super easy to whip together and it made for a ton of leftovers. Leftover soup that is. There will be no leftover crust. Oops.

chicken pot pie soup

Chicken Pot Pie Soup

for the crust:
2 cups all purpose flour
2/3 cup shortening
1 teaspoon salt
1/3 cup skim milk

for the soup:
2 teaspoons olive oil, divided
2 chicken breasts, cooked and diced
2 medium potatoes, peeled and diced (2 cups)
3 celery stalks, diced (1 cup)
2 medium carrots, peeled and diced (1 cup)
1 medium onion, diced (3/4 cup)
1/2 cup all purpose flour
5 cups chicken broth
2 ears of corn, kernels removed or 1 1/2 cups frozen corn
1 1/2 cups frozen peas
salt and pepper, to taste

  1. To make the crust: in a large bowl, stir together flour and salt. Cut in shortenings until well blended and mixture is crumbly. Gently stir in milk with a fork; mix until just combined. Pat dough into a disk and wrap in plastic wrap. Refrigerate for 45 minutes.
  2. Preheat oven to 425°F. Roll dough out on a well-floured surface to 1/8″ thick. Cut into 15 3″ circles with a biscuit or cookie cutter. Lay dough on ungreased baking sheet and bake for 12 – 15 minutes, or until lightly browned on top. Set aside.
  3. To make the soup: heat 1 teaspoon olive oil in a large dutch oven over medium high heat. Add in potatoes, celery, carrots, and onion and cook until onions are soft and translucent.
  4. Stir in flour to coat vegetables well. Slowly stir in chicken broth 1 cup at a time. Bring soup to a boil and reduce heat to a simmer. Simmer until soup thickens and add in corn and peas. Stir and cook until peas are heated through.
  5. Serve soup hot with pie crust.

recipe adapted from Food Network

P.S. Be a crust monster like me a bake up the extra scraps left over from when you’re cutting out the pretty circles. They’re just as tasty 😉

pot pie soup with crust


14 Comments

Vegetarian Potstickers

201

I have a notoriously bad memory. I can’t remember much of my childhood. I can’t recall the names of any of my teachers from elementary through high school, and college professors are getting a little spotty. Yikes. The few memories I do have, I cherish.

One of these memories is of my mom, sister, and me sitting around a kitchen table, folding potstickers. We each had a small pile of wrappers in front of us, small bowls of water, and a communal bowl of potsticker filling in the middle of the table. Baking sheets dusted with flour sat on the table lined with folded dumplings. My mom used chopsticks to scoop the filling from the bowl into her wrapper. My sister and I used spoons.

This time, I stood at the counter alone and folded roughly 100 potstickers filled with tofu, not pork. Mike came in towards the end and helped me. I have to admit, I much prefer the company of my mom and sister to the company of Netflix on my iPad.

So, grab yourself a potsticker buddy or two and get cooking! Or, if you choose to make this alone, choose something better than Toddlers & Tiaras as background noise 😉

If this is your first time making potstickers, don’t be intimidated. It’s actually quite simple. It’s easy as 1, 2, 3… kind of. And don’t forget – practice makes perfect.

potstickers

1) take a wrapper  2) 1 tablespoon filling  3) wet edges with water
4) pinch at top 5) pleat down right side  6) pleat down left side

cooking potstickers

7) arrange potstickers on baking sheet  8) fry in pan – don’t overcrowd
9) cook until brown on the bottom  10) add water & steam to finish cooking

Fair warning – this recipe makes an insane amount of potstickers – over 100 for me. I cooked 1/3 of them and froze the rest to fry up for a quick meal later. To freeze, I simply stuck the baking pan of potstickers into the freezer. Once frozen, I placed them in a freezer bag.

potstickers

Vegetarian Potstickers

10 ounces firm tofu, drained
1/2 medium onion
1″ piece of ginger, peeled
3 cloves garlic
2 cups shiitake mushrooms, stems removed
1 carrot
1 stalk celery
2 cups cabbage, finely shredded
1 cup bean sprouts, chopped
3 teaspoons sesame oil
4 tablespoons soy sauce
freshly ground pepper and salt, to taste
2 packages gyoza/potsticker wrappers

For dipping sauce:
2 tablespoons soy sauce
2 tablespoons rice vinegar
1 clove garlic, minced
1 small red chili pepper, thinly sliced (optional)

  1. Crumble tofu with your hands until it resembles ground meat. Place in a strainer and set aside. 
  2. In the bowl of a food processor, combine onion, ginger  garlic, mushrooms, carrot, and celery. Pulse until ingredients are roughly chopped. Place mixture into a large bowl. Mix in cabbage, bean sprouts, and tofu. Sprinkle mixture with sesame oil, soy sauce, pepper, and salt and mix well to combine.
  3. Set up your station: bowl of filling, stack of potsticker wrapper, a small bowl filled with water, and a large baking sheet.
  4. To fold: place wrapper in your non-dominant hand. Scoop about 1 tablespoon of filling into the center of the wrapper. Wet a finger on your dominant hand and lightly trace the outside of the wrapper. Fold wrapper in half to form a half circle and pinch at the top. Starting at the center, make 3 pleats down toward the bottom-right corner. Repeat on the left side. Continue with the remaining filling and wrappers.
  5. To cook: heat a large, lidded saute pan over high heat. Add in 1 teaspoon oil and swirl pan to coat. Add pot stickers, pleat-side up, being careful not to overcrowd. Cook until bottoms are browned, about 5 minutes. Add in 1/2 cup water and immediately cover the pan to contain the splatter. After 30 seconds, when splattering has subsided, slightly crack the lid open to allow steam to escape. Cook for an additional 5 minutes or until heated through and water has evaporated. Let cook for an additional 1 – 2 minutes to allow bottom to re-crisp. Serve immediately with dipping sauce.
  6. To make dipping sauce: combine soy sauce, vinegar, garlic, and chili pepper in a small bowl. Stir to combine.


6 Comments

Chicken Curry Rice Noodle Soup (Kow Boon)

We were blessed with the opening of Basil Cafe a little over a year ago. This place is one of my favorite restaurants in the Fox Cities; I haven’t eaten a bad thing there yet. Mike and I went here for Valentine’s Day last year and went there again this year. I tried something new this time – Kow Boon, a noodle soup with a coconut broth and a perfect amount of spice. I got the large (duh) and had leftovers for dinner the next day and breakfast the day after that (don’t judge).

It was so good that I wanted more. But, I realized that 3 visits to the same restaurant in 2 weeks was a little embarrassing, so I decided to try to make it at home. After all, what would I do if this place closed down? Or if we moved? What if I never got to eat this again? 

I labored over this recipe, tweaking ingredients over and over and over to try to match the flavors of Basil Cafe’s dish. All I had to go by was their menu description – “traditional Lao vermicelli rice noodles in a slightly spicy chicken coconut curry soup topped with bamboo shoots, fresh bean sprouts, mint, and cilantro” and the faint memory of how it had tasted. Hours later, I ended up with a huge pot of this delicious soup. Perfect. I will have breakfast, lunch, and dinner set for days. Now, I’m not claiming that this is as good as Basil Cafe’s soup, but it definitely hit the spot.

Chicken Curry Rice Noodle Soup (Kow Boon) | doughseedough.net

Chicken Curry Rice Noodle Soup // Kow Boon

1/2 pound of rice vermicelli noodles
2 chicken leg quarters, skin removed and fat trimmed
1″ piece of ginger, chopped into 3 pieces
1 stalk lemongrass, bruised
1 teaspoon salt
1 tablespoon freshly ground pepper
4 cups water

1 tablespoon canola oil
1 medium onion, thinly sliced
2 cloves garlic, minced
2 tablespoons red curry paste
2 tablespoons fish sauce
19 ounce can of bamboo shoots, sliced into strips
14 ounce can coconut milk

For garnish:
2 cups bean sprouts
1 lime, cut into wedges
1 bunch green onions, sliced
Cilantro

  1. Cook noodles in a large pot according to package directions. Drain and rinse under cold water. Set aside.
  2. In a large pot, combine chicken, ginger, salt, pepper, and water. Bring to a boil and cook until chicken is cook through. Remove chicken and strain out solids, reserving the soup base. Return soup to the pot and keep warm over medium-low heat. 
  3. When chicken is cool enough to handle, remove meat from bones, shred, and set aside.
  4. In a medium pan, heat oil over medium heat. Add in onions and garlic and saute until onions are lightly browned. Stir in curry paste and fish sauce and mix until well blended. Add curry to soup base and stir in bamboo strips and coconut milk. Bring to a simmer before assembling bowls.
  5. To assemble: place a “nest” of noodles on the bottom of the bowl. Ladle in soup and bamboo shoots. Top with bean sprouts, chicken, lime wedge and cilantro. Serve immediately.

kow boon


4 Comments

Butternut Squash Gnocchi

One of my favorite stress-relievers is reading cookbooks, cooking magazines and trolling the internet for recipes. Well one day I stumbled upon this recipe for sweet potato gnocchi on the Food Network website. It was perfect. I had sage I needed to use up! I scribbled out a grocery list and was about to head out the door when it struck me – butternut squash gnocchi. Why was I buying sweet potatoes when I could sub it with something else?

I’ve had this butternut squash sitting on my kitchen counter for months. I’m fairly certain it came from one of our last CSA boxes in… October? Yikes. Good news is that it’s stayed nice and healthy and squash-like. I wish all produce lasted this long!

So, that’s how this butternut squash gnocchi came to fruition. This was a fun weekend project for me. The process of making the dough and then cutting and shaping the gnocchi was strangely therapeutic.

Gnocchi

I decided to make it with two browned butter sauces. I wish I could tell you that one browned butter is better than the other, but they are both delicious. Do yourself a favor and make both! And of course, Happy Valentine’s Day! I hope you all have a chance to spend some time with those that you love.

gnocchi with sage browned butter

Butternut Squash Gnocchi

1 medium butternut squash, 2 – 3 pounds
salt and pepper
olive oil
2 1/4 cups all purpose flour
1 egg, whisked

  1. Preheat oven to 400°F. 
  2. Cut squash in half lengthwise and scoop out seeds. Place squash on baking sheet face up. Lightly coat with olive oil and season with salt and pepper. Bake for 90 minutes, or until squash is fork tender and lightly caramelized.
  3. Let cool slightly before scooping out flesh into food processor. Blend until smooth.
  4. Place pureed squash in a medium pot over medium-low heat and cook for about 30 minutes to cook off excess moisture. Move to a large bowl and put in fridge to cool completely.
  5. Once cook, combine 2 cups of squash puree with 1 teaspoon of salt and egg. Stir in flour 1/2 cup at a time, until dough pulls away from the side of the bowl.
  6. Move dough to a floured surface and knead until smooth and elastic. Divide dough into 6 sections. Roll each section into a long rope about 3/4″ in diameter. Cut into 1″ sections. Gently roll gnocchi with the back of a fork along the tines. Repeat with remaining dough.
  7. Bring a large pot of salted water to a boil. In small batches, cook gnocchi until it floats to the top of the water and is tender, about 6- 8 minutes. (Gnocchi may float to the top before fully cooked)
  8. Toss cooked gnocchi in browned butter sauce, recipes below, and serve immediately.

Cinnamon Maple Sage Browned Butter

1 stick unsalted butter
20 sage leaves
1 teaspoon cinnamon
2 tablespoon maple syrup
1/2 teaspoon salt
1/4 teaspoon freshly ground pepper

  1. Melt butter in a medium pan over medium heat and cook until milk solids have browned, about 5 minutes. Add sage leaves and cook for about a minute, stirring occasionally. Remove from heat and stir in remaining ingredients. Toss with gnocchi and serve immediately. 

Sage Browned Butter

1 stick unsalted butter
20 sage leaves
1/4 cup low sodium chicken broth
salt and freshly ground pepper, to taste

  1. Melt butter in medium pan over medium heat until milk solids have browned, about 5 minutes. Add sage and broth and reduce heat to medium-low. Cook until slightly reduced, about 3 minutes. Season with salt and pepper. Toss with gnocchi and serve immediately. 


2 Comments

Zha Jiang Mien

I’m not really sure what happened. I grew up living, breathing, speaking, and eating Chinese. Now here I am at 25, barely able to string together a sentence in Mandarin. My Chinese cooking is even more pathetic. I’ve tried countless times to watch and learn from my mom. The Wonder Woman who can throw together 6 dishes with ease, and in under an hour, too. It’s impressive (and kind of scary).

Unfortunately for me, she seems to invent most of her recipes or just has them stored in the depths of her brain. I tried to recreate a dish that I grew up with, zha jian mien, a sort of Chinese bolognese. This is my take on the classic Chinese dish. I’m not sure it even tastes close to what it’s supposed to, but Mike and I enjoyed it very much!

zha jiang mien

Zha Jiang Mein (Chinese Bolognese)

1 pound Chinese noodles (I used Shan Dong noodles)
1 pound ground pork
1 large yellow onion, chopped
3 cloves garlic, minced
1/2 cup hoisin sauce
2 tablespoons soy sauce
1 tablespoon hot soybean paste
2 tablespoons black bean sauce
1 pound extra firm or baked tofu, cubed
1 cup frozen peas
1 medium seedless cucumber, julienned
Black vinegar or rice wine vinegar, optional

  1. Cook pasta according to package directions. 
  2. While pasta is cooking, heat a large pan over medium-high heat. Add pork and cook for 3 – 5 minutes, stirring occasionally. Add in onions and garlic and cook until onions are translucent and pork is cooked through.
  3. Reduce heat to medium and add in hoisin sauce, soy sauce, black bean sauce, and soybean paste. Stir until well combined.
  4. Gently mix in tofu and frozen peas. Cook until heated through, stirring frequently.
  5. Portion out 1 1/2 cups of noodles into bowls and top with 1/2 cup of meat sauce. Garnish with cucumber and a splash of vinegar, if desired.


4 Comments

Grilled Veggie Kabobs with Lime Chimichurri

Mike and I were hustlin’ to use up all the produce we had in our fridge before we left. These veggie kabobs were absolutely perfect for the occasion! The added bonus was that we were able to finally use the grill! With our weird work hours, we can go days without eat dinner together. Mike and his grilling puppy, Ripley, set to work:

The kabobs gettin’ their grill on

Ripley the Grill Dog watching intently.

We ended up with a ton of leftovers. I munched on those over the next day over some steamed rice without the chimichurri. The original recipe called for 6 cloves of garlic in the sauce. I only used 4, and the garlic taste was still pretty strong. Next time, I’ll probably use 2 cloves or just skip the sauce altogether and just drizzle the kabobs with plain lime juice.


Grilled Veggie Kabobs with Lime Chimichurri

for the kabobs:
3 patty pan squash, halved and sliced into 1/2-inch pieces
2 red onions, quartered
2 bell peppers, cut in 2-inch pieces
1 pound cremini mushrooms, halved if large
1/2 tablespoon chipotle chili powder
salt and pepper, to taste

for thechimichurri:
4 garlic cloves
3 dried bay leaves
6 teaspoons lime juice
1 fresh poblano pepper, chopped
2 fresh serrano chilis, chopped
1 teaspoon sea salt
1/3 cup Italian flat-leaf parsley
1/4 cup oregano
1/2 cup basil
1/3 cup olive oi

  1. Combine veggies in a large dish. Sprinkle with chili powder, salt, and pepper and toss to coat evenly. Let sit for 30 minutes.
  2. Meanwhile, make chimichurri. Combine all ingredients except for olive oil in a food processor. Blend until smooth. Slowly add in olive oil until well combined.
  3. Thread vegetables onto skewers* leaving a little space between each item. Grill over medium heat until slightly charred on all sides. Serve immediately with sauce.
*Use metal or bamboo skewers. If using bamboo ones, don’t forget to soak them in water for a good 30 minutes or so!

recipe adapted from Runner’s World


2 Comments

Chicken Salad with Honey Mustard Dressing

This was a super easy dish! I was excited to be able to use up some more goodies from our CSA box (lettuce and cucumbers this time). I’m a big fan of easy, no-fuss dishes in the summer. What made this dish even better is that I had every single ingredient in my kitchen already! I love it when I don’t need to make a trip to the store to make a dish 🙂

I was impressed with how long the lettuce from our CSA lasted. They sent it to us with roots (and a little dirt) still attached and wrapped in some plastic wrap. It didn’t look wilty or sad when I finally got around to using it a week and a half later. I wish all lettuce looked this good after such a long time!

PS – Mike and I are en-route to Myrtle Beach today! I’m so excited for a week of sun and relaxation. There are some new recipes scheduled to be posted during the week I’m gone. Hope you all enjoy 🙂

Chicken Salad with Honey Mustard Dressing

1 head lettuce or salad greens of choice
2 limes, juiced
2 tablespoons mayonnaise
2 teaspoons honey
2 teaspoons mustard
1/2 teaspoon salt
1/2 teaspoon freshly ground black pepper
1/4 cup olive oil
2 cups diced cooked chicken
1 cucumber, seeded and diced
1 red bell pepper, diced
1/4 red onion, minced
1 large mango, diced

  1. In a small bowl, whisk together lime juice, mayonnaise, honey, mustard, salt and pepper. Slowly add in oil, whisking constantly.
  2. In a large bowl, toss chicken, cucumber, bell pepper, onion, and mango with the dressing.
  3. Place greens on plates and top with chicken salad. Serve immediately.

*adapted from Food and Wine


2 Comments

Eggplant Parmesan

I had said yesterday that I’ve only made one meal in the last week. I now have to admit that the only reason I made this was because I had signed up for a vegetarian recipe swap and the reveal is today. If it weren’t for this, I probably would’ve survived on random junk in my fridge and Sour Patch Kids. So, thank goodness for this tasty meal because it fed us for a really long time!

The recipe I was assigned was Eggplant Parmesan from Tasty Treats by Tina. The last time I had made eggplant parm was just over 3 years ago. Holy smokes! I love how Tina’s version is unbreaded. It cuts down on the prep and I think that her recipe is to die for!

Eggplant Parmesan
recipe very slightly adapted from Tasty Treats by Tina

1 large eggplant, cut into 1/2 inch slices
1 1/2 tablespoons salt
4 tablespoons olive oil
8 ounces fat free ricotta cheese
6 ounces mozzarella cheese, shredded
4 ounces Parmesan cheese, grated
1 egg, beaten
1/2 cup basil, chopped
4 cups tomato sauce (recipe follows)

  1.  Sprinkle both sides of the eggplant slices with salt. Place slices in a colander, and place a dish underneath the colander to capture liquid that will sweat out of the eggplant. Allow to sit for 30 minutes – 1 hour.
  2. Preheat oven to 350ºF.
  3. In a medium bowl, mix the ricotta, mozzarella, and 1/4 cup Parmesan. Mix in egg and basil.
  4. Rinse the eggplant in cold water until all salt is removed. In a large skillet, heat 2 tablespoons olive oil over medium heat. Place one layer of eggplant in the pan, brown each side. Repeat with remaining eggplant slices, using additional oil if necessary.
  5. In a 9×13 inch baking dish, evenly spread 1 1/2 cups of pasta sauce. Arrange a single layer of eggplant slices on top of the sauce. Top the eggplant with 1/2 of the cheese mixture. Repeat layering process until all the eggplant and cheese mixture is used. Pour remaining sauce on top of layers, and sprinkle with remaining Parmesan cheese.
  6. Bake 30 to 45 minutes in the preheated oven, until sauce is bubbly.

Basic Tomato Sauce

1 tablespoon olive oil
1 garlic clove, minced
1/2 medium onion, diced
4-8 ounce cans low sodium tomato sauce
1/2 teaspoon dried oregano
1/2 teaspoon dried rosemary
1/2 teaspoon dried cilantro
1/2 teaspoon dried thyme

  1. In a medium saucepan, heat  olive oil over medium heat. Add the garlic and onion and cook until until is translucent.
  2. Add tomato sauce and seasonings and bring to a boil, stirring often.
  3. Lower heat and simmer for 15 minutes.


2 Comments

Spicy Chicken with Kale

I had previously said that I don’t really like kale. I would like to take back that statement. It turns out that I just didn’t like whatever dish I had made with kale. I really really like this chicken and kale dish!

I ended up throwing this together after I spent a good 5 minutes staring at our (empty) fridge. I pulled out a few things that we did have (chicken, scapes, and kale for starters) and got cookin’!

Spicy Chicken with Kale

1 tablespoon low sodium soy sauce
1 tablespoon Shao Hsing rice wine
1/4 cup low sodium chicken broth
1 teaspoon cornstarch
salt and pepper, to taste
1 pound boneless, skinless chicken breast, cut into 1/2 – 3/4 inch pieces
2 teaspoons olive oil
5 garlic scapes, chopped
1 jalapeno pepper, thinly sliced
1 bunch kale, stemmed and washed
2 teaspoons sesame oil

  1. In a small bowl, combine soy sauce, rice wine, chicken broth, cornstarch, salt and pepper.
  2. Heat olive oil in a large skillet over high heat. Cook chicken until no longer pink in the middle and juices run clear.
  3. Add in garlic scapes and jalapeno and cook for 1 – 2 minutes, stirring constantly.
  4. Add in kale and cover, stirring occasionally for an additional 3 – 5 minutes, or until kale is cooked.
  5. Add the soy sauce mixture and sesame oil and stir fry for one more minute.
  6. Remove from heat and serve immediately with steamed rice.