This simple salad is packed full of flavor and makes the perfect accompaniment to pretty much any summer dish. If you’re ever asked to bring a salad or side dish for a potluck, throw this together… I’m 99% sure that no one else will show up with the same dish as you 😉
I’ll tell you a little secret though – this dish is also perfect alone as a main. I meant to grill some chicken to go with it, but sometimes I just run out of gas at the end of the day. This was one of those days. So we each had nice, large bowls of this instead. Perfect 🙂
Easy Quinoa with Roasted Mini Bell Peppers
4 cups low sodium chicken or vegetable broth
2 cups quinoa
3 cloves garlic, minced
1/4 cup garlic olive oil, divided
1 package mini bell peppers
salt and freshly ground pepper, to taste
4 ounces feta cheese, crumbled
2 tablespoons flat leaf parsley, chopped
Bring chicken broth to a boil in a large pot over high heat. Add in quinoa and garlic. Reduce heat to medium-low and cover pot. Simmer until chicken broth is absorbed, about 20 minutes.
Heat 1 tablespoon of olive oil in a skillet over medium-high heat. Place peppers in skillet in a single layer and cook until blistered on all sides. Set aside in a large bowl.
Add quinoa to bowl along with remaining olive oil, salt and pepper. Toss to combine. Top dish with feta and parsley and serve.
Coq au Vin has been on my must-cook list for years. Yes, years. I’m not sure why I never got around to making it, but I was pretty excited when I received this recipe for the “cooking with alcohol” swap from My Chicago Kitchen.
Now that I’ve made this, I know that I will be making this again and again and again. It was so easy to put together it was unbelievable. Slow cookers in my house are used pretty much only in the fall and winter. Once summer comes around, it goes into hibernation deep in my cupboards.
Why that happens, I’m not quite sure… but this recipe definitely convinced me that slowcookers are a year-round kitchen tool that I should be using!
Summertime Coq au Vin adapted from My Chicago Kitchen, originally from Williams-Sonoma
1 cup all purpose flour
salt and pepper
8 bone-in, skin on chicken thighs
4 tablespoons olive oil
4 shallots, minced
2 cups dry white wine
1 cup chicken stock
6 sprigs fresh parsley
6 springs fresh thyme
6 carrots, peeled and diced
2 cups pearl onions
2 cups sugar snap peas
Heat olive oil in a large skillet over medium-high heat. Season chicken with salt and pepper. Lightly dredge in flour and shake off any excess. Brown chicken in pan on all sides, about 3-5 minutes per side. Place chicken into slow cooker.
Pour off all but about 1 tablespoon of grease in pan. Add shallots and saute for 1 minute. Remove skillet from heat and pour in wine and chicken stock. Bring mixture to a simmer over medium heat. Pour into slow cooker over the chicken.
Add in parsley, thyme, and carrots, making sure the herbs are fully submerged in the liquid. Cover and cook for 2 hours on high or 5 hours on low.
After 2 or 5 hours, uncover and add in onion and peas, submerging them in the liquid. Cover and cook an additional 30 minutes on low. Serve warm.
Thanks to Taste of Home Cooking for organizing! Make sure to check out the other recipe swap posts!
It finally feels like summer to me. I’m taking a week off work to explore some great things out west with my family. Mike, my dad, step-mom, brother and I are trekking out there to do some serious exploring.
We’re doing a little bit of everything, from Vegas to Grand Canyon North & South Rim, Zion National Park, and Bryce Canyon with a bunch of stuff in between. I’m super excited since it’s going to be my first time ’round those parts 🙂
Downside(s)? The heat. I melt in the Wisconsin summer. I will surely die in the heat of Vegas (100°F? Why does this temperature even exist?) and surrounding areas. I’m also a little worried about my workouts. I’m bringing my running gear and I bought a travel yoga mat to help me stay on track. My plan is to run 3 times and do yoga 3 times while we’re out there. My regular routine, essentially. Hopefully I can stick to it!
We’re leaving for the airport in a few short hours and I still have a huge list of things to finish up (like the apple crisp in the oven). I’m running off to do some last minute packing now, but I’ll leave you with a super simple and super delicious recipe – enjoy!
Hot Italian Sausage and Pepper Hash
1 tablespoon olive oil
2 large onions, quartered and thinly sliced
3 cloves garlic, minced
1-19 ounce package hot Italian sausage links, casings removed
3 pounds red potatoes, cut into 1/2-inch pieces
10 mini bell peppers or 3 large bell peppers, sliced
salt and pepper, to taste
6 large eggs
Preheat oven to 450°F.
Heat olive oil in a large pan over medium-high heat. Add onions and sprinkle with about 1/2 teaspoon salt. Lower the heat to medium-low and cook onions, stirring frequently, until caramelized, about 15 minutes. Add in garlic and cook for another 2 minutes.
Meanwhile, place sausage in a medium pan over medium-high heat and brown, chopping up links into crumbles with a wooden spoon or a spatula. Cook until browned and drain off excess fat.
Stir sausage into onions and add in potatoes. Season with salt and pepper to taste. Cook for 10 minutes. Pour potatoes and sausage mixture into a large baking sheet and sprinkle sliced peppers on top. Bake in preheated oven for about 30 minutes, or until potatoes are cooked through.
In the last few minutes of baking, heat olive oil in a nonstick pan over medium-high heat. Cook eggs until desired doneness is reached. Scoop hash into bowls and top with an egg. Serve immediately.
I lost my favorite work perk last week with the end of the school year.
Salads. Delivered to me. Every day.
I never had to worry about what I was going to eat, never had to pack leftovers for lunch, never had to resort to a sad PB&J or turkey & cheese sandwich. I had an amazing salad sent to me. Now it’s all over. The kitchens are closed until September and I’m… hungry.
I’ll admit that I have been really bad about remembering to bring lunch with me. In the 7 work days that I have been salad-less, I have forgotten lunch 3 times. Not good, Jen, not good. I’m at least smart enough to keep our office fridge well-stocked with Greek yogurt and I have a fairly impressive stash of snacks in my desk drawer as well. Wheat crackers and Greek yogurt make for a sad lunch, though, and 3 days of it is more than enough for me.
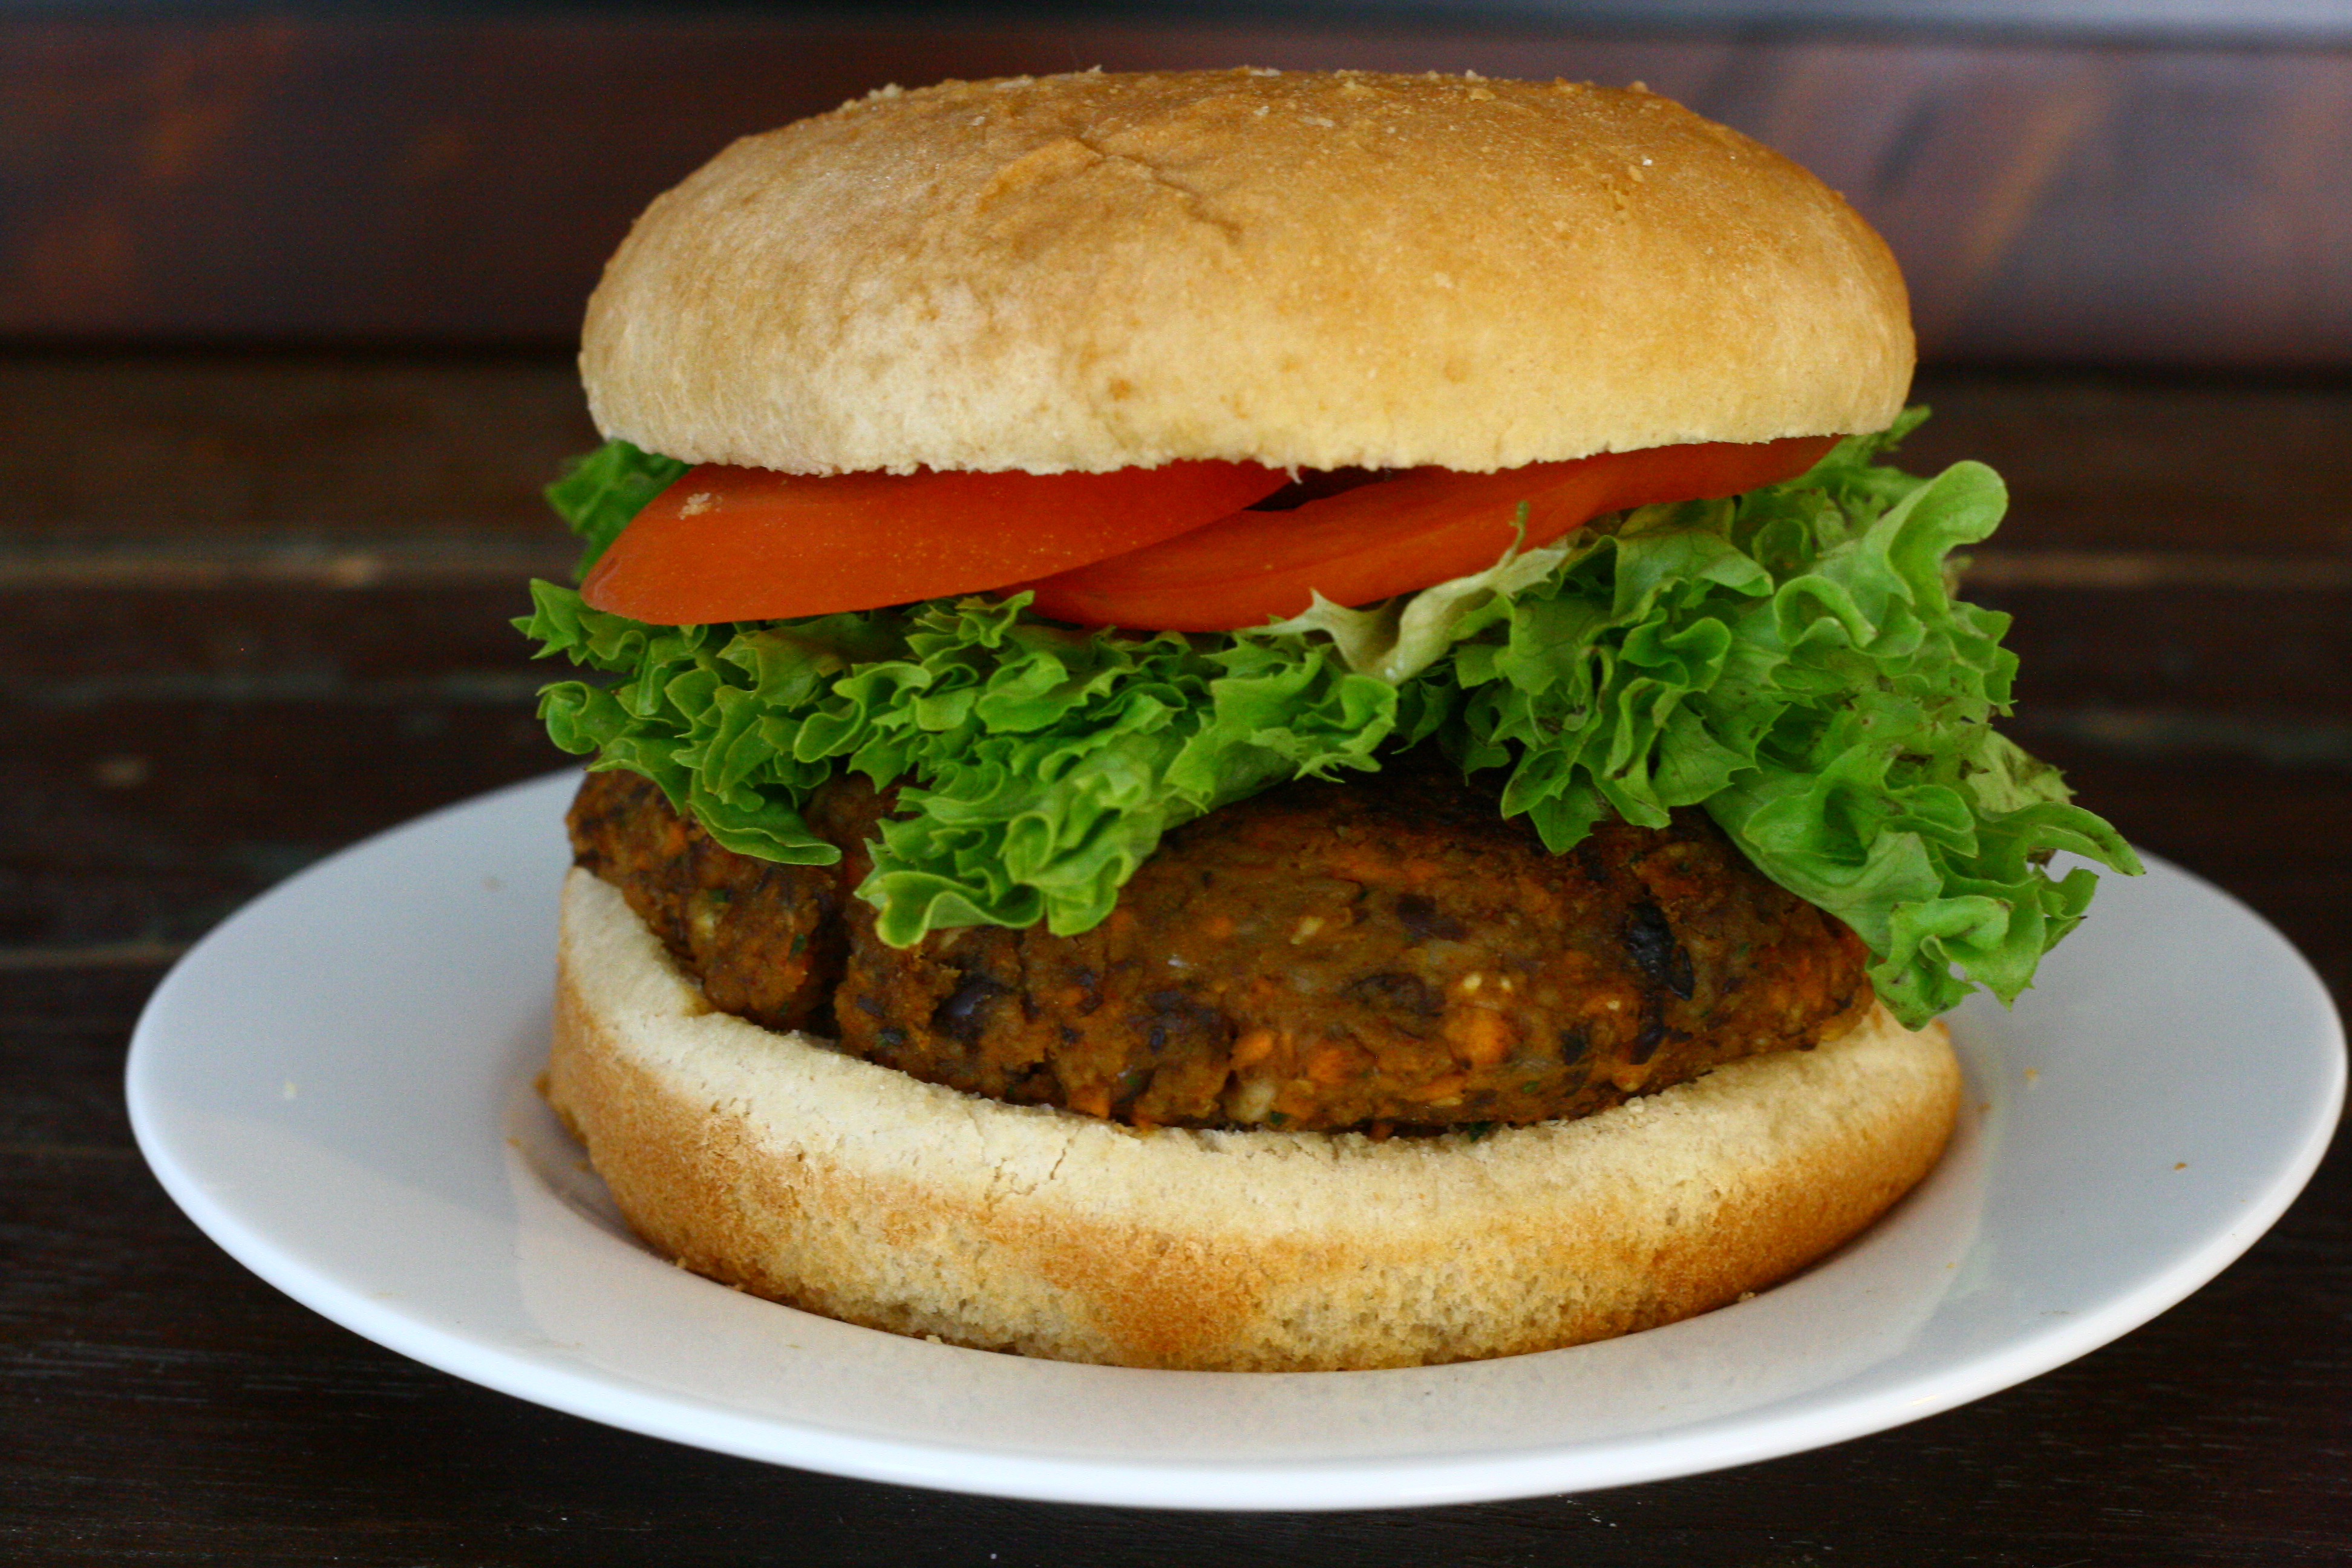
I’m making an effort to pack a lunch, and these veggie burgers were first up on my list. I made a huge batch of it and have enough to feed Mike and me for a week.
Ultimate Veggie Burger
for the patties:
2 cans black beans drained, liquid reserved
4 large carrots, grated
1 medium onion, finely chopped
3 cloves garlic, minced
1/2 cup old-fashioned rolled oats
1/4 cup cilantro, chopped
1 tablespoon Mexican chili powder
1 teaspoon salt
1 teaspoon freshly ground black pepper
for the burgers:
olive oil
whole wheat hamburger buns
optional toppings: thinly sliced tomato, lettuce, onion
Combine all veggie patty ingredients (black beans through black pepper) in a food processor. Pulse until combined, being careful not to puree. If mixture does not easily stick together, add reserved bean liquid 1 tablespoon at a time, until it does.
Shape mixture into 4 or 5 patties 1″ thick.
Heat 1 tablespoon of olive oil in a large nonstick pan over medium heat. Add patties and cook for 2 – 3 minutes on each side or until browned on both sides. Serve hot on a bun and garnish with lettuce, tomato, and any other toppings you desire!
It’s swap time again! The theme this month was Mexican food and I received a recipe for Cream Cheese Enchiladas from Carrie’s Sweet Life. I read only the name of the dish and raised my eyebrows. I jumped to the conclusion that these were going to be filled with cream cheese and only cream cheese.
Now, don’t get me wrong. I love cream cheese. Seriously. But the thought of eating a cream cheese enchilada was a bit too much for me. I read on and was very relieved to see that there were several other ingredients in the enchiladas in addition to cream cheese. Whew!
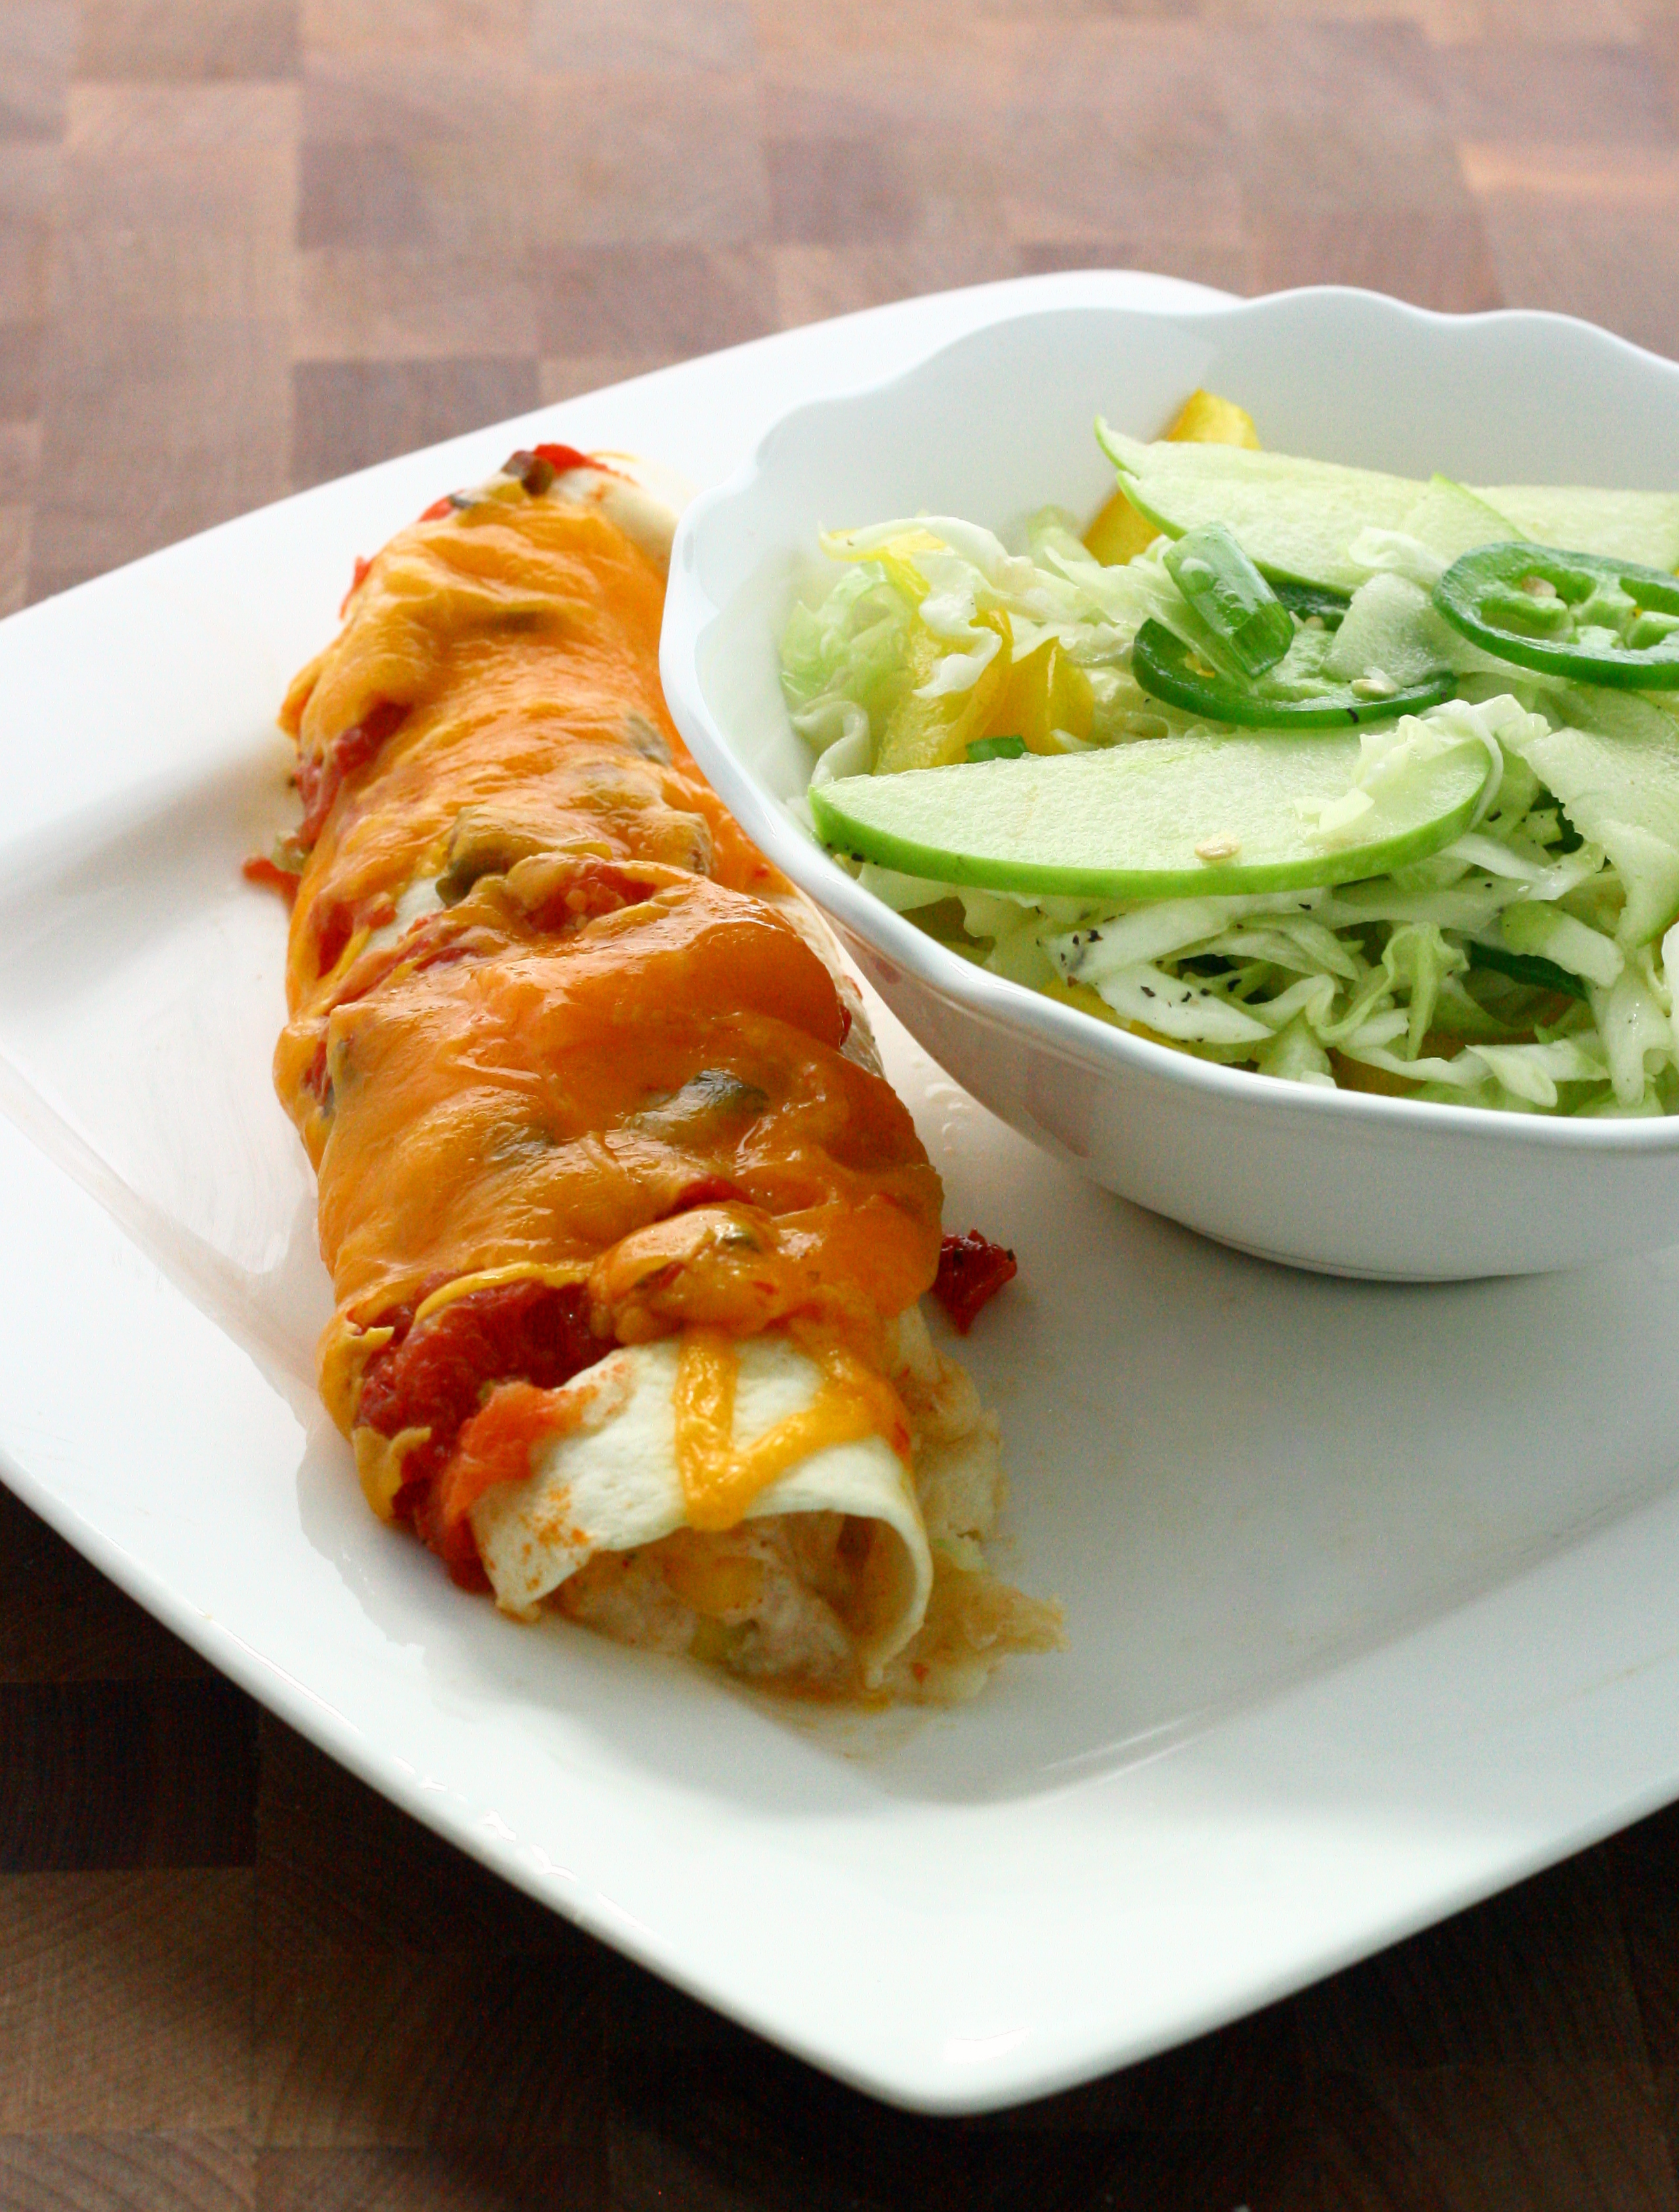
I absolutely loved these. They were super simple to make and had a great flavor, too. I followed in Carrie’s footsteps and made the filling and shredded all the cheese the night before. Then, the next day I assembled and baked them off. While they were in the oven I threw together a quick apple slaw to go with it.
Lightened Up Cream Cheese Chicken Enchiladas slightly adapted from Carrie’s Sweet Life
1 package Neufchatel or reduced fat cream cheese, softened
1/2 cup nonfat Greek yogurt
2 cup prepared salsa (I used some homemade stuff I canned last summer)
1 cup shredded colby cheese
1 cup shredded sharp cheddar cheese
1/2 teaspoon ground chipotle pepper
2 cups cooked, shredded chicken
1 cup frozen corn kernels, thawed
1/2 teaspoon chili powder
1/4 teaspoon cumin
salt and pepper, to taste
8-8 inch flour tortillas
Preheat oven to 325°F.
In a medium bowl, beat together cream cheese and Greek yogurt until smooth. Stir in 1/2 cup salsa, 1/2 cup colby, and 1/2 cup cheddar.
In a separate bowl, mix chicken, corn, cumin, chili powder, salt, and pepper. Fold into cheese mixture and stir until thoroughly combined.
Spread 1/2 cup salsa into the bottom of a large baking dish.
Place 1/3 – 1/2 cup of filling into the bottom third of a tortilla. Roll up and place seam-side down in baking dish. Repeat with remaining tortillas. Pour remaining 1/2 cup salsa on top and sprinkle with remaining cheese.
Bake in preheated oven for 25 – 30 minutes, or until cheese is bubbly and center of enchiladas are hot. Serve immediately.
Thanks to Taste of Home Cooking for organizing! Make sure to check out the other recipe swap posts!
There are some days where I just don’t have the time (or energy) to cook an elaborate meal. I’ve come to love quick, easy dinners that I can throw together in a half hour.
There are some sweet & sour meatball recipes that use only 3 ingredients: frozen meatballs, grape jelly, and chili sauce. I couldn’t even bring myself to consider making it. Instead, I opted to make meatballs from scratch (easy!) and sauce from scratch (easier!). Sure, it took a little longer to whip together than the 3 ingredient meatballs, but it’s well worth it to me! The meatballs are super tender and I love the sauce. I also love the fact that I can pour a healthy dose of Sriracha on top.
The only part that beats the fact that it is so simple to make is that this made a LOT of food. That means that Mike and I were able to eat it for breakfast, lunch, and dinner for a couple days 😉 If you’re cooking for a small group, you may want to cut the recipe in half.
Sweet & Sour Meatballs with Peppers adapted from All Recipes
for the meatballs:
2 pounds 90% lean ground beef
2 eggs
1 cup dry bread crumbs
1/2 cup finely chopped or grated onion
1-inch piece of ginger, grated
1 teaspoon seasoning salt
1 teaspoon ground black pepper
1 tablespoon Worcestershire sauce
for the sauce: 2 – 20 ounce cans pineapple chunks, drained and juice reserved
1 cup water
1/4 cup cider vinegar
2 tablespoons low sodium soy sauce
1/3 cup packed brown sugar
3 tablespoons corn starch
1/2 teaspoon seasoning salt
1 large onion, chopped
2 red or yellow bell peppers, sliced
white or brown rice, for serving
Preheat oven to 400°F. Line a baking sheet with parchment paper and set aside.
To make the meatballs: combine all ingredients in a large bowl. Mix by hand until just combined, being careful not to overmix. Shape into 1 – 1 1/2 inch balls and place on prepared baking sheet. Bake for 10 – 15 minutes or until lightly browned. Set aside.
Meanwhile, make the sauce. Pour reserved pineapple juice into a large pot over medium heat. Whisk in water, vinegar, soy sauce, brown sugar, corn starch, and salt. Cook, stirring occasionally, until thickened.
Stir in pineapple chunks, onion, bell peppers, and meatballs into the sauce. Gently stir to combine and simmer for 15 – 20 minutes or until meatballs are cooked through.
This post two-for-one deal. It’s a running and recipe post all rolled into one! Let me start the race recap with my Saturday. In my last post I talked about my nervousness and how I planned on dealing with it. So, what did I do all weekend?
Well, like I had said before, Mike and I went to the Cellcom Race Expo and picked up my race packet. We bought a running hat (for him) and some more running capris (for me) there. We then headed over to Hinterland for some beer & food. It was so good. We decided to sit in the lounge and I’m so glad we did. The space is really neat – we snagged a corner booth that had a nice view of the downtown area. The service and food were amazing. We’re already planning on next trip back – I’m sad they are a 40 minute trip away, but it’s definitely worth it.
We drank: Cherry Wheat (Crisp, cool and refreshing. Brewed using tart Door County cherries from Seaquist Orchards) and Bourbon Barrel Dopplebock (Dark amber color. Full-bodied. Pronounced notes of caramel and oak with a smooth bourbony finish. Aged 10.5 months). Both were delish.
We ate: Caprine supreme goat cheese curds with kimchee ketchup and Nueske’s smoked chicken pizza (maple bock barbecue, mango, chives, goat cheese). The cheese curds were different than any cheese curd I’ve had before – they were light and fluffy and the kimchee ketchup was awesome. The pizza was, of course, delish as well. I loved the addition of the mango.
Saturday, we wasted the day away at home and ran some errands. I felt sick with anticipation almost all day. I was refreshing the weather on my iPad every hour (definitely wasn’t helping). I ended up throwing together dinner early at around 5:00 so we could eat early and get to bed by 9:00.
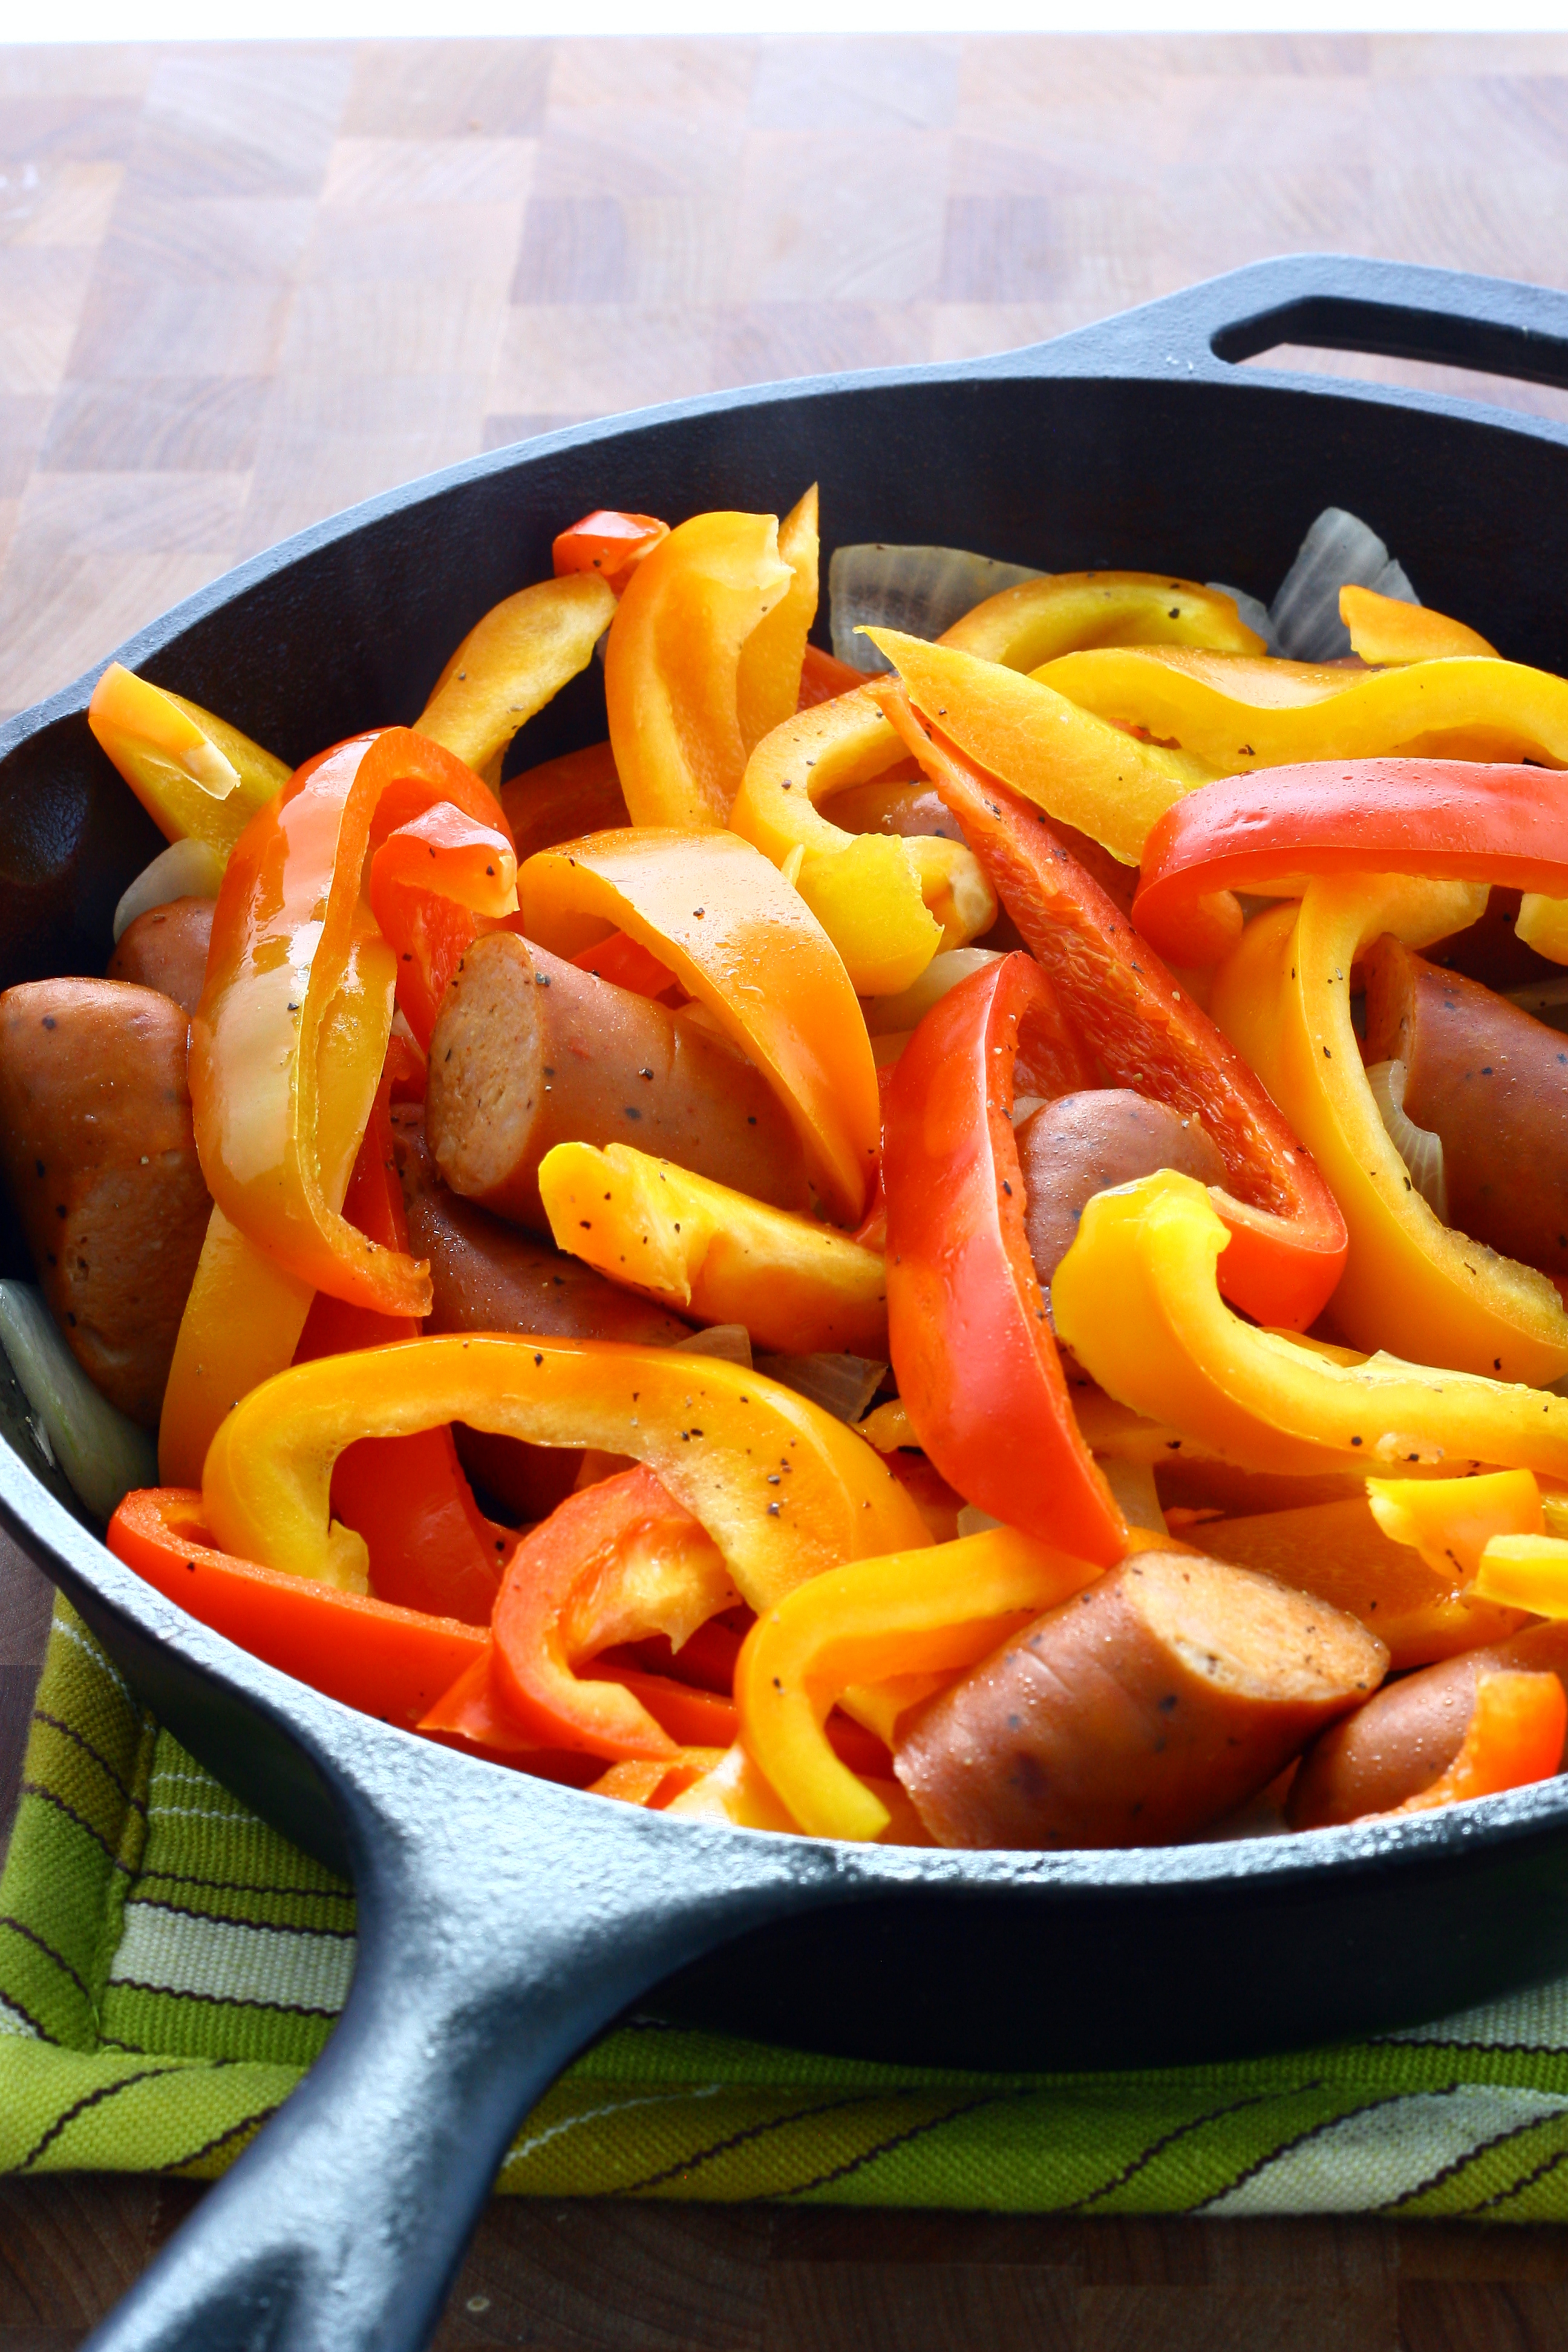
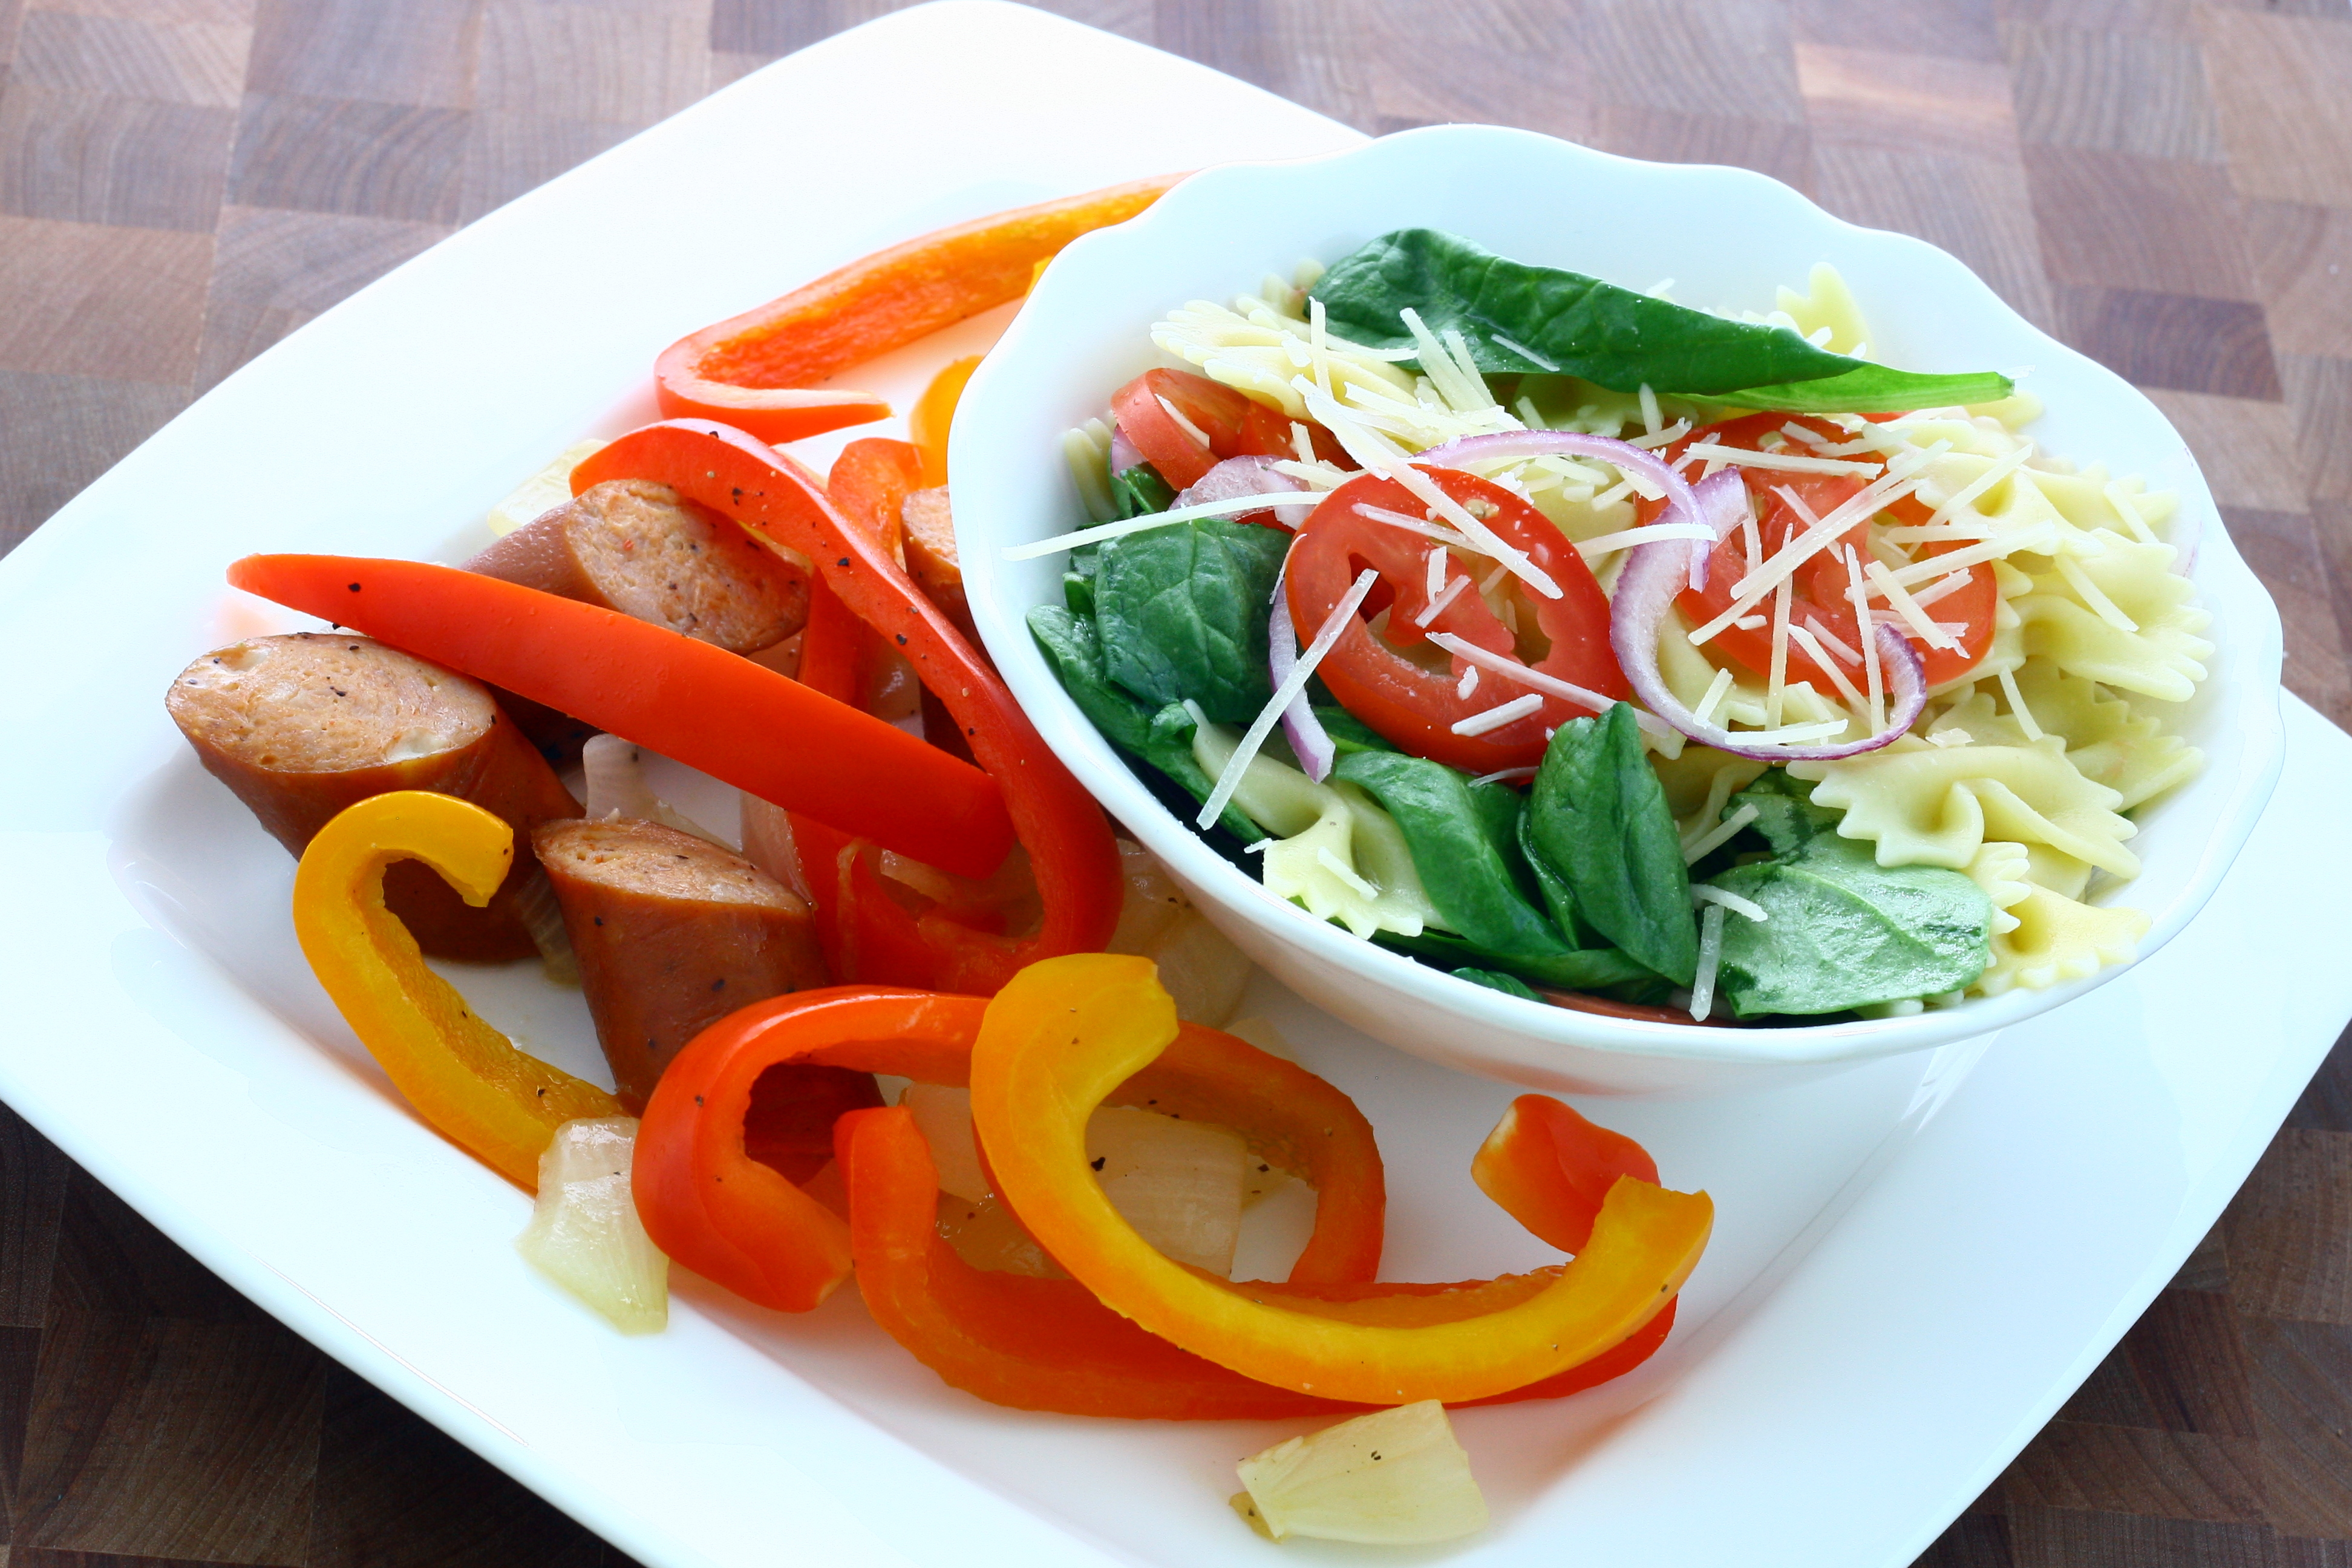
Some people have certain foods they need to stay away from before race day. I’ve found that I can eat almost anything, but it’s best if I stay away from fiber and copious amounts of grease. I ended up making a dish with chicken sausage and bell peppers with a pasta salad side. I loved that this meal was filling, easy, and my stomach handled it perfectly.
Chicken Sausage & Peppers
1 teaspoon canola oil
1 large onion, chopped
12 ounces fully cooked chicken sausage*, cut into 1 1/2 – 2″ pieces
2 bell peppers, sliced
salt and freshly ground black pepper, to taste
Heat oil in a large cast iron skillet over medium-high heat. Add in onions and cook for 3 – 4 minutes or until they start to soften.
Add in sausage and bell peppers and cook until sausage is heated through, 3 – 5 minutes. Season with salt and pepper to taste.
*I used Johnsonville’s Chicken Sausage – Chipotle Montery Jack in my dish. I’ve had this type before and love it so I used it again instead of trying something new.
Easy Spinach Pasta Salad
12 ounces farfalle or other small pasta
1 teaspoon garlic olive oil or plain olive oil*
3 cups baby spinach
1/2 red onion, thinly sliced
3 roma tomatoes, thinly sliced
1/3 cup freshly grated Parmesan
salt and freshly ground black pepper, to taste
Cook pasta according to package directions in a large pot of boiling salted water. Drain and immediately toss with garlic olive oil. Toss warm cooked pasta with spinach, onion, tomato and Parmesan. Season with salt and pepper and serve immediately.
*I used a garlic evoo from a local store, The Olive Cellar. Love the place and will never buy olive oil (or balsamic) from any other place.
After eating a fair amount of this, Mike and I turned in for the night. He tried to calm my nerves by playing the Fun Run episode from The Office. It worked 🙂
Now, that brings us to Sunday: race day. Mike and I rolled out of bed at around 4:00 that morning and I nervously ate a banana and some Quaker Oatmeal Squares. I chugged a little water and then we were off to Green Bay. We weather was beautiful at first. Here’s a picture of me – all happy that it was race day and ready to conquer Cellcom once again.
I got about 2 miles in before I realized just how hot and humid it was. Last year was hotter, but this year was much more humid. I do not handle humidity or heat very well. Put the two together and well… I’m a goner. Let’s just say that there aren’t many pictures I want to post of my grossness mid-run. I will, however, share with you the pics Mike snapped during my last mile in Lambeau Field!
I may look happy and full of energy in the above photos, but miles 2 – 12 were killer. I was dragging and just mentally d-o-n-e with it all. After I crossed the finish line and found Mike, I loaded up on brats and beer. I got my picture taken with a complete stranger (??) and then changed into dry clothes before heading back out to Lambeau and cheering on the marathoners and snapping a few more pics.
I wish I could say that everything was perfect. That I hit my goal time. That I PRed. But none of that is true. I debated sharing my time with the world because I was embarrassed at first. Then, I realized that all runners have good days and bad days. I just happened to have a bad day. And even though my time was 2:27 and I finished nearly 15 minutes after my goal time, I still did better than the person I was just 2 1/2 years ago. I used to be someone who couldn’t run for 20 seconds straight and struggled through Day 1 of Couch to 5k for a solid week.
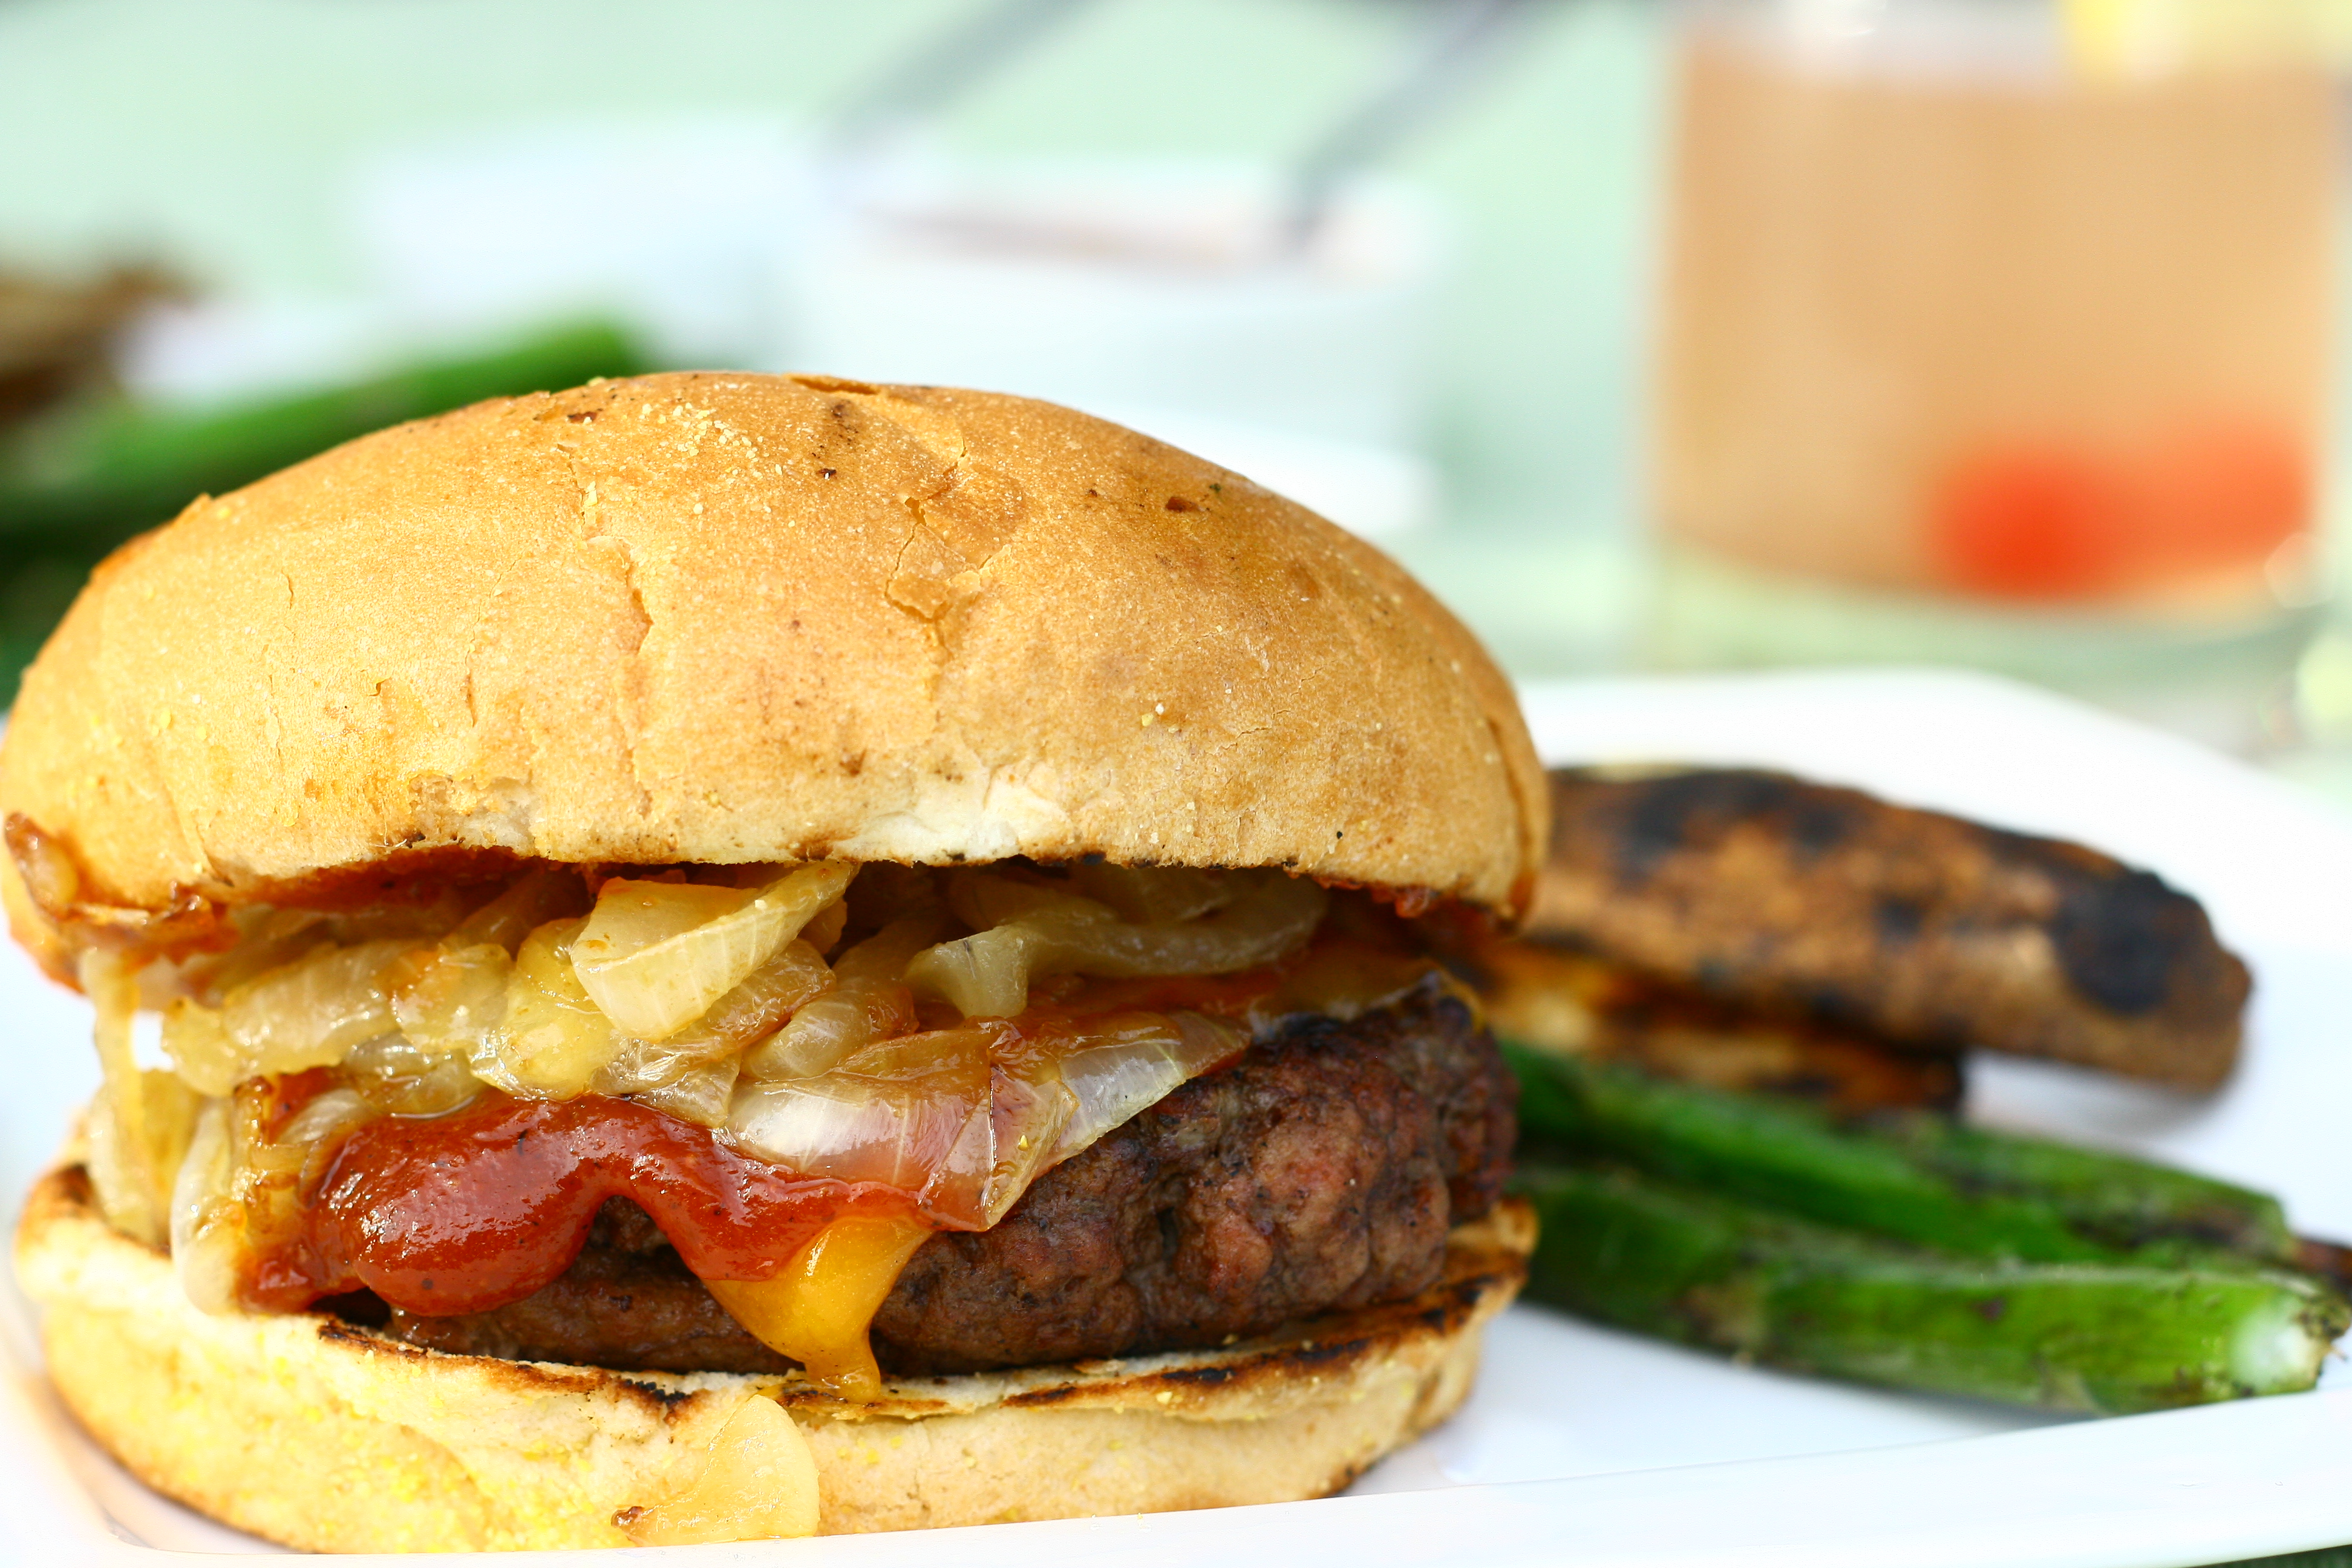
There’s something about a perfect burger that just screams “summer”! Even though it’s only spring, and even though it’s been a fairly cold spring so far, this burger made everything a-okay. I forgot for a few hours that summer was still forever away. Mike and I enjoyed these burgers with some grilled asparagus, grilled potato wedges, and of course, some fresh whisky sours.
Whiskey BBQBurgers with Caramelized Onions & Cheddar serves 4
for the whiskey barbecue sauce: 1 cup ketchup
1/2 cup water
1/4 cup apple cider vinegar
3 tablespoons brown sugar
2 tablespoons honey
1 teaspoon black pepper
1 teaspoon onion powder
1 teaspoon garlic powder
1 teaspoon ground mustard
1 1/2 teaspoons lemon juice
1 1/2 teaspoons Worcestershire sauce
1/3 cup bourbon
for the caramelized onions: 1 tablespoon butter
1 tablespoon olive oil
1 large yellow onion, sliced
1 teaspoon brown sugar
for the burgers:
1 pound ground beef
salt and pepper
4 ounces extra sharp cheddar cheese, thinly sliced
4 kaiser rolls, lightly toasted
To make the whiskey barbecue sauce: combine all barbecue sauce ingredients in a medium saucepan. Bring to a boil, stirring frequently. Reduce to a simmer and cook for 40 minutes, or until thick.
To caramelize the onions: heat olive oil and butter in a medium pan over medium-low heat. Add in onions and cook, stirring occasionally, for 10 minutes. Add in brown sugar and continue to cook, stirring occasionally, until onions are caramelized and soft, another 10 – 15 minutes.
To make the burgers: shape beef into 4 even patties. Make a depression in the middle of each patty with your thumb. Season both sides with salt and pepper. Heat a grill to high heat and cook burgers until slightly charred and browned on one side. Flip and cook burgers on second side until browned and slightly charged. Top with sliced cheddar cheese during last minute of cooking.
To assemble burgers: place a patty onto the bottom of roll. Slather with barbecue sauce and top with a heaping spoonful of caramelized onions. Top with other side of the roll and serve immediately.
I love burritos. I especially love the as-big-as-your-face abominations from Qdoba and Chipotle. If I spend a day with my college friends, there’s a pretty good chance you’ll find us at either a Qdoba or Chipotle at some point during the day. After all, we can’t live on beer and whiskey alone. But apparently beer, whiskey, and burritos = well rounded diet.
Some habits die hard. It’s been 3 years since we graduated, but our drinking and eating patterns during our weekends together are essentially the same. The only difference is now instead of drinking Milwaukee’s Best Light, we drink something a little classier like Miller High Life ;).
Anyway, back to the burritos. Up until now, I’ve never had a baked burrito. Baking these until they developed a perfectly crunchy outside brought the burrito to a whole new level. I ate one and died of happiness. So I ate another. I instantly regretted it, but it was just so… good. So learn from my mistake – eat only one. They are very, very filling.
Beef and Bean Baked Burritos with Creamy Poblano Sauce adapted from Elly Says Opa
for the burritos:
1 tablespoon canola oil
1 large onion, diced
1 pound 93% lean ground beef
4 cloves garlic, minced
1 tablespoon tomato paste
1 can black beans, drained and rinsed
1 cup corn kernels
1/4 cup beef broth
1/2 teaspoon cumin
1/2 teaspoon oregano
1 1/4 teaspoon Mexican chili powder
1/8 teaspoon cayenne pepper
1 teaspoon brown sugar
1/2 teaspoon salt
1 1/2 cups shredded pepper jack cheese
8 large whole wheat tortillas
olive oil cooking spray
for the creamy poblano sauce: 1 poblano pepper, roasted and chopped (see step 2)
2 jalapeno peppers, seeded and chopped
2 tablespoons butter
4 tablespoons flour
1 1/2 cup chicken broth
1/2 teaspoon garlic powder
salt and pepper, to taste
3/4 cup plain nonfat Greek yogurt
1/4 cup chopped fresh cilantro
Preheat oven to 450°F. Spray a large baking sheet with cooking spray and set aside.
To roast the poblano for the sauce: place inside a medium baking dish. Bake in preheated oven and turn every 6 – 8 minutes until skin is blistered on all sides, about 25 minutes total. Place in a clean kitchen towel and wrap up. Let cool slightly and rub the skin off the pepper with the towel. Remove the stem, seeds, and ribs.
To make the burritos: heat oil in a large skillet over medium heat. Add onions and cook until they begin to soften, about 3 – 5 minutes. Add in ground beef and cook and stir to break up the meat. Cook until well browned. Add in garlic and tomato paste and stir well to combine.
Add in black beans, beef broth, cumin , oregano, chili powder, cayenne, brown sugar, and salt. Bring to a boil, reduce heat to a simmer, and cook until most of the liquid has been absorbed.
To assemble the burritos: place 2 – 4 tablespoons of cheese at the end of a tortilla and spoon in some of the beef mixture over the cheese. Fold the left and right sides of the tortilla in and then roll the tortilla up, starting from the end closest to you. Place seam-side down on prepared baking sheet. Repeat with remaining tortillas. Spray tops of burritos with cooking spray. Bake in preheated oven until lightly browned and crispy, about 25 minutes.
Meanwhile, make the sauce: melt butter in a medium saucepan over medium heat. Stir in chopped roasted poblano and jalapenos. Sprinkle in the flour and stir to combine. Cook, stirring frequently, until flour is lightly browned, about 1 – 2 minutes. Whisk in chicken broth, garlic powder, salt, and pepper. Let cook over medium heat, stirring frequently, until the mixture bubbles and thickens. Remove from heat. Stir in Greek yogurt and cilantro. Serve over baked burritos.
Wow, I can’t believe it’s May already! Time has been absolutely flying by. I feel like whenever I have deadlines looming in future time just gets away from me. Right now the deadlines are mostly work-related, but my impending half marathon is also out there. I have been only half-heartedly training so it should be interesting. I’m just hoping the weather will be nicer this year! Last year, they shut the race down just minutes after I crossed the finish line due to the extreme heat.
Last Friday I spoke briefly about how I had found so many great recipes on Kim’s blog, Feed Me, Seymour. I had to choose just one recipe for the swap, but I couldn’t stop myself from making another dish. So, today I share with you the other dish – garlic lime chicken enchiladas.
I adapted her recipe slightly and made a homemade enchilada sauce and used Mexican rice instead of plain white rice. If I’m ever short on time I will definitely use a canned sauce and white rice – this dish is so full of flavor that I’m sure it’s just as tasty the original way!
If you notice that the enchiladas seem a bit squished in the photo, well, it’s because they are. I couldn’t find my 9×13 pan anywhere. I tore the kitchen apart looking for it and finally settled on using a smaller pan. I “found” the 9×13 pan a week later when my mom returned it to me 😉 Guess I need to keep better track of my bakeware, huh?
Mexican rice: 1 tablespoon olive oil
1 small onion, chopped
1 garlic clove, minced
1 cup uncooked white rice
1 teaspoon garlic powder
1/2 teaspoon ground cumin
1/2 cup tomato sauce
2 cups low sodium chicken broth
3 cloves minced garlic
1 thinly sliced red onion
juice of 1 lime
2 tsp. cayenne pepper
3 Tbsp. tomato paste
2 chicken breasts, cooked and shredded
2 cups cooked Mexican rice (recipe above)
1/4 cup cilantro, chopped and divided
2 cups enchilada sauce (recipe above)
1 tsp. olive oil
6 whole wheat flour tortillas
1 cup shredded cheddar jack cheese
To make the enchilada sauce, heat oil in a skillet over medium heat. Stir in flour and chili powder and cook, stirring constantly, until lightly brown. Gradually stir in remaining ingredients and stir until smooth. Cook for 10 – 15 more minutes, until slightly thickened.
To make the rice, heat oil in a large pan over medium-high heat. Add in onion and saute until translucent, 3 – 4 minutes. Add in garlic and rice and cook until rice is slightly toasted, about 2 minutes. Stir in remaining ingredients and bring to a boil. Reduce heat to a simmer, cover, and cook until rice is tender, about 20 minutes. Remove pan from heat and fluff with a fork.
To make the enchiladas, preheat oven to 375°F. Heat olive oil in a pan over medium-high heat. Saute onions until slightly soft. Add in garlic and saute for an additional minute. Stir in lime juice, cayenne pepper, and tomato paste.
Remove pan from heat and add in chicken, Mexican rice, and half the cilantro. Stir to combine.
To assemble: place tortillas on a clean surface. Put 2 large spoonfuls of filling onto each tortilla and roll tightly. Place seam side down in a 9×13-inch baking dish. Pour enchilada sauce on top of tortillas and top with shredded cheese. Bake in preheated oven for 10 minutes or until cheese is melted.