I love chips and dip. Taco dip, guacamole, salsa, French onion, hummus… I’m the weirdo hovering by your dip bowl at the party. Hovering? More like hoovering. I really want to host a chips and dip dinner party. I don’t know if anyone would come, but I could probably eat the entire spread myself. Just sayin’.
Spinach artichoke dip is one of my favorites to dip in, but all that cheese – oh goodness. I did my best to lighten it up while still keeping that to-die-for richness. I opt for fresh spinach, but feel free to sub in a package of frozen chopped spinach; just make sure to thaw and drain it before stirring it in.
Lightened-Up Spinach Artichoke Dip
8 ounce bag baby spinach, roughly chopped
2 cloves garlic, minced
1 (14-ounce) can artichoke hearts, drained chopped
8 ounce package reduced-fat or fat-free cream cheese
1 cup plain fat free Greek yogurt
2 tablespoon light mayonnaise
8 ounces part-skim mozzarella, shredded
1/2 cup shredded Parmesan cheese
1/2 teaspoon red pepper flakes
tortilla chips
In a medium pot, combine, spinach, garlic and artichoke hearts. Cook over medium heat until spinach is just wilted. Stir in cream cheese, yogurt, mozzarella, Parmesan, and red pepper flakes. Continue to cook, stirring frequently, until cheese is melted and ingredients are blended.
Bake at 350 for 20-25 minutes or until bubbly and golden brown.
Slow cooker instructions: place ingredients into a slow cooker and heat on low for 3-4 hours or high for 2 hours. Stir well before serving.
This pumpkin pie granola is a million times better than actual pumpkin pie. It packs all the delicious flavors of pumpkin pie without that baby food texture. Carrie over at Carrie’s Sweet Life hosted this month’s What’s Baking challenge and the theme was pumpkin or squash.
This granola recipe is crazy easy and since the pumpkin craze is in full swing, you probably have all the ingredients you need to make this in your kitchen already. I skipped out on using added fats in this recipe and instead used pumpkin to bind everything together to make a delicious, crunchy, slightly healthier granola.
Pumpkin Pie Granola
5 cups old fashioned oats
2 teaspoons pumpkin pie spice
1 ½ teaspoon ground cinnamon
¼ teaspoon ground nutmeg
½ teaspoon salt
¾ cup brown sugar
¾ cup pumpkin puree
¼ cup maple syrup
1 teaspoon vanilla
⅔ cup pepitas
⅔ cup pecans
⅔ cup dried cranberries
Preheat oven to 325°F. Line a large baking sheet with parchment paper and set aside.
In a large bowl, mix together oats, pumpkin pie spice, cinnamon, nutmeg, and salt. Set aside.
In another large bowl, mix together brown sugar, pumpkin puree, maple syrup, and vanilla until well combined. Pour the wet mixture into the oat mixture and stir until everything is evenly coated. Stir in pepitas and pecans.
Place granola onto prepared baking sheet. Bake in preheated oven for 30 minutes or until golden brown, stirring halfway through. Remove and sprinkle cranberries on top and stir in. Let granola cool complete; it will crisp as it cools.
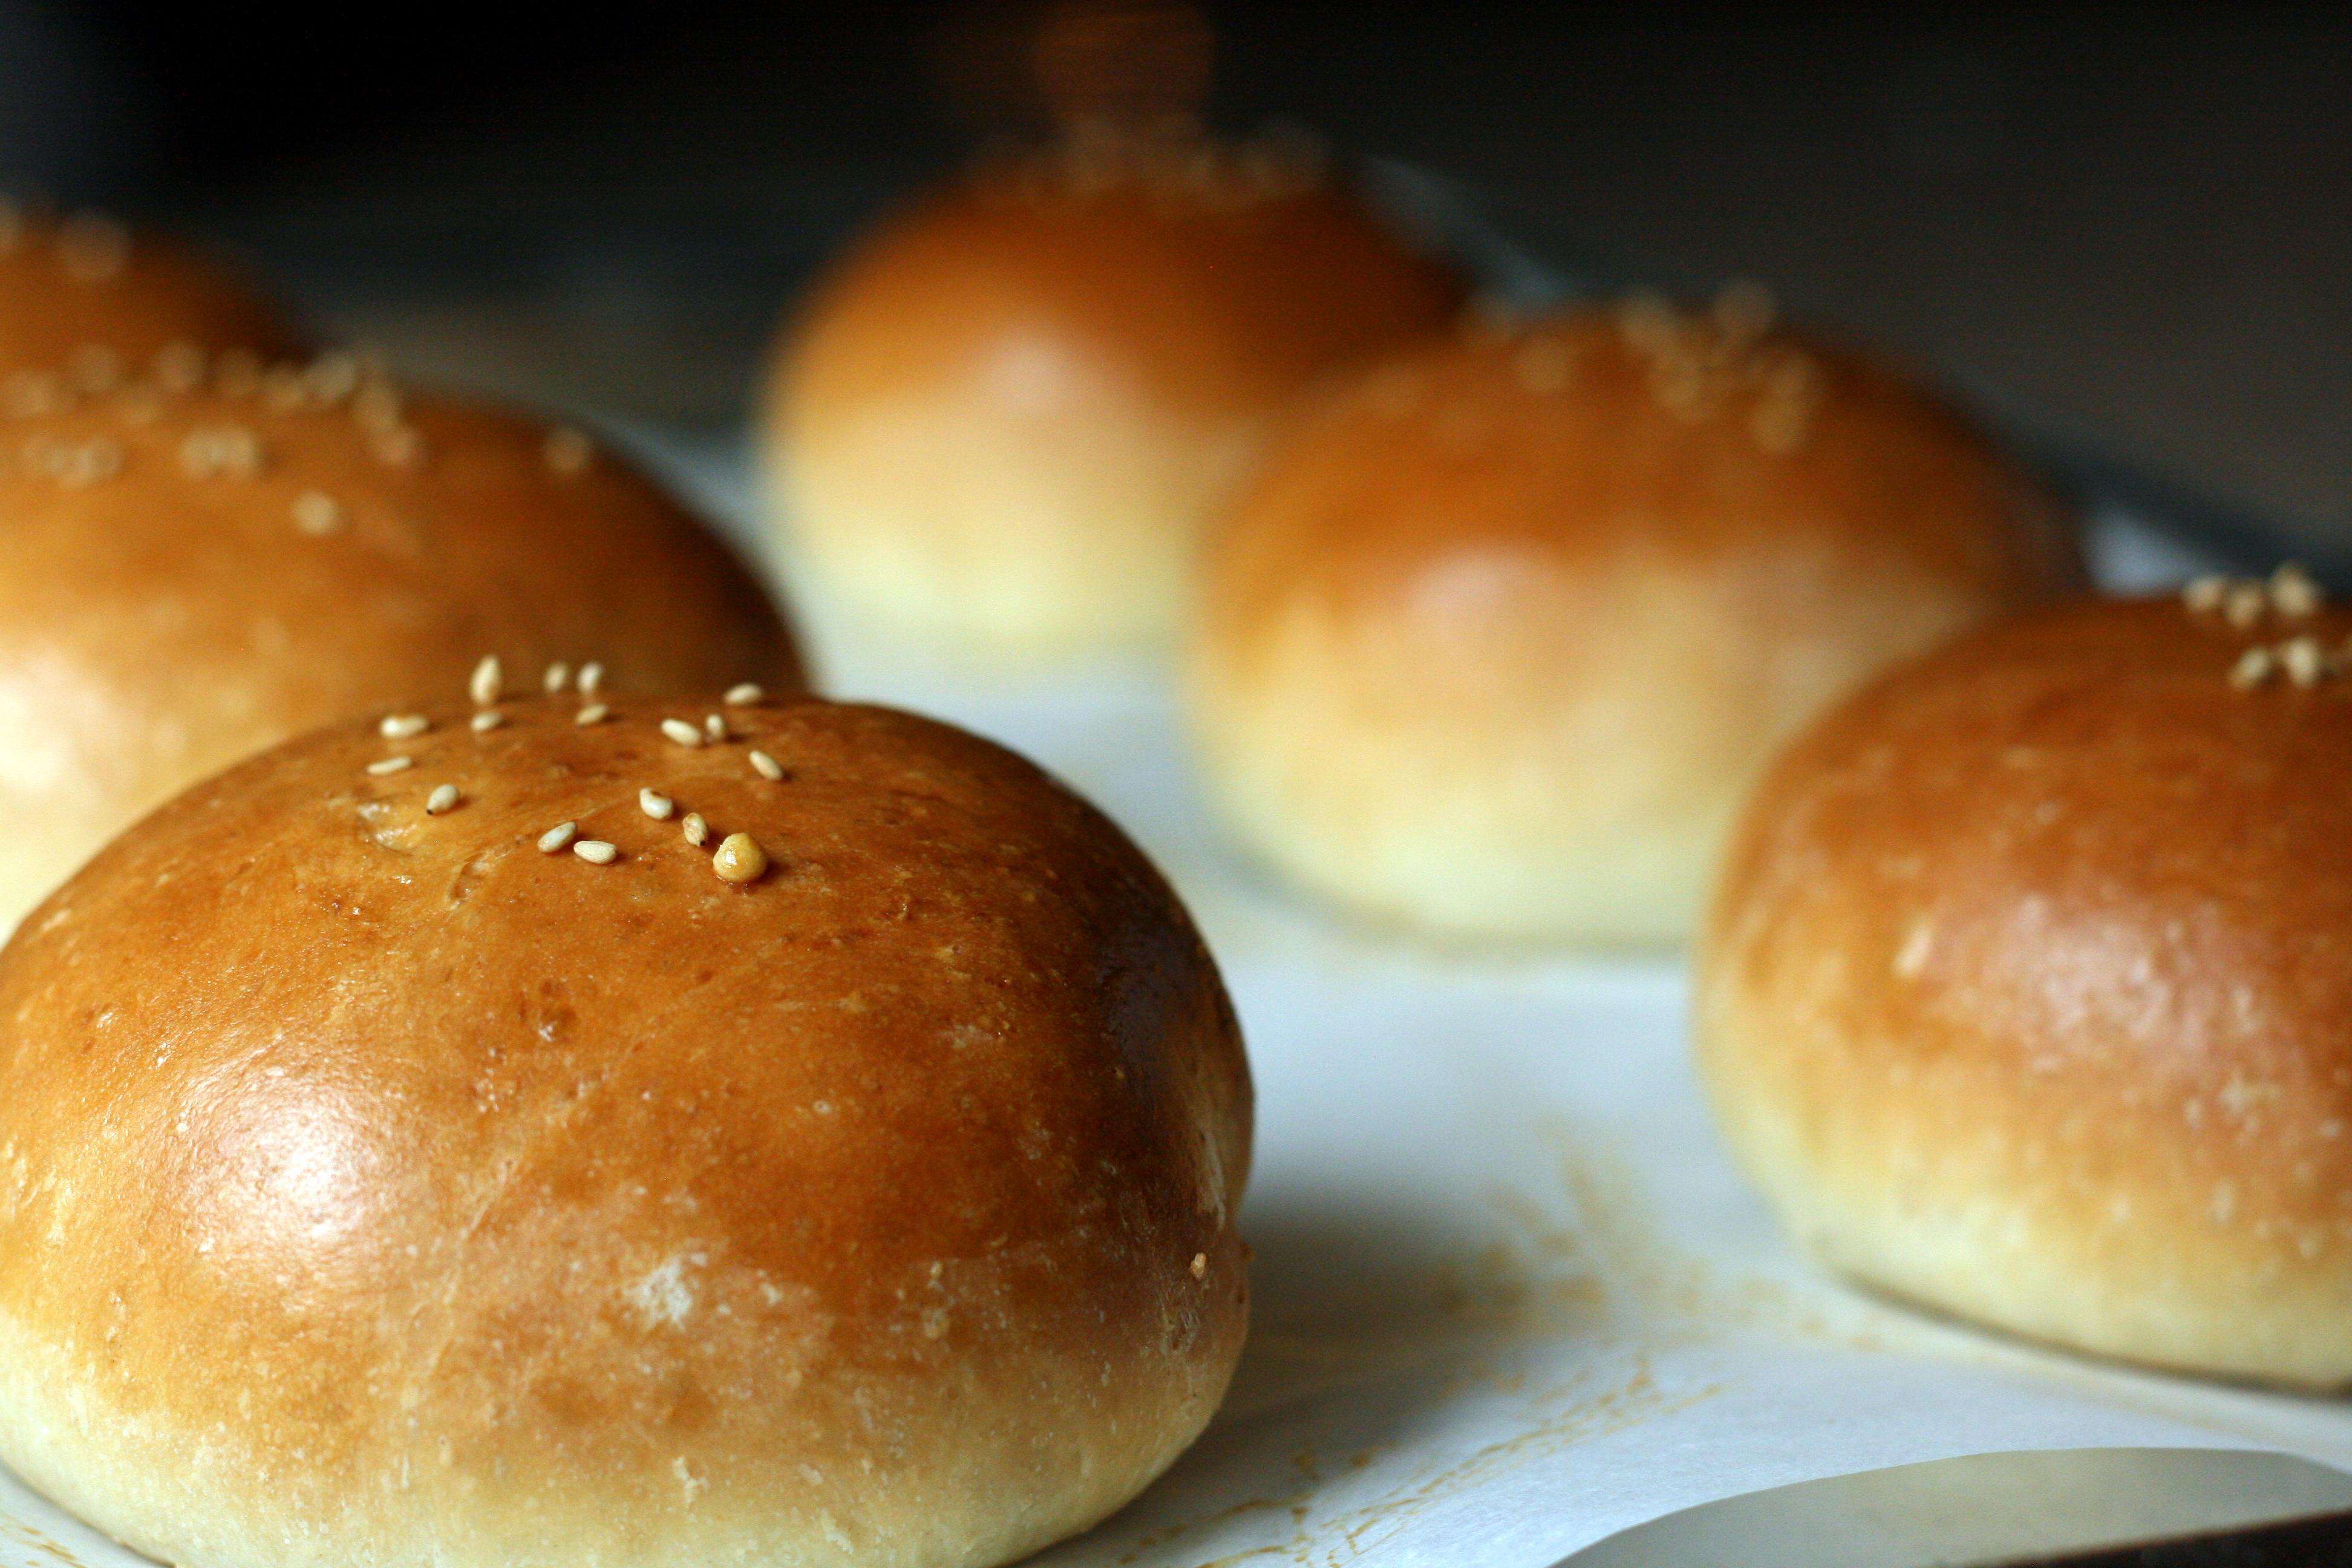
I think making these buns might have been the biggest mistake of my life. They’re just too dang good and I crave them constantly. The first batch quickly dwindled to nothing – I sent a bun or two off to my family and to Mike’s parents and sent a half-dozen off with Mike. I was left staring at four buns. I tried to make them last as long as possible, but I have to be honest… they lasted four days. Maybe less.
I think these buns might be the first thing I will ever put on my monthly “must make” list. I rarely make repeat dishes. It takes a good dish to warrant a second visit into my kitchen more than once a year. It takes a stellar dish to make a visit a few times a year. A dish that I want to make every month? Unheard of, until now.
I just can’t explain why I loved these buns so much. It’s a combination of the slightly sweet, mostly salty filling surrounded by an impossibly soft, fluffy, yet chewy bun. The texture of the buns is partially due to the tangzhong (roux) made from combining flour with water and milk. The tangzhong is incorporated into the dough and the endresult is a bun that’s… well, good.
I made this dish for this month’s What’s Baking. The host for August is Ali from Sparks from the Kitchen. She challenged us to bake up something to represent our heritage. I waffled between making dan ta, an egg custard tart, and feng li su, little flaky cakes encasing a pineapple filling. I don’t know how I ended up making neither of those and instead making the char siu bao, but I don’t regret my actions one bit. I loved char siu bao growing up, and I love them still. I hope you enjoy them as much as I do!
Char Siu Bao (Chinese BBQ Pork Buns)
for the buns:
6 cups bread flour, divided
2/3 cup water
1 1/3 cup milk, divided
1/3 cup sugar
1 teaspoon salt
4 teaspoons instant yeast
2 large eggs
4 tablespoons butter, melted
for garnishing: 1 egg beat with 1 teaspoon water (egg wash)
1 tablespoon sesame seeds
To make the tangzhong (roux/flour paste), mix together 1/3 cup flour, 2/3 cup water, and 1/3 cup milk in a small saucepan until well combined. Place the pan over medium heat and cook, stirring constantly, until the mixture thickens up and has the consistency of a thick yogurt. The temperature of the roux should not exceed 150°F. Remove the mixture from heat and set aside to cool.
In a large mixing bowl, combine 5 cups flour, sugar, salt, and yeast and mix with a wooden spoon to combine. Add the tangzhong/flour paste, 1 cup milk, 2 eggs, and melted butter. Stir together to form a soft dough. Knead by hand for 15 – 20 minutes. If your dough is sticky and not coming together, add the remaining 2/3 cup flour a little at a time until your dough is smooth and elastic.
Lightly grease a large bowl. Place dough inside and turn to coat. Cover the bowl lightly with plastic wrap. Place the bowl in a warm, draft-free place and let rise for 60 minutes or until it has doubled in size.
Meanwhile, get started on the filling. Heat the oil in a large pan over medium-high heat. Add the shallots and cook for 2 minutes, stirring constantly. Stir in the honey, soy sauce, oyster sauce, sesame oil, and dark soy sauce. Cook until mixture starts to bubble, stirring frequently. Stir in the chicken stock and flour until well combined. Reduce heat to medium-low and cook for 2 – 3 minutes, or until thickened. Remove from heat and stir in the diced roast pork. Set aside to cool.
Separate the risen dough into 16 equal pieces. Roll each piece into a 4-inch circle, leaving the center slightly thicker than the edges. Place a heaping tablespoon of filling into the middle of each circle. Crimp them closed, making sure they are tightly sealed. Don’t fret if they’re a little ugly – the crimped side ends up on the bottom, hidden from judging eyes 😉
Line baking sheets with parchment paper. Lay the buns seam-side down on the prepared baking sheets and let rise for another hour.
Preheat oven to 350°F. Brush the tops of the buns with the egg wash. Sprinkle with sesame seeds and bake in the preheated oven for 25 minutes, or until buns are golden brown. Let cool slightly before eating.
I’ve been making this caramel corn for years now, and it still hasn’t let me down. The results are consistently good and it couldn’t be easier. My step-dad loves this popcorn so much that I started making it for him for Christmas. This past holiday, I stuffed a 3-foot tall stocking full of caramel corn… and included some gift certificates for more batches of it throughout the year. He cashed in one of the gift certificates recently and here are the results. It was so irresistible that I ended up making two batches – one for him, and one for Mike and me. We may or may not have eaten the entire batch in just a few short days.
Feel free to use more or less popcorn. I’ve started to use closer to 8 quarts of popcorn so that the caramel is a bit lighter and you get the occasional piece that isn’t 100% coated in caramel. Use just 6 quarts for a very in-your-face sweet, sweet caramel corn.
Crunchy Caramel Popcorn makes 6 – 8 quarts
3/4 cup butter 2 cups brown sugar 1/2 cup corn syrup 1 teaspoon salt 1/2 teaspoon baking soda 1 teaspoon vanilla extract 6 – 8 quarts air-popped popcorn
Preheat oven to 250°F. Line three baking pans with foil or spray with cooking spray.
In a medium saucepan over medium heat, melt butter. Stir in brown sugar, corn syrup and salt. Bring to a boil, stirring constantly. Allow to boil, unstirred, for 4 minutes. Remove from heat and stir in soda and vanilla.
Pour popcorn onto baking pans, dividing evenly between three pans.
Pour caramel in a thin stream over popcorn, stirring to coat.
Bake in preheated oven for one hour, stirring every 15 minutes. Remove from oven and let cool completely. Stir gently, breaking up large pieces. Serve immediately or store in air-tight container.
Tips for clean up – soak the pot and utensils in hot water. The sticky caramel will melt right off and there will be minimal scrubbing required. The foil in the pans will give you a quick, easy clean up. Just crumple up and toss!
I’ve been loving the spring weather this week. All the snow is gone and the temps have been warm enough for me to run in a tee. Mike and I are hoping to take advantage of this weather by going on a nice, long hike and with the pups this weekend and then grilling out after. Fingers crossed that the forecast is wrong and that it doesn’t rain!
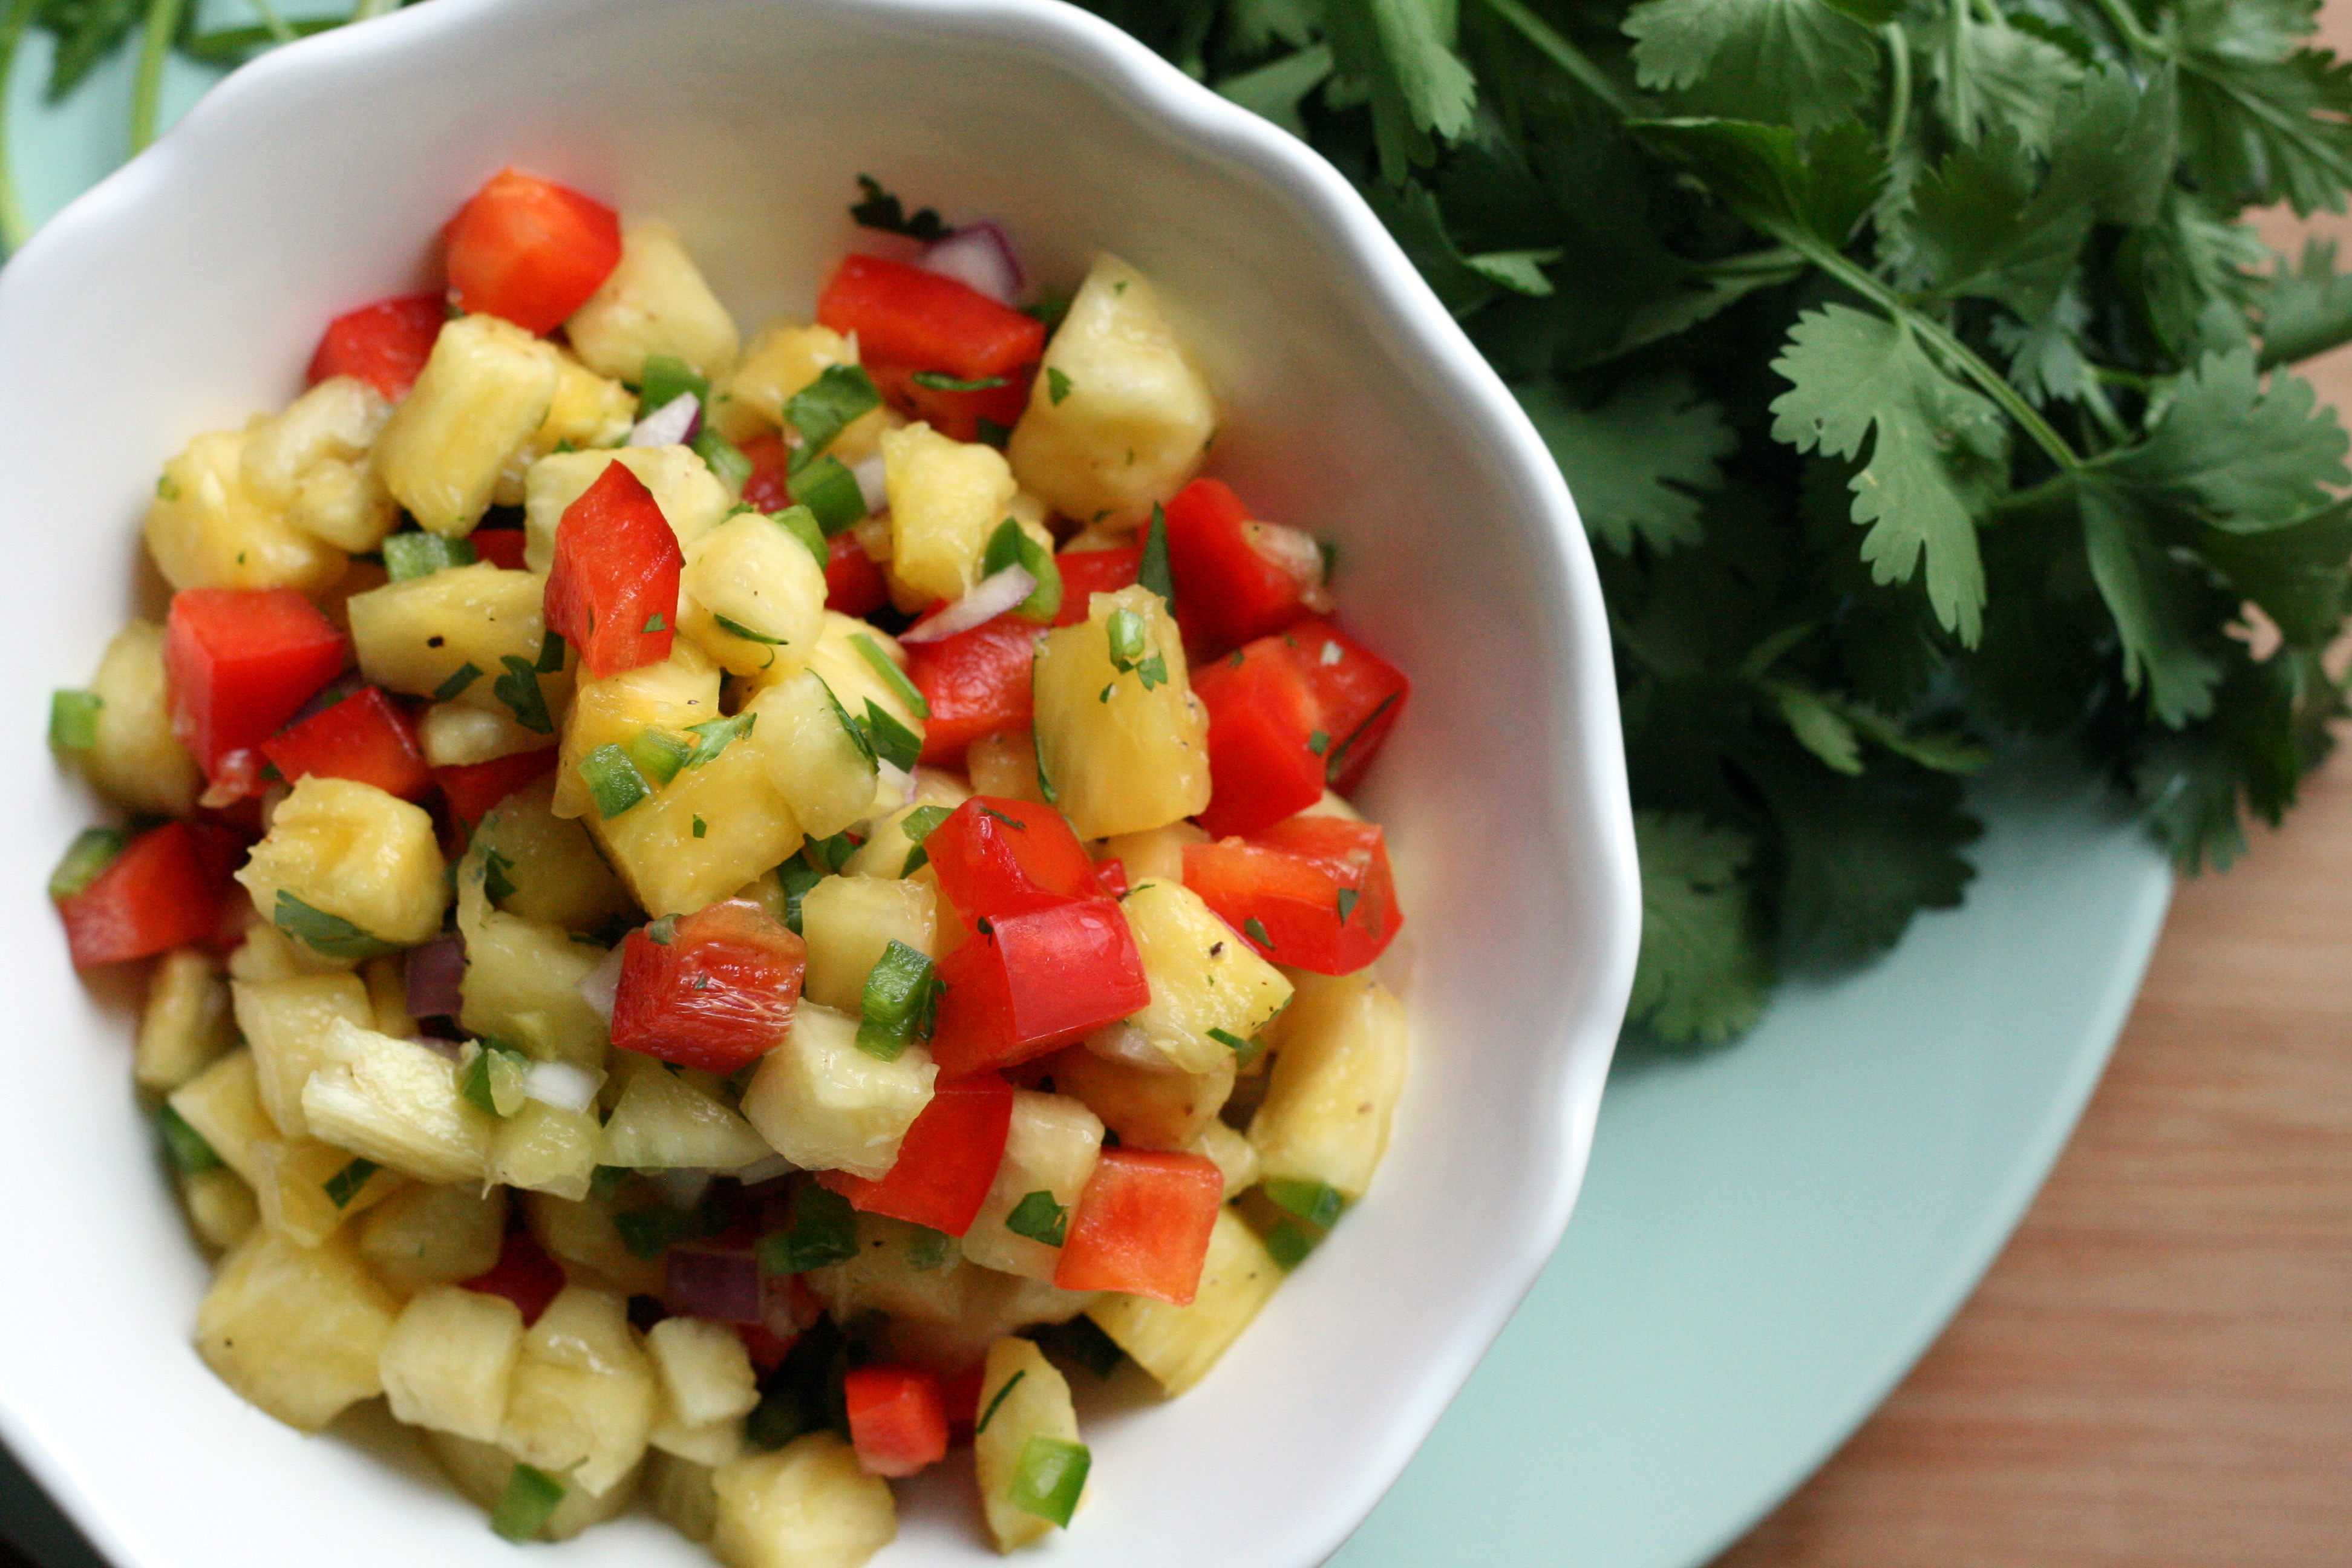
This pineapple salsa is sweet with the perfect amount of heat. It’s super versatile, too. I ate it with chicken, with pretzel thins, and even just straight-up with a spoon.
Fresh Pineapple Salsa
1/2 pineapple peeled, cored and cut into 1/4-inch dice (about 3 cups)
1/2 cup diced red onion
1 1/2 cup diced red bell pepper
1 jalapeno, seeded and minced
1 tablespoons freshly squeezed lime juice
1/2 cup chopped cilantro
salt and pepper, to taste
In a large nonreactive bowl, stir together pineapple, onion, bell pepper, jalapeno, lime juice and cilantro. Season with salt and pepper.
I can still remember a few (many?) years ago my mom handed me two cookbooks and told me to pick one. One was a Bobby Flay cookbook. The other, a Ming Tsai cookbook. It was a no-brainer – I chose Ming. I’m a cookbook hoarder – I have a scary amount of cookbooks stockpiled in our house. I love looking through them, but I rarely cook from them. Simply Ming is one exception; I cook from his book all the time.
Ming Tsai has yet to let me down. Everything I’ve made of his has been delicious, and this savory-sweet chutney is no exception. It is out of this world. Seriously. I had Mike taste it for a seasoning-check and he asked if he could have it for dinner (ha! crazy man). I am obsessed with this stuff. My one regret is that I didn’t make a double batch of it. I want to put it on everything right now. I have two recipes coming up in the next week or so that will use this chutney and they, too, are pretty dang delicious.
Ginger-Apple Chutney makes about 4 cups
4 cups Fuji apples (about 6 – 8 apples), peeled, cored and cut into 1/4-inch dice 1 lemon, juiced 1 tablespoon canola oil 2 medium onions, cut into 1/4-inch dice 2 tablespoons peeled and minced fresh ginger kosher salt and freshly ground black pepper 1 cup rice wine vinegar 1 cup apple juice
Toss apples with lemon juice in a large bowl.
Heat oil in a large saucepan over medium heat. Add in onions and ginger and saute until onions are soft, about 3 -4 minutes. Add the apples and stir to combine. Cook for about 3 minutes, stirring occasionally. Season with salt and pepper, to taste.
Add in vinegar and apple juice and simmer for about 30 minutes, or until only 1/2 cup liquid remains.
Taste and season with salt and pepper, if needed. Refrigerate for up to 1 week.
Hummus is one of my favorite snack foods. It’s so, so easy to make, but I’m guilty of buying hummus when I’m feeling extra lazy. The store-bought hummus is good, the store-bought spicy hummus is even better, but this homemade spicy hummus tops it all.
Jalapeno Cilantro Hummus
2 – 15 ounce cans garbanzo beans, drained
1/4 cup olive oil
3 limes, juiced (about 1/3 cup)
2 jalapenos, seeds removed and chopped (use 1 jalapeno for a mild hummus)
3 cloves garlic, minced
1 cup cilantro, chopped
salt and pepper
to serve: fresh cut veggies, pita chips, tortilla chips
Place all ingredients into a food processor or blender. Blend until smooth. Season with salt and pepper, to taste.
I’d like to say that I’ve grown from this experience. I think I have. I’ve learned to think about my life situation in a different light. I hope I can carry this wisdom with me as I continue in my “normal” life now. I’ve learned that I can live without so many things that I’ve deemed necessary in the past. That $5 after-work cocktail to unwind? No longer is it a necessity on a Friday. It’s a luxury. That $5 could feed a person for an entire flippin’ day. That $5 fed me for a day.
I’m well aware that living on a limited budget for a week doesn’t come close to the struggles that low-income families face for weeks, months, or years on end. It does, however, give me a better understanding and a new perspective. It was also a good reminder to why I volunteered for so many years at food pantries. It was the push I needed to get back out there again; because no matter how busy life gets or how hard it may seem, there is always time to help another person out.
What we ate on our last day:
Breakfast: oatmeal with egg (me) and whole wheat toast with peanut butter and banana (Mike)
Snack: grapes (me) and cookies and pineapple chunks (Mike)
Lunch: black bean soup with baked tortilla chips and guacamole (me) and sandwich with turkey, cheddar cheese, guac, and mustard (Mike)
Dinner: black bean soup
I will leave you with my favorite meal of the SNAP Challenge: spicy black bean soup with a cumin lime sour cream and baked tortilla chips.
Spicy Black Bean Soup with Cumin Lime Sour Cream
2 tablespoons canola oil
2 onions, chopped
2 carrots, diced
4 jalapenos, minced
5 garlic cloves, minced
2 tablespoons cumin
2 tablespoons chili powder
2 teaspoons white pepper
2 teaspoons dried oregano
6 cans (15 ounces each) black beans, drained but not rinsed
2 cups cherry tomatoes, halved
7 cups water
for the sour cream: 1/2 cup light sour cream
1/4 teaspoon cumin
1 lime, juiced
salt and freshly ground black pepper
2 green onions, thinly sliced
baked tortilla chips (recipe below)
Heat olive oil in a large stock pot over medium-high heat. Add onions, carrot, jalapenos, and garlic. Saute until onions are translucent, about 3 – 5 minutes.
Add spices and stir until well combined. Continue to cook for 3 minutes, stirring frequently.
Add beans, tomatoes, and water and bring soup to a boil. Reduce heat to a simmer and cook until thickened, about 40 – 45 minutes.
Meanwhile, prepare the sour cream: To make the sour cream, combine all ingredients in a bowl. Refrigerate until needed.
When soup has thickened, use an immersion blender and blend soup until smooth or use a blender to puree in small batches.
Garnish with sour cream and sliced green onions and serve with baked tortilla chips.
Today’s Feeding America prompt: “We know that low-income Americans have to make choices between groceries, prescriptions, gas for the car, utilities, and other household necessities. After living on a limited food budget this week, how has your perspective changed about the decisions families facing hunger must make?“
Simply put? I can’t imagine it. Even thought I have limited our food budget, our scenario in no way even compares to what millions of families deal with on a daily basis. We were hungry, but we didn’t go hungry. I had the comfort of knowing that I could fail out of the challenge and get something to eat if we did run out of food. These families don’t have that option.
While Mike and I try to stick to a budget, we realize that sometimes things happen. We might need more gas one week. I might get sick and need to see a doctor or pick up some meds (Mike never gets sick…). Or my car brakes might decide to die. Or my car wipers might decide to stop working…. Yeah, my car is a trouble maker. But, we deal with these unexpected expenses. I honestly don’t know what I would do if I had to choose between gas to get to work or a meal for my family. Would I walk? Try to catch a ride from a coworker? What if someone got really sick? Do we go to the doctor? Do we pay for their medication? Having to choose between life essentials doesn’t seem right.
All these “what ifs” make it clear to me that programs like SNAP are essential for low-income families. It’s a good reminder to be thankful for what I have in life.
This Challenge is bringing about a lot of emotions. Mike and I talk a lot about food insecurity and poverty on the way to work. It’s a really intense way to start the day. Things are getting a little easier for me now. We only have 2 more days left of the Challenge and I can tell that we will have enough food. It’s still hard not having the luxury of eating whatever we want, whenever we want, but I’m starting to adjust.
Unfortunately, I think I’m also getting sick. All I wanted to do after work is eat a bowl of mango sorbet and go to bed. But I couldn’t. I couldn’t even skip making dinner because if I didn’t cook dinner that would mean I wouldn’t have lunch the next day. Blargh.
What we ate today:
Breakfast: savory oatmeal with an egg (me) and peanut butter toast with sliced banana (Mike)
Snack: peanut butter toast with 1/4 banana (me) and a cookie (Mike)
Snack: peanut butter toast with 1/4 banana (me) and turkey sandwich with mustard (Mike)
Dinner: chicken fajitas with guacamole, tortillas, and sauteed zucchini (Mike also had cheese and sour cream)
Snack: raisins
Easy Chicken Fajitas
for the chicken:
1 lime, juiced
3 cloves garlic, minced
1/4 teaspoon chili powder
1/4 teaspoon ground cumin
salt and pepper, to taste
2 boneless, skinless chicken breast
1 teaspoon canola oil
for the vegetables: 3 onions, halved and sliced into 1/4-inch pieces
2 bell peppers, sliced into 1/4-inch strips
salt and pepper, to taste
to serve: flour tortillas
sharp cheddar cheese, grated
light sour cream
guacamole (see below for recipe)
In a shallow bowl, combine lime juice, garlic, chili powder, cumin, salt and pepper*. Taste and adjust seasonings if needed. Add chicken and turn to coat. Cover and place in the refrigerator for 30 minutes, turning every 10 minutes.
Heat oil in a large nonstick skillet over medium heat, Brown chicken and cook until cooked through and meat is no longer pink in the middle. Remove from heat and keep warm.
Using the same skillet, add vegetables and saute until tender-crisp, about 10 minutes. Slice chicken into 1/4-inch pieces and toss with vegetables. Serve immediately with tortillas and garnishes, if desired.
*I made a double batch of this marinade and mixed half of it in with my garden zucchini! I seeded the squash, quartered it, and then sauteed it with the marinade over medium heat for about 15 minutes until tender. Delish 🙂
This guac made not being able to have cheese and sour cream on my fajita a little more bearable. I ate a ton of it. Splurging on an extra avocado during the shopping trip was totally worth it!
Guacamole
2 medium avocados
1 lime, juiced
2 Roma tomatoes, seeded and diced
1/4 onion, finely diced
1 clove garlic, minced
salt and pepper, to taste
In a medium bowl, mash avocados with a fork. Mix in lime juice, tomatoes, onion, garlic, salt and pepper. Stir until well combined.
I love going to the farmer’s market. I’m proud to say that Madison is home to one of the greatest farmer’s markets ever. I’m also proud to say that the Appleton market is also pretty darn spectacular. I try to go to the market every weekend. Since we have a garden full of veggies, I don’t usually end up buying any vegetables. The one thing I make sure I walk away with? Kettle corn.
Yum. There’s something about that sweet and salty combination that just get to me. It’s dangerous. One minute I have a warm, foot-tall bag. The next, it’s empty and my stomach hurts. To make it worse, I am left kettle corn-less for a whole week until I buy another bag on Saturday. Repeat over and over and over.
Well, I finally figured it out. I can make it at home with my Whirley Pop! This is bad news. I made my first batch on Friday night as a movie snack. I inhaled it. Then Saturday night I ate kettle corn for dinner. I’m going to be out of town for work for a couple days, and I’m contemplating cooking up a huge batch of it to bring with me. A suitcase half full of kettle corn… Hmm.
Sweet & Salty KettleCorn make this easy snack in a Whirley Pop* or a large lidded pot
1 tablespoon canola oil
1/2 cup popcorn kernels
1/4 cup sugar
salt
Whirley Pop directions: Heat canola oil in a Whirley Pop over medium-high heat. Place a few popcorn kernels in the popper. When the kernels pop, it means the oil is hot enough! Place remaining kernels in and pour in sugar, stirring constantly. Stir popper over heat until popping slows down to 3 – 5 seconds between pops. Remove from heat and continue to turn handle until popping stops.
Large pot directions: Heat canola oil over medium-high heat with a few popcorn kernels. Once these kernels pop, pour in the remaining kernels and sugar and stir quickly with a wooden spoon to coat the kernels. Cover the pot and shake vigorously every 5 – 10 seconds to keep sugar from burning. Continue to shake until popping slowly to 3 – 5 seconds between pops. Remove from heat and continue to shake until popping stops.
Pour popcorn into a large bowl, shaking salt over it as you go.
Popcorn may stick as it cools – simply give it a good shake in the bowl or gently break it up with a wooden spoon.
Serve immediately. Sharing is optional 🙂
*Don’t have a Whirley Pop? Get one. Now. I use mine all the time to make popcorn! I’m pretty sure that there’s no such thing as too many popcorn makers. I also own an air popper and I’ve been known to make microwave popcorn as well once in a while. YOLO.