DoughSeeDough

a balanced plate with room for dessert


Leave a comment

Vegan Cranberry Orange Muffins

Vegan Cranberry Orange Muffins | doughseedough.net

A cup of coffee is definitely not the best part of waking up. At least not for me. These muffins, though? These muffins are worth waking up for. I am cranberry-obsessed. I seriously cannot get enough of this tangy fruit. I need to make a mental note to stock up on the fresh berries while they’re available so I can hoard them in my freezer and use them throughout the year (and not just during the holidays). If you’re searching for some easy brunch ideas for your holiday gatherings, give these muffins a try!

Vegan Cranberry Orange Muffins | doughseedough.net

Vegan Cranberry Orange Muffins
makes 12 muffins

2 cups all purpose flour
2/3 cup sugar
2 teaspoons baking powder
1/2 teaspoon baking soda
1/2 teaspoon salt
2 tablespoons orange zest (from about 4 large oranges)
1 cup fresh-squeezed orange juice (from about 4 large oranges)
1/4 cup canola oil
1/4 cup unsweetened applesauce
2 teaspoons pure vanilla extract
1/4 teaspoon almond extract
1 1/2 cup fresh cranberries, roughly chopped
1/2 cup chopped walnuts

  1. Preheat oven to 375°F. Lightly grease a muffin tin or line with liners.
  2. In a large bowl, whisk together flour, sugar, baking powder, baking soda, salt and orange zest. Make a well in the center of the dry ingredients and pour in orange juice, canola oil, applesauce, vanilla extract, and almond extract. Mix by hand for 5 seconds or until wet and dry ingredients just start to come together. Add in cranberries and walnuts and continue to mix until ingredients are just moistened, being careful not to overmix.
  3. Fill muffin tins 3/4 full. Bake for 20 – 25 minutes, or until muffins are lightly browned on top and a toothpick inserted into the center comes out clean.
  4. Let cool in pan for 5 minutes before moving to a wire rack to cool completely.


recipe slightly adapted from Post Punk Kitchen


2 Comments

Vegan Iced Pumpkin Coffee Cake

Vegan Iced Pumpkin Coffee Cake with Streusel Topping | doughseedough.net

I’ve finally given in to pumpkin. Pumpkin treats, that is. I suppose it’s that time of year – leaves are turning, it’s getting colder, days are getting shorter… there’s even a threat of snow around here.

I love all things pumpkin except for pumpkin pie. Pumpkin cookies, pumpkin cheesecake, pumpkin cinnamon rolls… you name it, I’ll eat it. This pumpkin cake has won over my heart. It is definitely the pumpkin treat of choice for me. I will eat and eat and eat and eat until it’s gone. Seriously, it’s that good. Pumpkin cake with a streusel topping and some icing – what can be better than that?

I came across this recipe when I was looking around for a brunch dish for a work party. I made the coffee cake and it smelled (and looked) so good that I knew I couldn’t wait until the next day to eat it. So, I made another one. Big mistake. Mike and I ate about a quarter of the cake that night. And then we kept eating it the next day… and the next. And then it was gone. I was heartbroken when it was gone because I was also out of pumpkin. I stocked up on pumpkin this weekend so I can make sure we have a steady supply of this amazingness for a couple weeks 😉

Vegan Iced Pumpkin Coffee Cake with Streusel Topping | doughseedough.net

Vegan Iced Pumpkin Coffee Cake
serves 10

for the streusel topping:
1/2 cup all purpose flour
1/2 cup brown sugar
1/4 teaspoon salt
2 teaspoons ground cinnamon
1/4 cup dairy free butter substitute (I use Earth Balance)

for the cake:
2 cups all purpose flour
1 teaspoon baking soda
1/2 teaspoon baking powder
1/2 teaspoon salt
1 1/2 teaspoons ground cinnamon
2 teaspoons pumpkin pie spice
1 cup pure pumpkin puree
1/2 cup brown sugar
1/2 cup canola oil
1/4 cup pure maple syrup
1/4 cup plain almond milk

for the glaze:
1 cup powdered sugar
2 tablespoons unsweetened almond milk

  1. Preheat oven to 350°F. Spray an 8×11 or 9×9 baking pan and grease with butter substitute or nonstick spray. Set aside.
  2. To make the streusel topping, combine flour, brown sugar, salt and cinnamon in a small bowl. Cut in butter with a fork, two knives, or a pastry blender until mixture is crumbly. Set aside.
  3. To make the cake, combine flour, baking soda, baking powder, salt, cinnamon, and pumpkin pie spice in a large bowl. In a separate bowl, whisk together pumpkin puree, brown sugar, oil, maple syrup and milk until well combined. Pour wet ingredients into the dry ingredients and mix until just combined, being careful not to over mix. Pour batter into prepared baking pan and use a spatula to smooth out the top.
  4. Sprinkle prepared streusel topping over the batter and gently press down into the batter. Bake in preheated over for about 30 minutes, or until a toothpick inserted into the center comes out clean.
  5. When cake is almost done baking, make the glaze. In a small bowl, combine the powdered sugar and almond milk and whisk until smooth. Drizzle over cake. Serve immediately, or keep at room temperature for up two three days.

recipe slightly adapted from Sally’s Baking Addiction


4 Comments

Banana Espresso Chocolate Chip Muffins

Lightened Up Banana Espresso Chocolate Chip Muffins | doughseedough.net

I’m a cookbook junkie. I have shelves and shelves of cookbooks of all different types. I seriously love them. I honestly love just having them – I don’t cook a lot from them. In fact, most of my cookbooks get looked at once, maybe twice a year. As always, there are exceptions. Baked: New Frontiers in Baking is my most recent purchase and I’m obsessed with it. Every single dish I’ve made from it has been amazing. If you don’t own this book, I beg you – BUY IT!

Now, these muffins… so so good. In fact, I made these about 2 months ago for some friends. They were gobbled up before I even got a chance to take a photo for the blog. Thankfully, these muffins are also very easy to make and really tasty so I didn’t mind having to make these again! In fact, I whipped these up before heading to work on Friday. It only took about 20 minutes of prep time and another 20 for baking. I  made a few adjustments so they would be a bit healthier and I loved how they turned out!

Lightened Up Banana Espresso Chocolate Chip Muffins | doughseedough.net

Banana Espresso Chocolate Chip Muffins
very slightly adapted from Baked: New Frontiers in Baking

3 cups mashed, very ripe bananas (6 – 7 medium – large bananas)
1 cup sugar
1/2 cup packed brown sugar
1 stick unsalted butter, melted
1 cup unsweetened applesauce
1/2 cup skim milk
2 large eggs
1 1/2 cup all purpose flour
2 tablespoons instant coffee granules
3 teaspoons baking soda
2 teaspoons salt
2 cups bittersweet chocolate chips

  1. Preheat oven to 350°F. Line 2-12 cup muffin pans with liners or grease with nonstick spray.
  2. In a medium bowl, stir together bananas, sugar, brown sugar, butter, applesauce,  milk, and eggs.
  3. In a large bowl, whisk together flour, instant coffee, baking soda, and salt. Make a well in the middle of the dry ingredients and slowly pour in wet ingredients. Stir until just combined. Fold in chocolate chips.
  4. Fill prepared muffin cups with batter, filling each one 3/4 full.
  5. Bake for 20 – 25 minutes, or until a toothpick inserted into the center comes out clean.
  6. Let cool in pan for 10 minutes before removing the muffins and placing on a cooling rack to cool completely.


1 Comment

Chicken Gyros & Homemade Pocketless Pita

chicken gyros | doughseedough.net

I love gyros. I love watching the cooks shave off pieces of the tender lamb from the… meat cone or whatever you might call it. This time, I tried making my own at home. I chose to make the pita versus buying it, but if you’re looking to save some time then by all means use a pocketless pita from the grocery store!

pocketless pita | doughseedough.net

The entire process took me just under two hours, but the results were so worth it. My schedule was like this: marinate chicken and refrigerate, mix dough for pita and let rise for 30 minutes, make tzatziki while waiting for chicken and dough. Refrigerate finished tzatziki, roll out dough for pita, cook chicken and pita simultaneously. In between flipping pitas, slice tomatoes and onions. Assemble and serve.

Sure, it’s quite a bit of multitasking, but I think I made pretty good use of my time and when I got around to assembling, the chicken was still piping hot and the pitas were perfectly warm. The best part? I had all ingredients on hand already. Yes, I do keep a huge tub of Greek yogurt in my fridge at all times.

chicken gyros | doughseedough.net

Chicken Gyros
adapted from Elly Says Opa and Kalofagas

For the chicken:
1.25 pounds chicken breast
4 cloves garlic, smashed
juice of 1 lemon
2 teaspoons red wine vinegar
2 tablespoons extra virgin olive oil
1/4 cup plain nonfat Greek yogurt
1 tablespoon dried oregano
salt and pepper

For the tzatziki:
1 – 17.6 ounce tub of plain nonfat Greek yogurt
1 cucumber, seeded
4 cloves garlic, minced
1 teaspoon white wine vinegar
juice from half a lemon
salt and pepper, to taste

For the pita:
1 1/2 teaspoons active dry yeast
1 teaspoon salt
1 teaspoon sugar
2 tablespoons olive oil
1 1/2 cup warm water (110°F)
3 1/2 cups all purpose flour, plus more for dusting
canola oil

For toppings:

1 medium red onion, thinly sliced
3 roma tomatoes, thinly sliced

  1. Make a marinade for the chicken by whisking together garlic, lemon juice, vinegar, oil, yogurt, oregano, salt and pepper in a large bowl. Add the chicken and rub the marinade in. Cover and refrigerate for 1 hour. 
  2. Heat a large nonstick pan over medium heat and lightly coat with olive oil. Brown chicken on both sides and cook until juices run clear, about 4 – 6 minutes per side.  Let rest before slicing into strips.
  3. To make the tzatziki: shred or grate the cucumbers and squeeze excess moisture out. Make sure to get as much liquid out as possible! Mix together yogurt, cucumbers, garlic, vinegar, lemon juice, salt and pepper. Refrigerate at least 30 minutes before serving to allow flavors to meld.
  4. To make the pitas: in a large bowl, mix together yeast, salt, sugar, olive and water and let stand for 5 minutes or until top is foamy.
  5. Using your hands, gradually add in flour 1/2 cup at a time to the wet ingredients. Knead until dough pulls away from the sides of the bowl. Cover with a damp towel and let rise in a warm spot for 30 minutes.
  6. Divide dough into 6 pieces and roll out on a floured surface into 8-inch rounds about 1/4 inch thick. Lightly poke the surface with the tines of a fork, being careful not to poke through the dough.
  7. Heat a large cast iron skillet over medium-high heat. Lightly coat the skillet with oil and place one dough round into the skillet and fry the bread until it starts to puff and bubble, about 1 – 2 minutes. Flip and fry the other side. Repeat with remaining dough.
  8. Assemble gyros by piling a pita with chicken, tzatziki sauce, tomatoes, and onions. Enjoy!


2 Comments

Nutella Swirled Banana Bread

I love banana bread. Banana bread with chocolate chips? Good. Banana bread with nuts? Even better. Banana bread with Nutella? Best. I wonder if this bread can get any better. Maybe next time I’ll do Nutella, chopped hazelnuts, and chocolate chips. Boom. Taste explosion.

I especially loved eating the crust on this bread. Poor Mike was left with crustless pieces…

103

I’m going to warn you all: I am not an expert swirler. Evidence of this can be seen above. Beautiful swirls throughout the loaf? Not so much. It kind of looks like a heart, actually (awwww!!). Swirl or heart, this bread is good.

Nutella Swirled Banana Bread
slightly adapted from Sugar Plum Blog

2 1/3 cups all purpose flour
1 teaspoon baking soda
1 teaspoon baking powder
1/2 teaspoon salt
1 1/3 cup mashed ripe banana (about 3 medium)
6 tablespoon unsalted butter, room temperature
1/2 cup sugar
1/2 cup packed brown sugar
1 teaspoon vanilla extract
2 large eggs
1/2 cup Nutella

  1. Preheat oven to 350°F. Grease a 9-inch loaf pan with butter and set aside.
  2. In a medium bowl, whisk together flour, baking powder, baking soda, and salt.
  3. In a large mixing bowl, with a mixer set on  medium speed, beat together banana, butter, sugar, brown sugar, and vanilla until well combined, about 2 minutes. Beat in eggs until well combined.
  4. Reduce mixer speed to low and beat in flour mixture until just combined. Remove half the batter to a medium bowl and stir in Nutella.
  5. Take turns spooning Nutella batter and plain batter into the loaf pan. Swirl the batters together gently with a knife.
  6. Bake in preheated oven for 60 minutes or until a toothpick inserted into the center comes out with clean.


1 Comment

Homemade White Bread

027a

Nothing goes better with homemade soups and stews than a freshly baked loaf of bread. I strayed from my tried-and-true bread recipe to try this classic white bread recipe from Cooking Light. This was super easy and I had all the ingredients on hand. The bread was light and fluffy and the crust baked up to a perfect crunch. This bread will definitely make several more appearances in our home.

036a

Homemade White Bread
makes 1 loaf

2 1/4 teaspoons active dry yeast
1 tablespoon sugar
1 1/2 cups warm skim milk (100 – 110°F)
2 tablespoons butter, melted
4 1/2 cups flour, divided
1 1/2 teaspoons salt
Cooking spray

  1. Dissolve yeast and sugar in milk in a mixing large bowl. Let stand 5 minutes or until foamy. Stir in butter. 
  2. Add 4 cups flour and salt to yeast mixture and stir until blended. Turn dough out onto a well floured surface, and knead until smooth and elastic about 10 minutes. If dough is sticky, add remaining 1/2 cup flour a little at a time until dough is easy to handle.
  3. Place dough in a large bowl coated with cooking spray, turning to coat top. Cover with a damp cloth and let rise in a warm place for 1 hour or until doubled in size.
  4. Punch dough down and let rest for 5 minutes. Roll into a 14×7 inch rectangle on a well-floured surface. Roll up rectangle tightly, starting from the short edge. Pinch seam ends to seal. Place loaf seam-side down in a 9×5 inch loaf pan coated with cooking spray. Cover with damp cloth and let rise 1 hour or until doubled in size.
  5. Preheat oven to 350°F.
  6. Bake for 45 minutes or until loaf is browned and sounds hollow when tapped. Remove bread from pan and let cool on wire rack.


Leave a comment

Spicy Cheese Bread

cheese bread

Nothing says “Madison Farmer’s Market” like Stella’s spicy cheese bread. If you’ve never had the chance to shove handfuls of this deliciousness into you’re mouth, you are missing out. In the summer, Capitol Square is packed full of people cradling delicious, warm bags of cheesy, doughy goodness.

I might go so far to say that this bread was the highlight of my college career.

Being in the real world means I can’t drop everything and jet off to Madison to get this bread whenever I feel like it. And I’m just not willing to shell out $8 + $9 shipping per loaf for it. Fortunately, a pretty tasty replica can be created in your own kitchen.

cheese bread

Spicy Cheese Bread

1 cup warm water
2 tablespoons yeast
2 tablespoons sugar
2 teaspoons garlic powder
1/2 teaspoon black pepper
2 teaspoons Italian seasoning
2 teaspoons crushed red pepper
1/4 cup melted butter
1/4 cup olive oil
3 cups all-purpose flour
2 teaspoons salt
8 ounces jalapeño cheese, cut into 1/4″ cubes
1/4 cup grated Parmesan cheese
1 teaspoon Italian seasoning
1 teaspoon red pepper flakes

  1. Mix together the yeast and water and let it sit for 5 minutes. Add sugar, garlic powder, pepper, Italian seasoning, and crushed red pepper. Mix in the butter and olive oil.
  2. Knead in flour a little at a time by hand or with a stand mixer fit with a dough hook. Add the salt and knead for 10 minutes, or until dough is smooth. Knead in jalapeno cheese.
  3. Grease a large bowl and place dough inside. Cover with a damp cloth and let rise for two hours, or until doubled in size.
  4. Grease a round cake pan and place dough inside. Gently press dough to pan edges. Cover with a damp cloth and let rise in a warm place for 30 minutes.
  5. Preheat oven to 400°F. Sprinkle Parmesan cheese, Italian seasoning and red pepper flakes on bread. Bake for 30 minutes until bread is golden brown. Serve warm.


Photos in this post were taken by Rebecca Li


11 Comments

Apple Pie Bread

Life is so strange. I work in food service and my days are filled with food, menu planning, nutrition… the list goes on and on. Yet, I never have time to cook. I’ve been living on school food and whatever I scrape up from the fridge at home. I was ready to live this life of school salads and random dinners for a couple months. When I started this job in July, I was told that everything would calm down by October at the latest.

Hmm. Last time I checked, it’s January, and work is still crazy. I have been dutifully taking pictures of the new dishes that I make. Unfortunately, it’s been so long since I took the pictures that I honestly cannot remember what the dish was, let alone what was in it! So, I guess I will start with one of the more recent things I’ve made: apple pie bread. I know, I know. I don’t have a lot of time to cook, so I use my precious time making things like… bread? Here’s what happened:

Cravings are a funny thing. I never seem to crave food that I have in the house. Or even food that is easily accessible to me. It’s always something that I can’t have. In this case, it was apple pie bread. More specifically, it was apple pie bread from Breadsmith. The craving hit on a Saturday night. By Sunday I was getting a bit cranky because I didn’t have any. I got ready to make the short drive over to Breadsmith and popped onto their website to make sure they had it.

Boom.

My world crashed around me. They don’t have apple pie bread on Sundays. They have it almost every other day of the week. But not Sundays. I almost launched my iPad across the room in frustration. I stewed for a few minutes before deciding to make the dang thing myself.

Now, fair warning: this is not a replica of Breadsmith’s bread. It is really good though. Honestly. Mike and I inhaled half the loaf in about 15 minutes. The rest of it was gone before Wednesday.

IMG_4233

Apple Pie Bread

For the filling:
3 apples, peeled and diced (about 3 cups)
2 teaspoons fresh lemon juice
1/2 cup brown sugar
2 tablespoons butter
2 teaspoons cinnamon
1 teaspoon nutmeg
1 teaspoon cornstarch dissolved in 2 teaspoons water

For the dough:
3/4 cup milk
1/4 cup butter
3 1/2 cups flour
2 1/4 teaspoons yeast
1/4 teaspoon salt
1/2 cup brown sugar
1/4 cup water
1 egg

For the streusel:
1/4 cup brown sugar
1/2 teaspoon cinnamon
1/4 cup flour
2 tablespoons butter, softened
1/3 cup chopped pecans

  1. Preheat oven to 350°F. Grease a 9×5 loaf pan and set aside.
  2. Combine filling ingredient in a saucepan over medium-high heat. Bring to boil. Reduce heat and simmer for 4 minutes. Remove from heat and set aside. 
  3. Heat milk and butter in a small saucepan until butter is melted.
  4. Whisk  together flour, yeast, salt, and brown sugar in a large bowl. Add in water, egg, milk and butter. With the dough hook on your stand mixer, combine all ingredients until dough comes together.
  5. Remove dough from bowl and place on a well floured surface. Knead for 5 minutes or until dough is smooth and elastic. If dough is very sticky, add additional flour 1 tablespoon at a time, until dough is no longer sticking to the counter or your hands.
  6. Roll dough out into a 1/4 inch thick rectangle. Spread filling over the dough evenly, reserving 1/3 cup of the filling.
  7. Using a pizza cutter, cut the dough into 4×5″ rectangles. With the loaf pan on it’s side, stack the pieces on top of each other. Set the pan down and, if needed, spread the dough gently to distribute through the pan evenly.
  8. Sprinkle the remaining 1/3 cup of apple filling on top of the dough.
  9. Combine streusel ingredients together in a bowl until well combined and crumbly. Sprinkle over dough.
  10. Bake for 55 – 60 minutes, or until bread is golden brown.
  11. Let cool in pan on wire rack for 20 minutes before running a knife along the edges to loosen. Enjoy!!


3 Comments

Fueling the Run with Cranberry Orange Bread

Born to run? Not me. Picked last in gym class? Spent afternoons after school in math club? That’s more like it. So, why did I choose running as my sport? To be quite honest, it’s because it is one of the few sports that don’t involve an object flying at your face. Yeah, I lack hand-eye coordination. Big time.

I was scarred for life when I played soccer in elementary school. Tennis lessons in middle school? Horrifying. To this day, I stay away from soccer, volleyball, tennis, kickball and any other sport that involves a fast-flying ball.

I started to run my junior year in college to prepare for a family vacation to the Boundary Waters. I decided to use the ever so popular Couch to 5K program as my training guide. I’m not going to lie, doing day 1 of week 1 was almost too much for me and I wanted to quit halfway through.  But, I pushed through it. Two days later, I pushed through another workout. Rinse and repeat until I could (gasp!) run for 30 minutes straight. Boundary Waters went off without a hitch. Unfortunately, having nothing to work towards after the trip, I stopped running.

I didn’t start running again until my younger sister talked me into running a 15K with her. I have no idea how she convinced me, but it turns out that my promise would change my life.  I spent that winter painfully, slooooowly running (a more accurate word would probably be shuffling) that winter, gradually working my way up to 1 mile, then 2, 3… when I finally hit 5 miles, I felt like I had conquered the world.

I trained as hard as I could and in November of 2011, I ran my very first race at the age of 24. Completing the 15k was probably one of the most proudest moments of my life. I had done what I thought was impossible: I was a runner. I ran a 5 mile Turkey Trot a few weeks later and knew I was hooked.

My sister (R) and me after the Hot Chocolate 15K in Chicago

Mike and me after the 5 mile Turkey Trot

I am now looking forward to another 15K in February and then a half marathon in May. I may not be fast, graceful, or have an athlete’s body, but I am a runner.

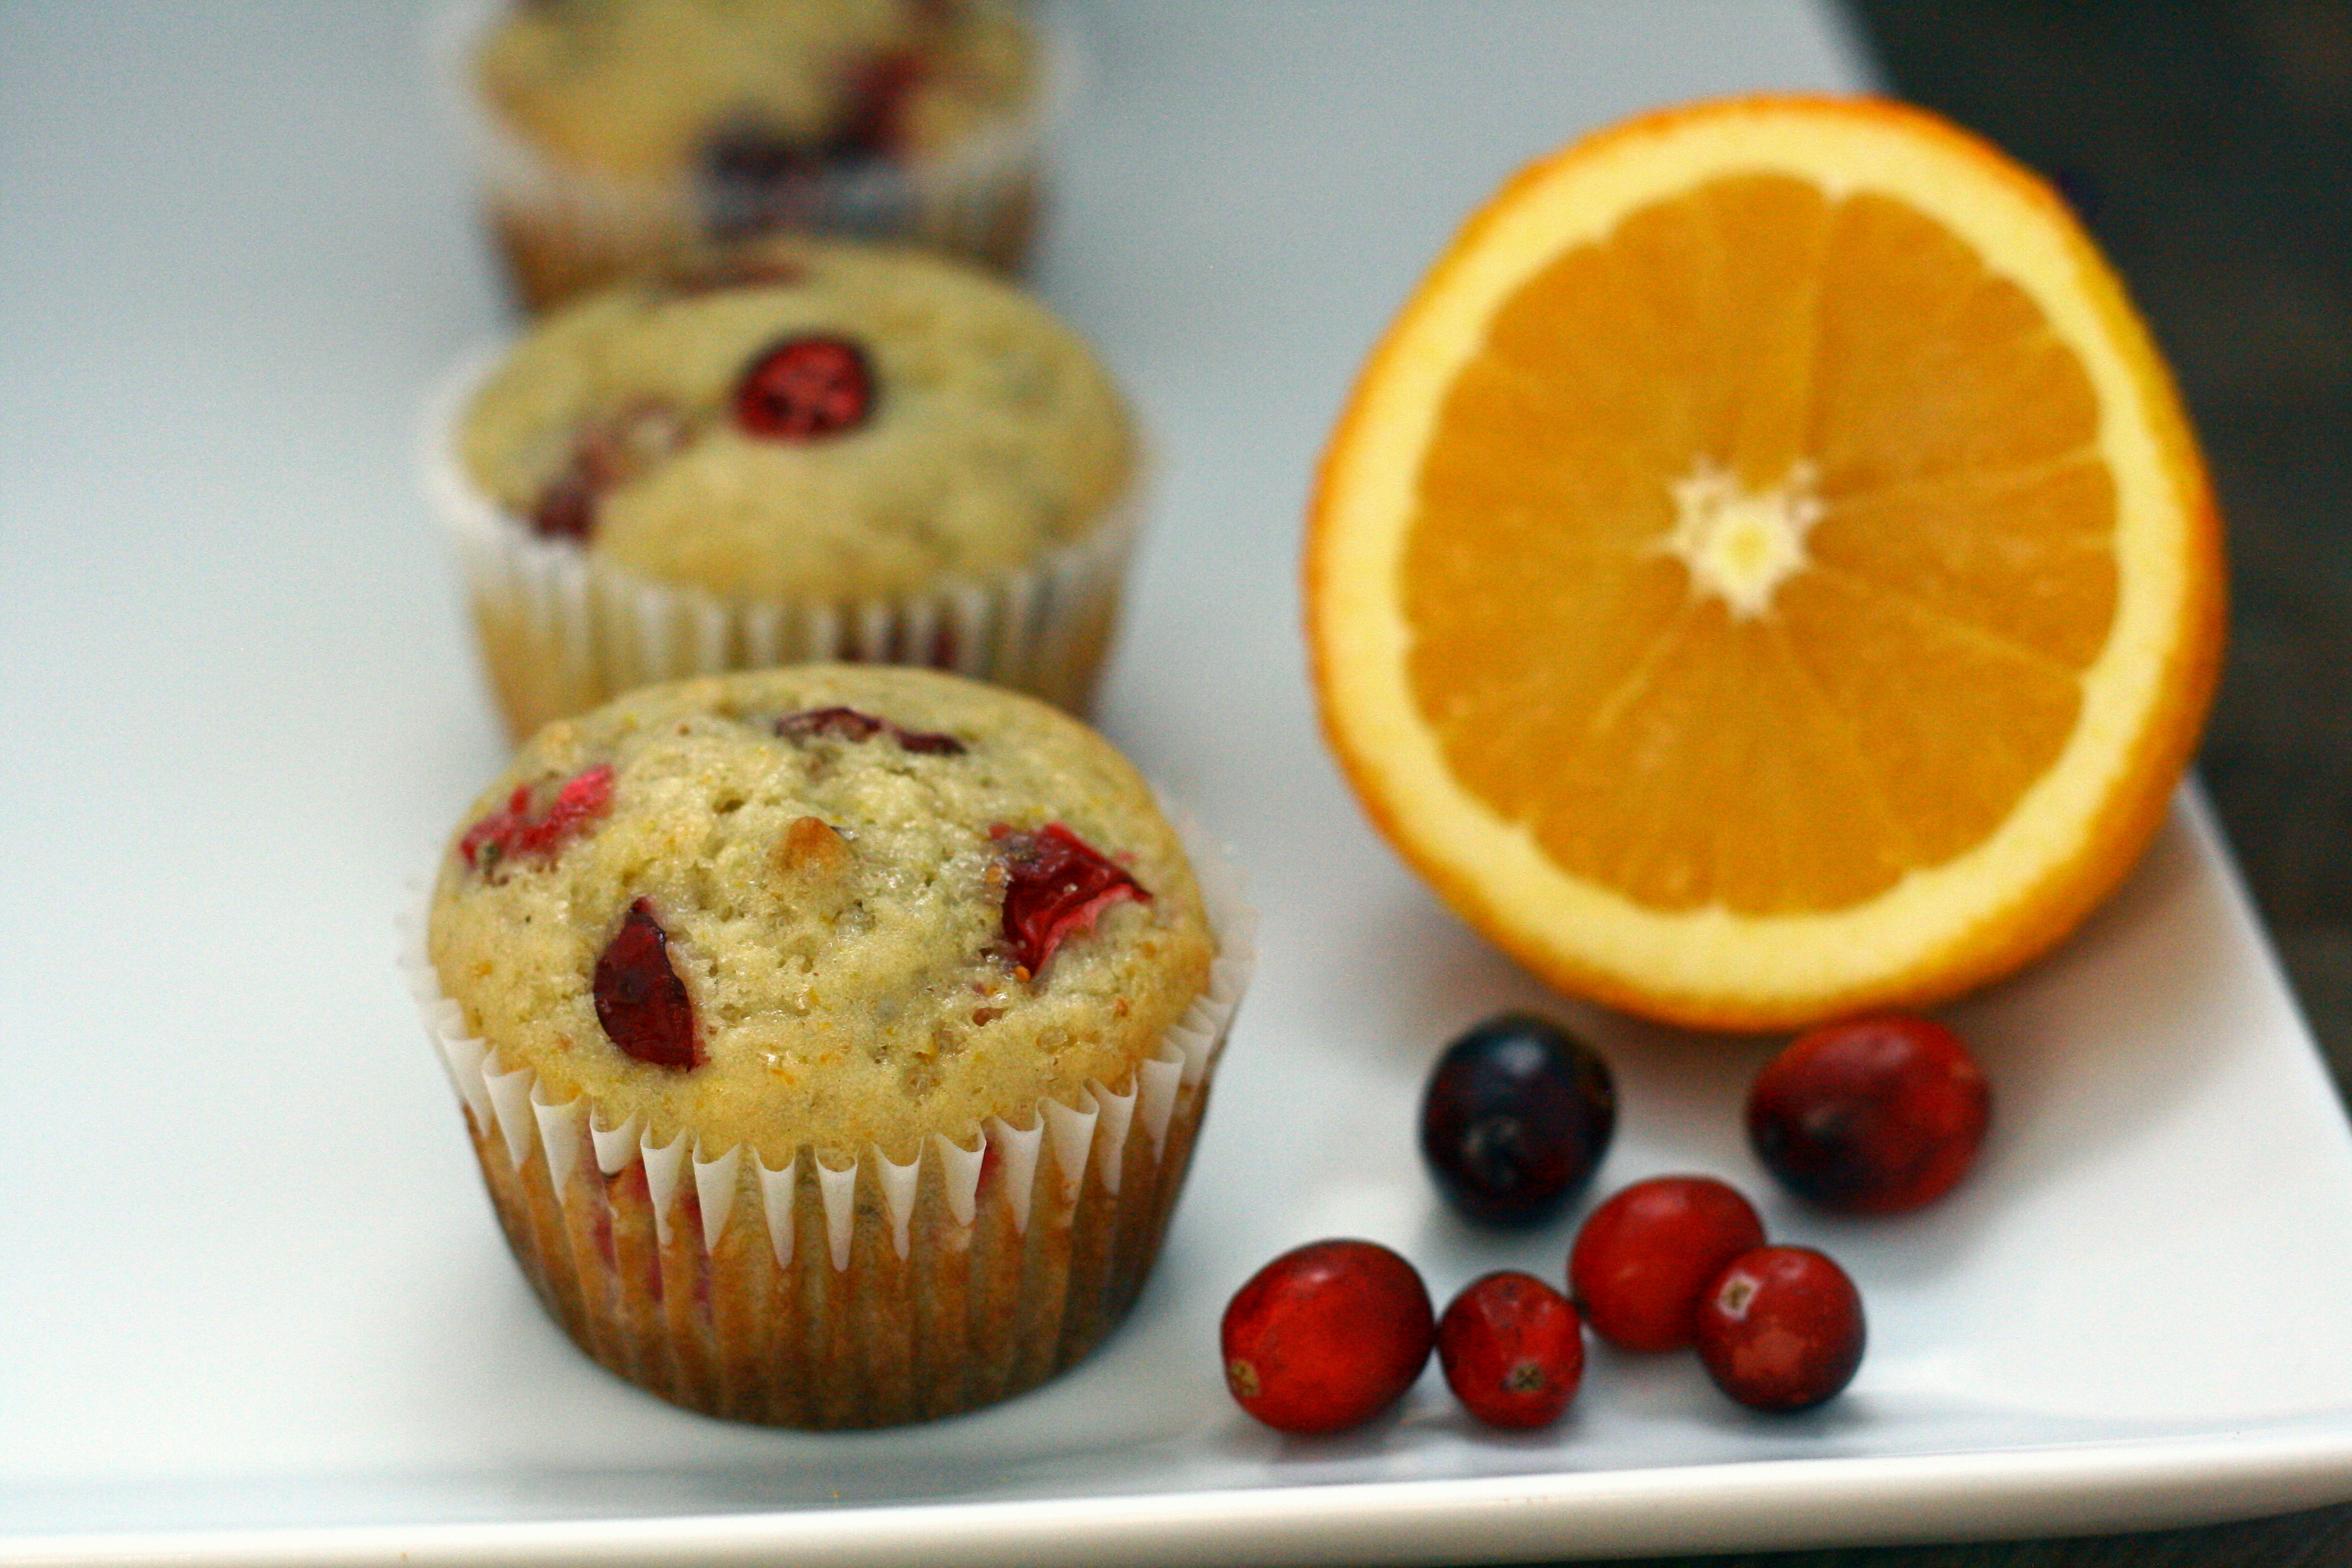
The best part? Running fueled a new interest in nutrition. I had a degree in dietetics, but never knew what I wanted to do with it until I started running. I realized how I felt after I ate certain foods. I found out my perfect pre-run (Greek yogurt and a small banana) and post-run (most recently cranberry orange bread) foods. Running urged me to continue my schooling, and that’s where I am now – working through a dietetic internship with a new passion for nutrition!

If you made it through this long-winded post (quite possibly my longest ever), I am amazed. As a thank you, I will offer you the recipe to my new favorite post-workout food – cranberry orange bread!

I have made the bread two ways now – one as written on allrecipes.com and the other with the changes published below. I prefer the recipe below – it’s a bit denser and not-so-sweet. Adding in whole wheat flour and reducing the amount of butter and sugar are an added health benefit, too!

Cranberry Orange Bread

1 cup whole wheat flour
1 cup all purpose flour
1 1/2 teaspoons baking powder
1/2 teaspoon baking soda
1/2 teaspoon salt
1 large orange, zested (about 1 heaping tablespoon)
1 1/2 cups fresh cranberries
1/2 cup walnuts, chopped
2 tablespoons butter, softened
2 tablespoons unsweetened applesauce
1/2 cup sugar
1 egg
3/4 cup orange juice

  1. Preheat oven to 350°F. Grease and flour a 9×5 loaf pan.
  2. In a medium bowl, whisk together flour, baking powder, baking soda, salt, and orange zest. Stir in cranberries and walnuts. Set aside.
  3. In a large bowl, cream together butter, applesauce, and sugar until smooth. Beat in egg and orange juice. Stir in flour mixture, mixing until just moistened.
  4. Pour batter into prepared loaf pan and bake for 55 – 65 minutes, or until bread is golden brown and springs back when lightly touched. Let stand 15 minutes and then turn out onto cooling rack to cool completely.

Recipe adapted from allrecipes.com


2 Comments

Pita Bread

I can’t believe it took me this long to make pita bread! Never again will I pay $3+ for a tiny bag of pita. I can no make it at home for just mere pennies. That’s my kinda food!!

In fact, the money you save can buy you a neat little thermometer. It will come in handy… for example, you can use it to make sure your water is the right temperature in this recipe! Or any recipe with yeast, actually.

Don’t like pita? Make this any way. It’s fun watching the dough rise in the oven from completely flat to a mini-balloon.

Pita Bread

1 1/8 cups warm water (110°F)
1 1/2 teaspoons white sugar
1 1/2 teaspoons active dry yeast
3 cups all-purpose flour
1 teaspoon salt
1 tablespoon vegetable oil

  1. In a small bowl, combine water, yeast and sugar. Let sit until foamy, about 5 minutes. Add in oil.
  2. Combine flour and salt in the bowl of a stand mixer. With a dough hook, lightly mix to combine.
  3. Pour yeast mixture into flour and mix on low (#2 on a KitchenAid) until moistened, about 30 seconds. Increase speed to medium (#4) and knead for 10 minutes, until dough is smooth.
  4. Place dough into a large, lightly oiled bowl. Cover with plastic wrap and allow to rise until double in size.
  5. Turn dough onto lightly floured surface. Stretch dough into a 12 inch rope. Cut into 8 even pieces and roll each piece into a 6 – 7 inch circle. Set aside on a lightly floured surface and cover with a towel. Let rise for 30 minutes.
  6. Meanwhile, reheat oven to 500°F and place baking stone on oven rack. Allow to heat for 20 minutes.
  7. Place dough onto baking stone (I was able to make 3 at a time) and lightly spritz with water. Bake for 3 minutes, or until pitas are puffy and tops are not yet brown.
  8. Remove from baking stone and let cool on a clean towel.