DoughSeeDough

a balanced plate with room for dessert


1 Comment

Peanut Butter Crispy Bars

Peanut Butter Crispy Bars | doughseedough.net

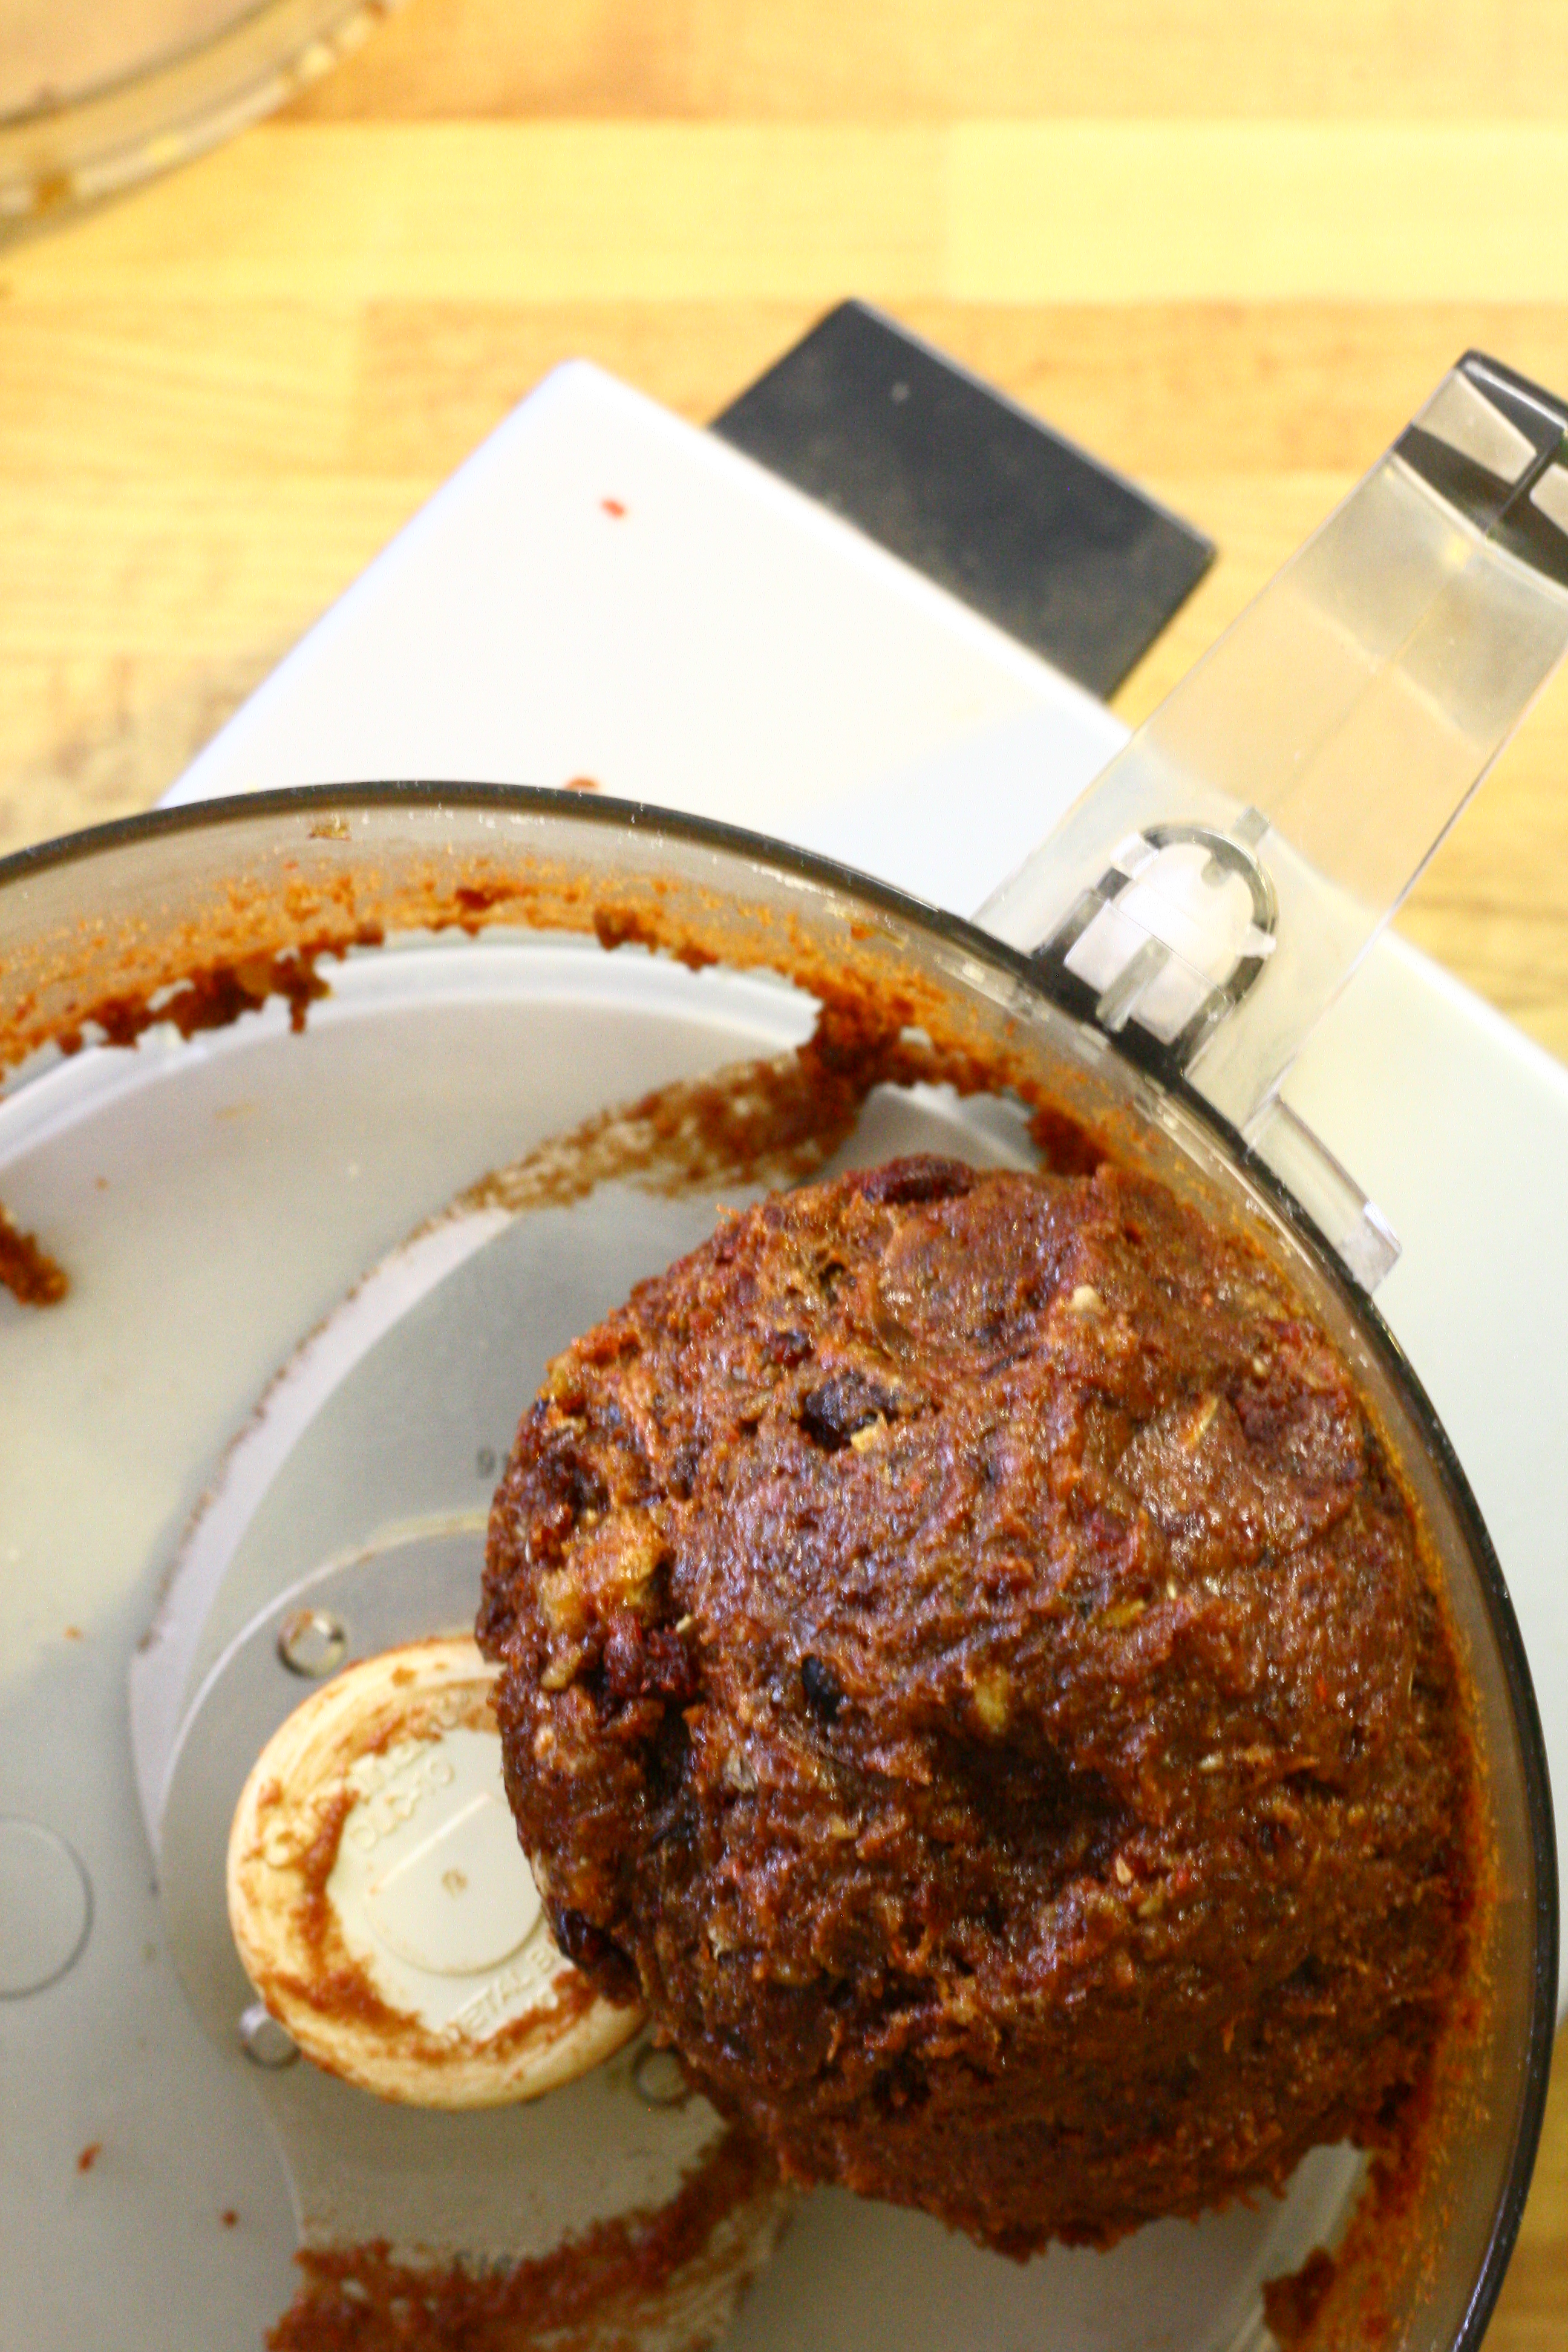
I’m going to be honest: this was my second attempt at making these bars from the Baked: New Frontiers in Baking cookbook. You see, the first time I didn’t make it too far. I started with the crispy rice cereal base and cooked the sugar base exactly as written. I used my candy thermometer and everything. Unfortunately, it wasn’t cooked long enough. The sugar water mess remained, well, a mess. It never got to the point where it became beautiful and syrupy. I mixed it into the cereal anyway, but the cereal turned into mush.

Take two was much more successful. I do think that I will make these a third time with a new modification: double the cereal base. These treats are decadent. The authors of the cookbook say that these can be cut into 9 squares. I say they should be cut into 16 squares. Or 25 squares. The chocolate:peanut butter:cereal ratio was just a little off to me. Mike loved them, though.

Peanut Butter Crispy Bars | doughseedough.net

Peanut Butter Crispy Bars
adapted from Baked: New Frontiers in Baking

for the crispy crust:
1 3/4 cups crisped rice cereal
1/4 cup sugar
3 tablespoons light corn syrup
3 tablespoons unsalted butter, melted

for the milk chocolate peanut butter layer:
5 ounces milk chocolate chips
1 cup creamy peanut butter

for the chocolate icing:
3 ounces dark chocolate, coarsely chopped
1/2 teaspoon light corn syrup
4 tablespoons unsalted butter

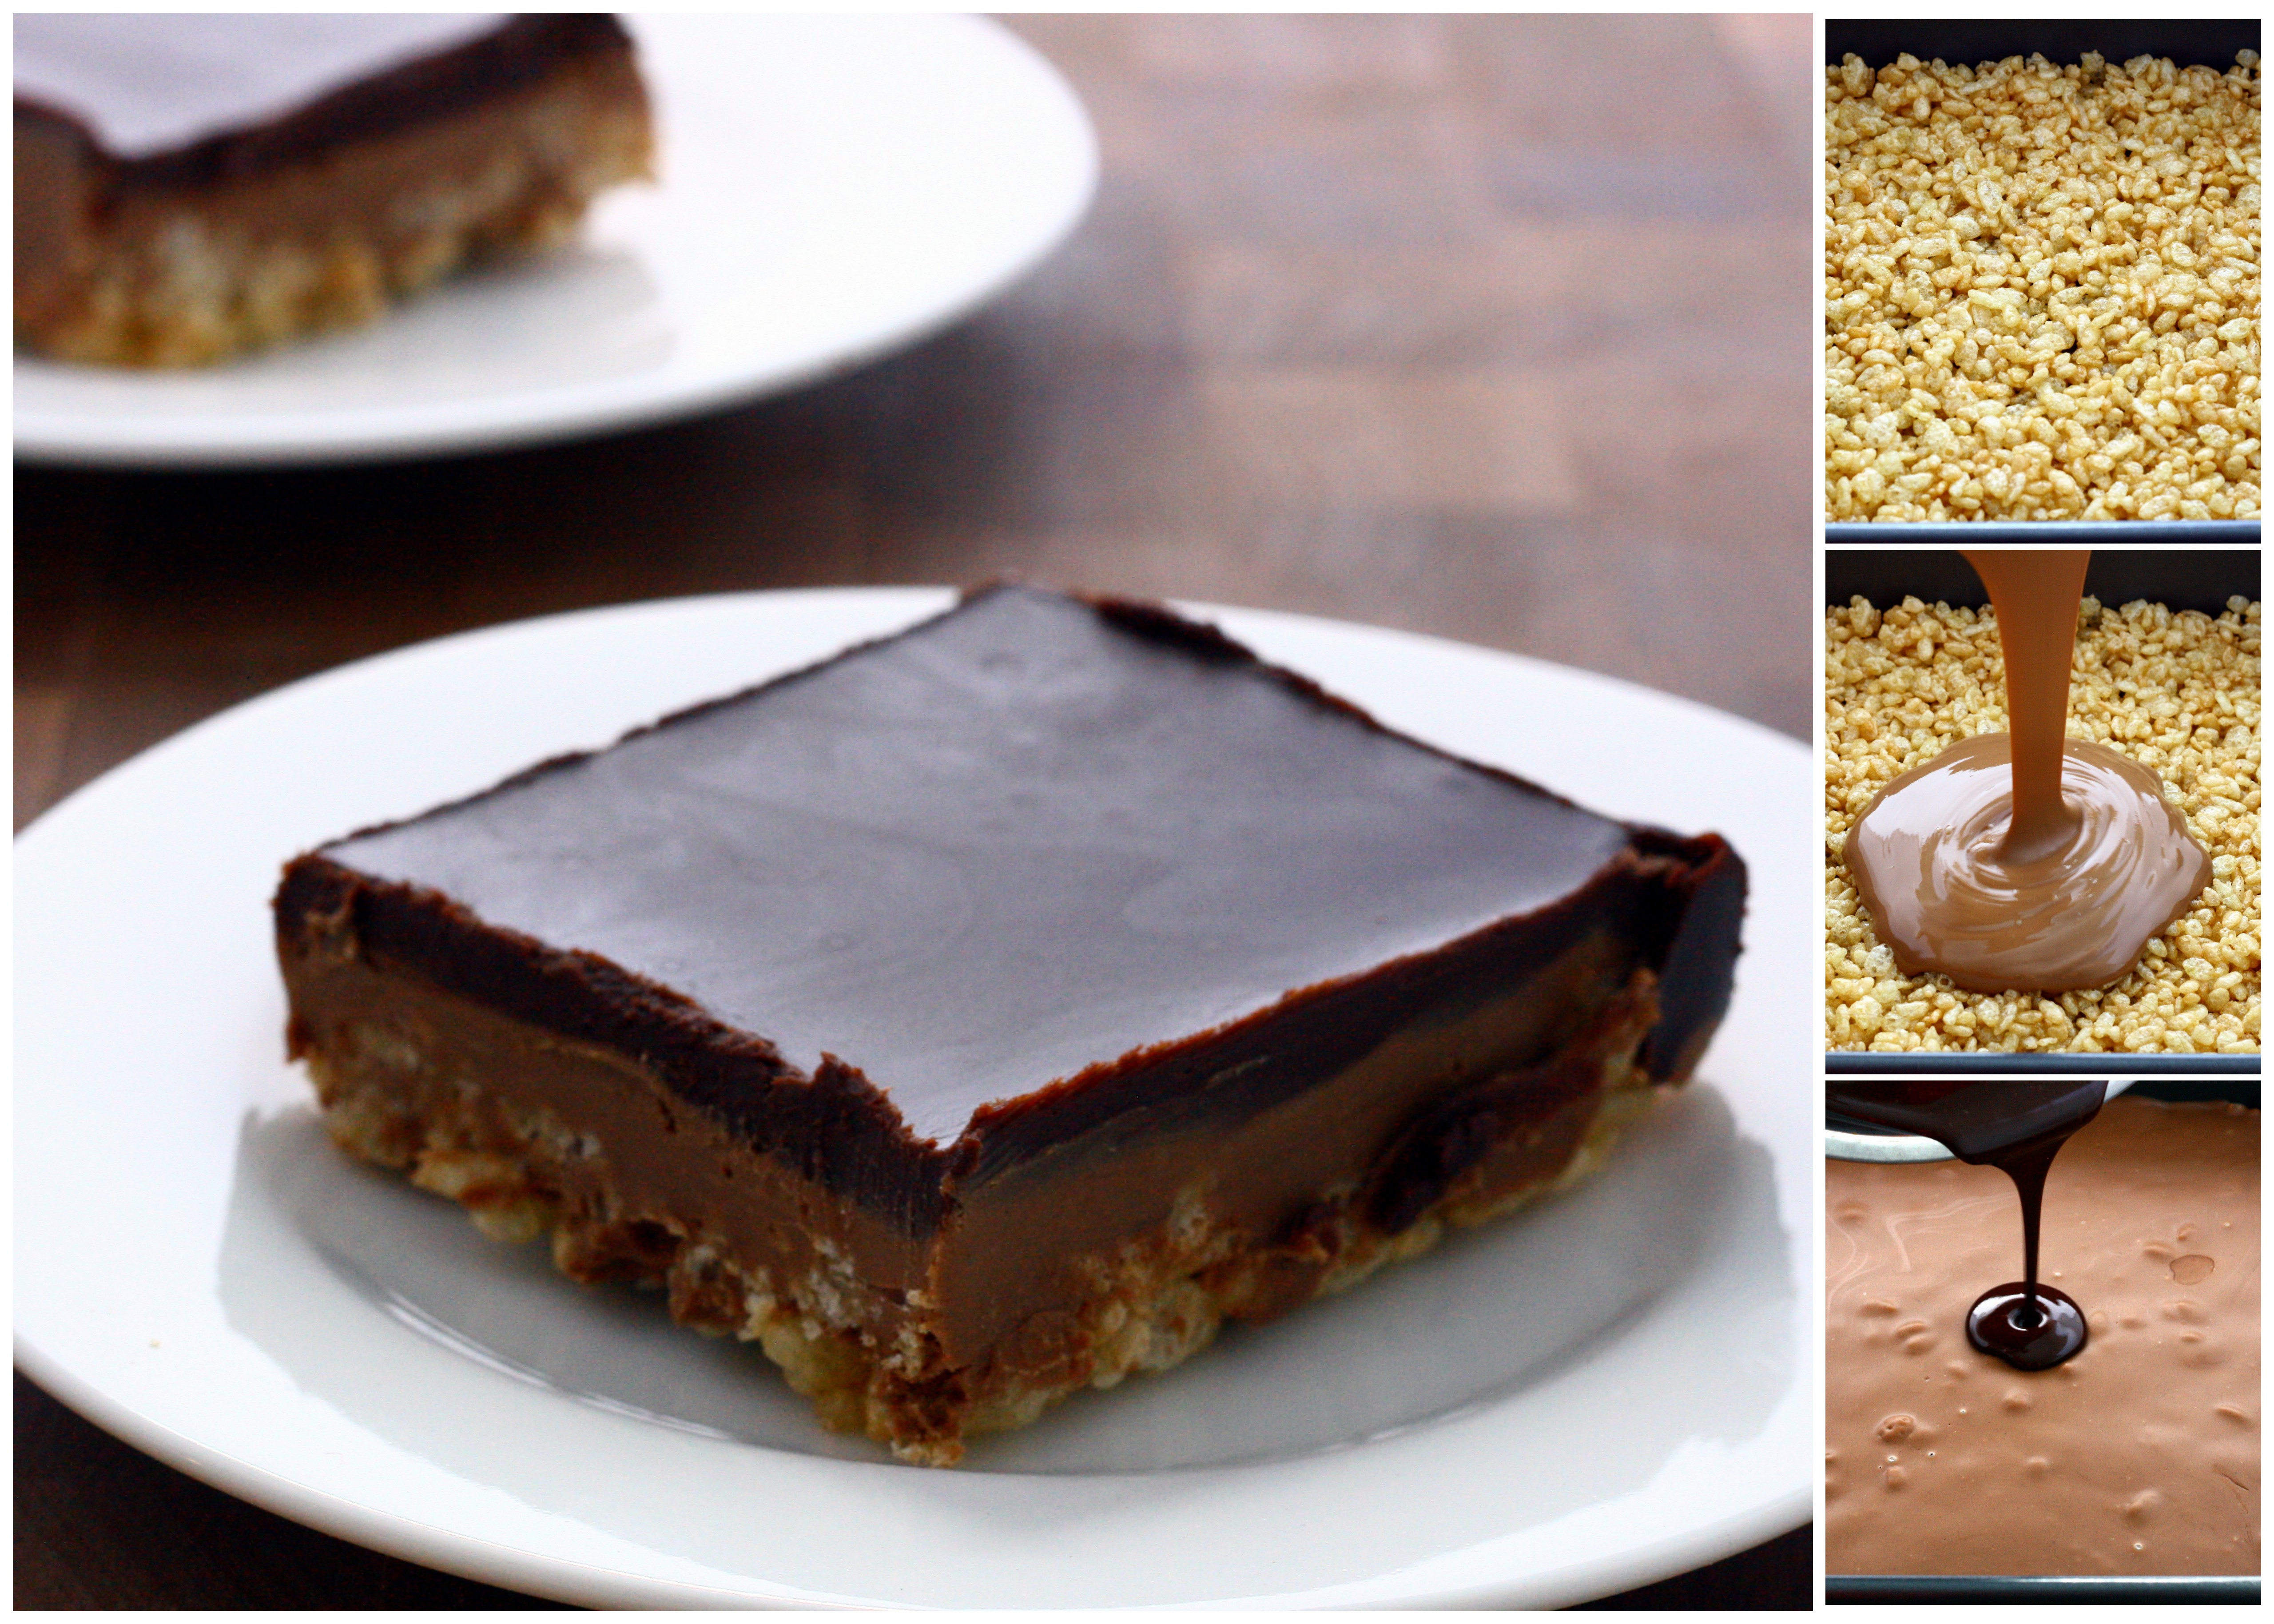
  1. Make the crispy crust: Lightly grease an 8×8-inch baking pan. Set aside. Place cereal in a large bowl and set aside.
  2. Pour 1/4 cup water into a small saucepan. Add sugar and corn syrup to the center of the pan, being careful to not let to let it touch the sides of the pan. Using a small wooden spoon, gently stir the mixture until just combined. Place a candy thermometer in the saucepan. Cook over medium-high heat and bring to a boil. Cook until the mixture reaches the soft ball stage, 235 – 245°F.
  3. Remove mixture from heat and stir in butter. Pour mixture over cereal and stir until thoroughly coated. Pour into prepared pan and using the palm of your hand, gently press mixture into the bottom of the pan (do not press up the sides). Let the crust cool to room temperature while you make the milk chocolate peanut butter layer.
  4. Make the milk chocolate peanut butter layer: in a large nonreactive metal bowl, stir together the chocolate and the peanut butter. Set the bowl over a saucepan of simmering water and cook, stirring constantly with a rubber spatula, until chocolate is melted and the mixture is smooth. Remove bowl from the pan and stir for about 30 seconds to let it cool slightly. Pour evenly over crispy crust. Place into the refrigerator and chill for one hour.
  5. Make the chocolate icing: in a large nonreactive metal bowl, combine all ingredients. Set the bowl over a saucepan of simmering water and cook, stirring with a rubber spatula, until mixture is smooth.  Remove bowl from the pan and stir for about 30 seconds to let it cool slightly. Pour mixture evenly over peanut butter layer. Place into the refrigerator and chill for one hour.
  6. Cut into 16 squares and serve. Or, store in the refrigerator, covered tightly, for up to 4 days.


2 Comments

Peanut Butter Chocolate Chip Cookies

Happy Monday! If you’re anything like me, you’re probably having post-weekend blues. I guess that’s the downside to having really great weekends. This weekend was more fun than most. In addition to baking and cooking like I do every other weekend, we did something that I haven’t done in probably 10 years – we went laser tagging. It was fun to be a kid again 🙂 We ended the night with a terrifying four episodes of American Horror Story. And then we watched four more episodes on Sunday.

peanut butter chocolate chip cookies | baked with love by doughseedough.net

I have a love-hate relationship with this series. I’ve been hearing how good it was for a while now. Mike and I attempted to watch it last weekend but I made him turn it off after 7 minutes of the first episode. I couldn’t handle it. Why I decided I wanted to try watching it again, I don’t know. Stupid. But now I’m hooked. Thank goodness I have these cookies to comfort me.

These cookies are ridiculously good. They’re the perfect combination of crisp edges with a chewy center, not overly sweet, and I seriously cannot get enough of them.

081

Peanut Butter Chocolate Chip Cookies
adapted from Baked: New Frontiers in Baking

1 3/4 cups all purpose flour
2 teaspoons baking soda
1 teaspoon salt
2 sticks unsalted butter, room temperature
1 cup sugar, plus more for sprinkling
1 cup brown sugar
2 large eggs
1 teaspoon vanilla extract
1 cup natural creamy peanut butter
3/4 cup milk chocolate chips

  1. Whisk together flour, baking soda, and salt in a medium bowl and set aside. 
  2. In the bowl of an electric mixer, beat together butter and sugars until light and fluffy. Scrape down the bowl and mix in eggs, one at a time, mixing until incorporated. Mix in vanilla and peanut butter and beat until well combined.
  3. Add half the flour mixture and mix until just combined. Repeat with remaining half of the flour mixture. Fold in chocolate chips.
  4. Cover the bowl with plastic wrap and refrigerate for 3 hours.
  5. Preheat oven to 375°F. Line baking sheets with parchment paper.
  6. Drop dough by rounded tablespoons onto prepared baking sheets, at least 2 inches apart.  Gently press down and very slightly flatten the tops with the palm of your hand.
  7. Sprinkle the tops of the cookies with sugar and bake for 10 – 12 minutes, rotating the pan halfway through the baking time, until the tops just begin to brown.
  8. Remove pan from the oven and let cookies cool for 5 minutes. Use a spatula to transfer to a cooling rack to cool completely.


2 Comments

Nutella Swirled Banana Bread

I love banana bread. Banana bread with chocolate chips? Good. Banana bread with nuts? Even better. Banana bread with Nutella? Best. I wonder if this bread can get any better. Maybe next time I’ll do Nutella, chopped hazelnuts, and chocolate chips. Boom. Taste explosion.

I especially loved eating the crust on this bread. Poor Mike was left with crustless pieces…

103

I’m going to warn you all: I am not an expert swirler. Evidence of this can be seen above. Beautiful swirls throughout the loaf? Not so much. It kind of looks like a heart, actually (awwww!!). Swirl or heart, this bread is good.

Nutella Swirled Banana Bread
slightly adapted from Sugar Plum Blog

2 1/3 cups all purpose flour
1 teaspoon baking soda
1 teaspoon baking powder
1/2 teaspoon salt
1 1/3 cup mashed ripe banana (about 3 medium)
6 tablespoon unsalted butter, room temperature
1/2 cup sugar
1/2 cup packed brown sugar
1 teaspoon vanilla extract
2 large eggs
1/2 cup Nutella

  1. Preheat oven to 350°F. Grease a 9-inch loaf pan with butter and set aside.
  2. In a medium bowl, whisk together flour, baking powder, baking soda, and salt.
  3. In a large mixing bowl, with a mixer set on  medium speed, beat together banana, butter, sugar, brown sugar, and vanilla until well combined, about 2 minutes. Beat in eggs until well combined.
  4. Reduce mixer speed to low and beat in flour mixture until just combined. Remove half the batter to a medium bowl and stir in Nutella.
  5. Take turns spooning Nutella batter and plain batter into the loaf pan. Swirl the batters together gently with a knife.
  6. Bake in preheated oven for 60 minutes or until a toothpick inserted into the center comes out with clean.


13 Comments

Thin Mint Brownies

thin mint brownie | baked with love by doughseedough.net

Girl Scout Cookie Season is one of my favorite times of the year. This year, I bought 7 boxes of cookies. Three boxes of Peanut Butter Patties (for Mike), one of Caramel DeLites, one of Mango Cremes, one Lemonades, and one box of Thin Mints.

One. Thin. Mint. What was I thinking?! Why in the world did I only get one box of my favorite cookie?

thin mint cookies | doughseedough.net

That brings me to this week’s recipe swap. It was blogger’s choice, so I got to choose a recipe of my liking from Cookies on Friday. I combed through every single one of her posts going all the way back to 2008. I bookmarked a bunch of recipes and settled on making these triple ginger cookies. Then, she posted Thin Mint Brownies.  And I knew in my heart that I had to make them. Even though I wanted to cry at the thought of sacrificing one precious sleeve of my single box of Thin Mints.

But, this was so worth it. If I had a whole sleeve of Thin Mints left, I would make a second batch. But the second sleeve is residing happily in my stomach now. RIP.

thin mint brownies | baked with love by doughseedough.net

Thin Mint Brownies
slightly adapted from Knead to Cook via Cookies on Friday

1/4 cup Hershey’s Special Dark cocoa powder
1/2 cup cocoa powder
1/2 teaspoon baking soda
1/3 cup canola oil
1/2 cup of boiling water
2 cups of sugar
2 eggs
1/3 cup of canola oil
1 1/3 cups flour
1 teaspoon vanilla
1/2 teaspoon mint extract
1/4 teaspoon salt
1 sleeve of Girl Scout Thin Mints, roughly chopped
  1. Preheat oven to 350 degrees.  Line a 9” x 13” pan with parchment paper and set aside.
  2. In a large mixer bowl, blend the cocoa powders, baking soda, boiling water and the first 1/3 cup of oil. Stir on low until blended.  Add the sugar, eggs and remaining 1/3 cup oil, stirring again on low until blended.  Finally, add the flour, vanilla, mint extract and salt.  Stir until just combined. With a spatula, stir in the chopped Thin Mints.
  3. Spread into the prepared pan and smooth the top. Bake for 35-40 minutes.  Allow to cool completely in pan. Remove the brownies from the pan by lifting the parchment paper. Peel away the parchment paper and cut into bars.

Be sure to head on over to Taste of Home Cooking to check out the recipe swap round-up!


6 Comments

Toffee Almond Magic Cookie Bars

It’s recipe swap time again! I’m finally getting back into the swing of things, and that means participating in a recipe swap with a really great group of bloggers. This swap’s theme: desserts!

I can’t believe how lucky I got with this one. It has everything I love in life. Toffee. Chocolate. Nuts. Is it ok for a dietitian to admit that she can single-handedly polish off an entire tray of this? No? Ok, well I didn’t. Mike helped. A little.

toffee almond cookie bars

I rarely make the same dish twice in a month. For me to do so it has to be really good. Really, really good. And yeah, these were that good. I made not one, but two pans of this in a week. The second pan is sitting in the kitchen right now, taunting me. I’ve already munched away a corner of it, but I plan on shipping the rest of it to work with Mike and bringing a few pieces to my office as well so I’m not tempted at home.

Also, I burned my mouth and I’m a little angry at them. But that’s my own stupid fault because I have no self control and I couldn’t wait until they were even a teeny bit cooled before sneaking a bite. I think I can find it in my heart to forgive them, though.

toffee almond cookie bars

Toffee Almond Magic Cookie Bars
very slightly adapted from Kate’s Recipe Box

9 full graham crackers
4 tablespoons unsalted butter, melted
1 can sweetened condensed milk
1/2 cup bittersweet chocolate chips
1 cup Heath milk chocolate toffee bits
1/2 cup sliced almonds

  1. Preheat oven to 350°F. Grease bottom and sides of a 9×13″ pan with butter and line with parchment paper. Grease parchment paper with butter. Set aside. 
  2. Crush graham crackers into crumbs using a food processor rolling pin. Mix in melted butter until well-combined. Press crumbs into lined baking dish.
  3. Evenly pour the sweetened condensed milk over the graham cracker layer. Sprinkle the chocolate chips, toffee bits, and almonds evenly over the sweetened condensed milk. Gently press in a little.
  4. Bake for 30 minutes or until browned and pulling away from the edges of the pan. Let cool completely before cutting.

Be sure to head on over to Taste of Home Cooking to check out the recipe swap round-up!


1 Comment

Ultimate Chocolate Cookie

My tastes have changed a lot over the years. For example, I used to hate bananas. Yes, hate. Their texture and taste never failed to make me gag. One night a couple of years ago, this all changed. Now, I like them when they’re still partially green or all yellow with no brown spots.

I also used to dislike chocolate. I never craved it, never sought it out. I was entirely indifferent to it. Ice cream? Strawberry, never chocolate. Candy? Sour or fruit candy, never chocolate. Hot drink? Tea or cider, never hot chocolate.

Then, I started the dietetic internship and the stress of it all brought out the chocolate monster that has been dormant all these years. Now I can’t get enough of the stuff. I never fail to have at least one chocolatey goodie a day. It doesn’t help that my work place seems to have an endless supply of chocolates. Funny enough, chocolate chip cookies are still not my favorite. Maybe it’s because there’s not enough chocolate?

ultimate chocolate cookie

This cookie, though, this cookie does have enough chocolate. There are not one, but two types of chocolate chips in it. And not one, but two cocoa powders to make for the ultimate chocolate cookie.

In my opinion, these are best eaten warm. Unfortunately I don’t have the patience to bake up a couple cookies whenever I get the itch, However, a 10 second spin in the microwave will bring the cookie back to the just-baked gooeyness, or at least really close to it.

ultimate chocolate cookies

Ultimate Chocolate Cookies
adapted from Martha Stewart

1 cup all purpose flour
1/4 cup dutch-process cocoa powder
1/4 cup dark cocoa powder (like Hershey’s Special Dark)
1/2 teaspoon baking soda
1/2 teaspoon salt
1/2 cup (1 stick) unsalted butter
1 1/2 cups bittersweet chocolate chips, divided
1 teaspoon vanilla extract
2 large eggs
1 1/4 cup sugar
1 cup semisweet chocolate chips

  1. Preheat oven to 325°F. Line two baking sheets with parchment paper and set aside. 
  2. Whisk together flour, cocoa powders, baking soda, and salt in  a large bowl. Set aside.
  3. In a small saucepan, melt butter over low heat, stirring frequently. Stir in 1/2 cup of bittersweet chocolate chips until melted. Remove from heat and stir in vanilla extract. Set aside.
  4. In the bowl of an electric mixer fitted with the paddle attachment, beat eggs and sugar at medium speed until light yellow in color, about 3 minutes. With mixer on low speed, add in chocolate mixture slowly, beating until well combined.
  5. Add flour mixture and beat until just combined. Fold in 1 cup bittersweet chocolate chips and 1 cup semisweet chocolate chips by hand.
  6. Scoop batter using a 2 tablespoon cookie scoop, placing 2 inches apart on baking sheet.
  7. Bake for 12 – 13 minutes, until outsides are set but center is still soft. Let cool on baking sheet for 5 minutes before transferring to a wire rack to cool completely.
  8. Store in an airtight container for up to one week.


7 Comments

Domo Cake

I would like to take a second and…


HAPPY BIRTHDAY, BECCA!


Ok, so this cake is (obviously) for my sister’s birthday. She came home over the weekend and we had a dinner for her at my parents’ house. I asked her about a week ago what kind of cake she wanted – fruit? chocolate? She replied “cheese”, as in cheesecake. And then said chocolate fruit. I replied “chocolate cheesecake with fruit?” She said “haha, I don’t think so” and finally ended it by telling me to make whatever I wanted.

Yes ma’am.

I set out and found the perfect, beautiful cake to make – a chocolate raspberry layer cake from Bon Appetit. At the grocery store, I had a change of heart. Why stop at a beautiful cake? I should go above and beyond and cake-ify her favorite thing in the world – Domo.

Yeah, Domo. That weird brown creature thing that is actually really, really cute –

photo from here

So, here’s my edible version of Domo. I’m going to be upfront – this cake was not a quick project. It took quite a few hours to get all the components ready, including my weird sketch of the Domo dimensions (Domensions?). 

domo sketch

I don’t regret a second of it. The look on her face was priceless. We tried to capture her excitement when she first saw the cake, but all the pictures turned out really blurry. I guess bouncing around will do that!

becca & domo cake

Plus, Domo loved it, too 🙂

domo and domo cake

My suggested timeline – set aside one night and the next day to make this cake.

The night before: Bake cake and let cool. Store in cake pan covered. Make fondant and let rest in fridge overnight.

The next day: make frosting, roll fondant, decorate cake.

domo cake

Domo Shaped Chocolate Raspberry Layer Cake
cake recipe adapted from Bon Appetit and fondant from All Recipes

for the cake:
1 teaspoon lemon juice
1 cup skim milk
2 cups all purpose flour
1 3/4 cup sugar
3/4 cup unsweetened cocoa powder
2 teaspoons baking soda
1/4 teaspoon salt
3/4 cup water
3/4 cup canola oil
3 eggs

for the fondant:
8 ounces mini marshmallows
2 tablespoons water
1/2 teaspoon vanilla
1 pound powdered sugar
red gel food coloring

for the frosting & filling:
1 cup unsalted butter, room temperature
3 1/2 cups powdered sugar, sifted
1/2 cup Hershey’s Special Dark Cocoa Powder, sifted
1/2 teaspoon salt
1 teaspoon vanilla extract
4 tablespoon heavy whipping cream

2/3 cup seedless raspberry jam

2 Junior Mints, for the eyes
1 teaspoon cornstarch, plus more for dusting
2 tablespoons water

  1. For the cake: Preheat oven to 350°F. Grease two 9×13 pans. Line bottoms with parchment paper and grease well with butter. Set aside. 
  2. Mix together lemon juice and milk and let stand for 10 minutes.
  3. Whisk together flour, sugar, cocoa powder, baking soda, and salt in a large bowl. Form a well in center.
  4. Whisk together lemon juice/milk mixture with water, oil, and eggs in a medium bowl until well combined. Pour wet ingredients into well of dry ingredients. Whisk until just blended.
  5. Divide batter evenly between the two pans. Bake until toothpick inserted in the center comes out clean, about 25 – 30 minutes. Cool completely and cover baking pan with plastic wrap. Set aside until the next day.
  6. For the fondant: Place marshmallows in a large microwave-safe bowl and heat on high for 1 minute. Mix in water and vanilla extract to hot marshmallows and stir until smooth.
  7. Grease mixer bowl and dough hook attachment well with shortening. Place mixture in well-greased mixing bowl. Add in powdered sugar, 1/2 cup at a time, and knead on medium-low with dough hook until fondant is smooth. If you don’t have a stand mixer, you can do this by hand. Grease hands and kneading surface thoroughly with shortening.  Knead in powdered sugar by hand 1/2 cup at a time. Once all sugar is incorporated, continue to knead for 5 – 10 minutes, or until fondant is smooth.
  8. Divide fondant in half. Form one half into a ball, wrap tightly in plastic wrap, and refrigerate. Spoon 1/4 teaspoon of red gel food coloring until remaining half of fondant and knead until color is well blended. Add more gel coloring as needed to reach desired color. Form into a ball, wrap in plastic wrap, and refrigerate overnight.

The next day:

  1. For the frosting: cream butter in a mixer on medium speed. Add in powdered sugar and cocoa powder. Beat on low until just combined. Increase mixer speed to medium and add in salt, vanilla, and whipping cream and beat until fluffy, about 3 minutes.
  2. To shape Domo: Place 1 cake layer on serving platter, short edge facing you. Trim off 1″ from one of the long edges and set aside (blue line). Trim a 2″ piece from the enter of the bottom short edge to form the two legs (purple lines). Remove the trimmed piece and set aside. Repeat with other cake.
    domo cuts
  3. Take reserved trimmed pieces and form arms. The 1″ section (blue cuts) – 4 pieces formed the arm on the left. The 2″ piece removed for Domo’s legs (purple cuts) turned into the right arm. domo cuts arms
  4. Assemble 1 layer of the arms on the bottom layer of the cake. Spread half the raspberry jam on top. Place other layer of the cake body and arms on top and spread remaining raspberry jam on top.
  5. To frost, fit a pastry bag with a Wilton #233 tip (the grass tip) and fill with frosting. Pipe frosting on sides of the cake first, working in sections. Continue to frost the remainder of the cake.
  6. To decorate the face: Place one Junior Mint about 1.5″ from the left side of the cake and 2.5″ from the top of the cake. Repeat with the other Junior Mint for the other eye.
  7. To make the mouth: Allow fondant to come to room temperature. Combine 1 teaspoon cornstarch and 2 tablespoons water and set aside. Dust surface and hands lightly with cornstarch. Take 1/4 of the red fondant and roll to 1/16″ thick. Cut into a rectangle 4.5″ long and 3.5″ tall.
  8. Take 1/4 of the white fondant and roll out to 1/16″ thick. Cut into 8 triangles 1″ wide and 1″ tall for the teeth. Brush the back of each triangle lightly with the cornstarch-water mix and place on arrange four triangles on the top of the rectangle and four on the bottom to make the teeth. Press lightly to adhere.
  9. Move “mouth” to cake. Place in center of the cake, about 1.5″ below the eyes.
  10. Take a deep breath, step back, and enjoy the cutest cake you’ve ever made 🙂

domo cake

And don’t forget the candle. After all, it is a birthday!

domo with candle


2 Comments

Chocolate Covered Cherry Cookies

Just in time for Valentine’s Day, folks! If your special someone is a lover of chocolate covered cherries, then this is the recipe for you. In all honesty Mike and I don’t really do much for V-Day.  The most romantic gesture I make is buying him all the half-priced chocolate covered cherries I can find on February 15th. A few months ago I bought a couple of jars of maraschino cherries with the intention of making homemade chocolate covered cherries to surprise him. That never happened.

chocolate covered cherry cookies frosting

I figured the next-best thing I could do is transform them into chocolate covered cherry cookies. After all, what else was I going to do with these cherries?

I was kind of doubtful about these cookies at first because the frosting is spread on prior to baking, but they actually turned out really well! The best thing about these cookies is I’ve used up one jar of the maraschino cherries. I now have only one jar left… and I think I’ll turn it into cherry limeade with a healthy splash of champagne (or vodka). Yum 🙂


chocolate covered cherry cookies

Chocolate Covered Cherry Cookies
makes 4 dozen cookies

1 1/2 cups flour
1/2 cup cocoa powder
1/2 cup unsalted butter, room temperature
1/2 cup sugar
1/2 cup brown sugar
1/4 teaspoon salt
1/4 teaspoon baking powder
1/4 teaspoon baking soda
1 egg
1 1/2 teaspoons vanilla extract
10 ounce jar of maraschino cherries, drained, liquid reserved
6 ounces semisweet chocolate chips
1/2 cup sweetened condensed milk

  1. Preheat oven to 350°F.
  2. In a small bowl, whisk together flour and cocoa powder. Set aside.
  3. In a large mixing bowl, cream together butter and sugars until fluffy. Beat in salt, baking powder, and baking soda until combined.
  4. Beat in egg and vanilla extract. Slowly add in flour and cocoa powder mixture and mix until combined.
  5. Shape dough into balls about 1 inch in diameter. Place on parchment-lined baking sheets.
  6. Make an indentation in the middle of each cookie with a finger and place a cherry into the middle of each cookie.
  7. For frosting, melt chocolate chips in sweetened condensed milk in a small saucepan over low heat or in a glass bowl. Stir until smooth. Remove from heat and add in 4 teaspoons of reserved cherry juice.
  8. Spoon 1 tablespoon of frosting over each cookie. Bake cookies for 10 – 12 minutes. Let cool for 5 minutes on baking sheet before removing to wire rack to cool completely.

recipe slightly adapted from Taste of Home


3 Comments

Dark Chocolate Cherry Almond Bar

I finally grew up. I inherited a DSLR from my generous sister, Becca, who has moved onto bigger & better cameras. I started using it just a couple of weeks ago. The trouble is, I don’t know how to use it. Pfft, technology. I’m clunking my way through photos. Each time I make a dish it goes something like this.

Plate food
Poke at it with my fingers to make it look “better”.
Give up because I’m not expert at food plating and presentation.
Set it down and take some pictures.
Too dark.
Mash some buttons on the camera.
Too light.
Mash more buttons.
Too blurry.
Setup a makeshift tripod with my rolled up yoga mat (shut up, it’s all I have).
Still blurry (not surprising).
Prop camera on cake stand.
Snap a few more photos.
Still not great.
Give up and tell myself I’ll fix it in Picasa.
Get to Picasa and can’t figure it out.
Post the picture any way.

Some day I will learn how to use this thing… and how to edit the photo I take. Until then, you’ll have to bear with the cake-stand-as-makeshift-tripod unedited photos.

I’ll make up for subpar photos with stellar recipes, though! I give to you today a fruit & nut bar that will rock your world. It’s inspired by the Cranberry Almond KIND bars, but at a fraction of the cost. It’s filled with amazing goodies – almonds, cashews, dates, cranberries, and cherries.

I was a bit skeptical at first, because the fruit base is a bit unsightly after you blend it all together–
fruit & nut bar paste
But the end result? So good.  Not overly sweet with a bit of tang from the cranberries and just the right amount of saltiness from the nuts.
063
Dark Chocolate Fruit & Nut Bar
makes 16 bars
Olive oil spray
1/2 cup cashews
1 1/2 cup pitted dates
1 cup dried cherries
1/2 cup dried cranberries
1 cup roasted almonds, divided
1/2 cup puffed rice cereal
1/2 cup semisweet chocolate chips
  1. Place cashews in food processor and pulse a few times or until cashews are very roughly chopped. Place into a large, bowl lightly sprayed with olive oil.
  2. Generously spray food processor bowl and blade with olive oil. Place dates, cherries, and cranberries into food processor and blend until a paste forms.
  3. Place fruit paste, 1/2 cup of almonds, and puffed rice into bowl with cashews. Lightly spray hands with olive oil, and hand-mix until all ingredients are well combined. I find it easiest to knead it like I would with bread dough.
  4. Line an 8×8 pan with aluminum foil, leaving an overhang. Press fruit and nut mixture evenly in pan. Sprinkle remaining 1/2 cup of almonds on top and press firmly into fruit and nut mixture. Place in freezer for 15 minutes.
  5. Lift bars out of pan with foil. Gently peel off foil. Spray a large knife with olive oil and cut bars into 16 bars, approximately 1×4″.
  6. Melt chocolate chips in a small bowl in microwave in 20 second intervals until fully melted.
  7. Drizzle chocolate with a fork over bars. Let chocolate cool and harden before enjoying.


3 Comments

Gluten-Free Vegan Chocolate Cupcakes

I love challenges. I needed a dessert for a dietetic intern potluck. The catch – I wanted everyone to be able to enjoy it and one intern eats vegan and another gluten-free. Bring on the challenge, baby! I scoured the internet far and wide (ok, I only used Google and Pinterest) and ended up combing a bunch of different recipes to get this final product.

I got the base cake recipe from Eggless Cooking. It’s made with beets and chickpeas. I was really skeptical at first, but I decided to give it a try. Turns out you can’t even taste the chickpeas or beets! I used canned chickpeas and beets to cut down on prep-time and it turned out pretty well.

These cupcakes were soooo decadent. It’s not really cake-like. More fudge-like perhaps? They’re dense, rich, and definitely chocolatey!

(Sorry for the bad photo - I took this minutes before running out  
the door to get my butt to the potluck!)

Gluten-Free Vegan Chocolate Cupcakes with Chocolate Frosting
yields 12 cupcakes 

For the cupcakes:
2 cups chickpeas, canned or freshly cooked
3/4 cup beets, cooked
1/2 cup sugar
1/4 cup coconut oil, melted
1 teaspoon baking powder
1/2 teaspoon instant coffee granules
2 tablespoons lemon juice
1/2 teaspoon vanilla extract
1 1/2 cups vegan chocolate chips*

  1. Remove the thin outer skin from the chickpeas. Enlist help if you can – this will take a while! Use a food processor or blender to puree until smooth with a tablespoon or so of water.
  2. Puree beets into a smooth paste, using the cooking water.
  3. Preheat oven to 350°F. Line a cupcake pan with liners and set aside.
  4. Melt chocolate chips in microwave in 20 second increments, stirring after each until completely melted.
  5. Combine chickpeas, beets, and sugar in the food processor or blender until completely smooth – no lumps allowed! Puree in coconut oil, baking powder, coffee granules, lemon juice, and vanilla extract until well combined.
  6. Blend in the melted chocolate chips into the chickpea and beet mixture and let the food process or blender run for a couple minutes to allow chocolate to distribute evenly throughout the batter.
  7. Pour batter into prepared cupcake pan and bake for 40 – 50 minutes.
  8. Remove pan from the oven and place on a wire rack. Let the cupcakes cool completely in the pan.
  9. Remove cupcakes from cupcake pan when cool and frost with chocolate frosting (recipe below)!
For the frosting:
1 can regular coconut milk, opened and refrigerated overnight – do not shake!!
1 cup Smart Balance, room temperature
3/4 cup cocoa powder
2 teaspoons vanilla extract
4 – 6 cups powdered sugar
  1. Scrape the thick layer off the top of the coconut milk into a large bowl. Add in Smart Balance and beat until well combined and smooth.
  2. Mix in cocoa powder and vanilla extract until well combined.
  3. Gradually add powdered sugar into frosting, 1 cup at a time, until desired consistency is reached**.
  4. Use immediately or refrigerate, covered.

*I used Enjoy Life mini chocolate chips and they were pretty darn tasty!
** I ended up using some of  coconut milk left in the can to thin out the frosting and give it another boost of flavor. I ended up using about 5 cups of powdered sugar in addition to about 1/4 cup of the coconut “water” that was left in the can.