I can’t really remember how (or why) I started making biscotti. But for as long as I can recall, my mom has always requested biscotti as her gift for just about everything – birthday, Mother’s Day, Christmas… Thanksgiving?

I usually make some sort of chocolate biscotti, but this time I opted for something new – pistachios + dried cherries. How did it turn out? Amazing. Better than any of the chocolate-based biscotti I’ve ever made or tasted. Better than any biscotti I’ve ever had, period. I’m dreaming of the day that I can make these again – I’m hoping to get my hands on some delicious Door County cherries!
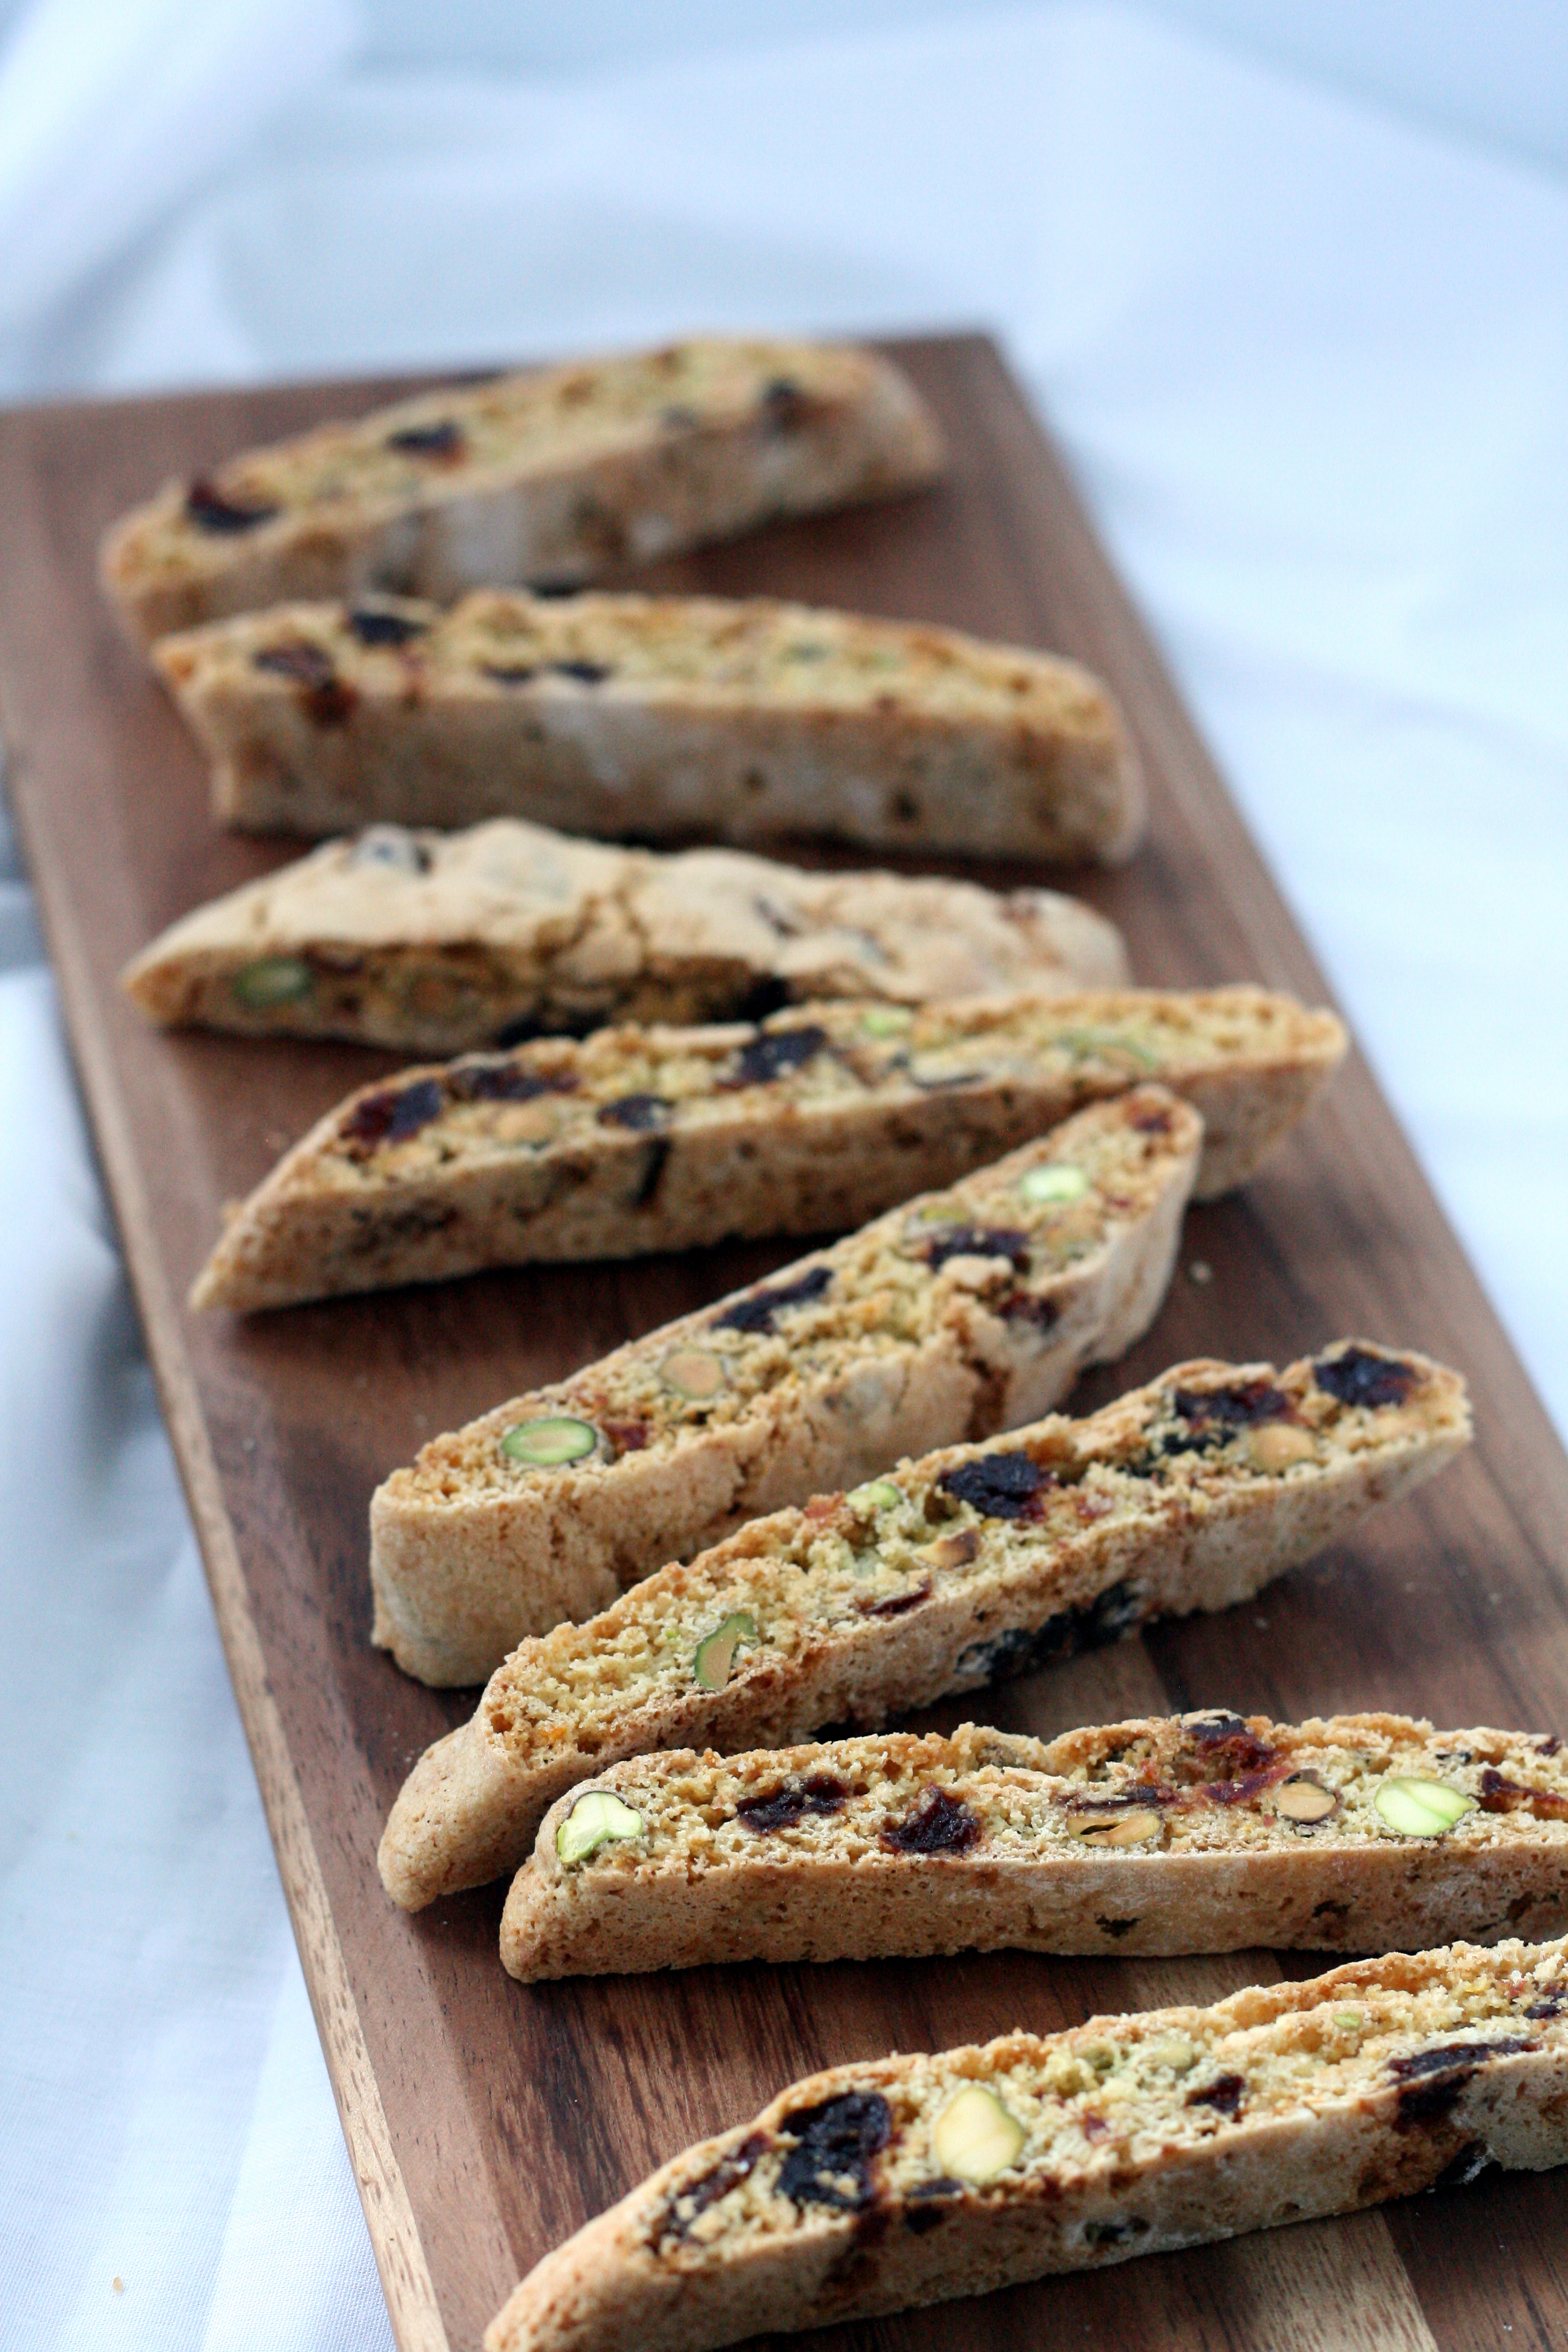
Pistachio and Dried Cherry Biscotti
1 3/4 cups all-purpose flour
1 cup sugar
1/2 cup old-fashioned oats
1 teaspoon baking powder
1/2 teaspoon baking soda
1/2 teaspoon kosher salt
2 large eggs
3 tablespoons canola oil
1 tablespoon orange zest
2 teaspoons lemon zest
1 1/2 teaspoon vanilla extract
1/2 teaspoon almond extract
1 cup dried cherries, roughly chopped
1 cup unsalted, shelled pistachios
- Preheat oven to 350°F. Line a baking sheet with parchment paper and set aside.
- In the bowl of a stand mixer or in a large mixing bowl, combine flour, sugar, oats, baking powder, baking soda, and salt. Mix for 30 seconds to combine.
- In a separate bowl, whisk together eggs, oil, orange zest, lemon zest, vanilla extract and almond extract. Add egg mixture to flour mixture and beat on low speed until dough is crumbly and just combined, about 1 minute. Knead dough with your hands for another minute until dough comes together. Fold in cherries and pistachios.
- Transfer dough to a lightly floured surface and divide in half. Dust hands with flour and shape each piece of dough into a 16-inch long log. Transfer logs to prepared baking sheet and use your palm to flatten into a 2-inch wide strip.
- Bake until biscotti is lightly browned and set, about 30 minutes, rotating pans halfway through. Allow cookies to cool slightly on the baking sheet for 15 minutes.
- Turn oven down to 250°F. Line a second baking sheet with parchment paper and set aside.
- Transfer biscotti logs to a cutting board and slice diagonally into 2/3-inch thick slices*. Arrange pieces, cut side down, on prepared baking sheets.
- Bake biscotti for 20 minutes. Flip biscotti and bake for an additional 20 minutes or until cookies are crisp. Carefully transfer cookies cooling rack and let cool completely. Store in an air-tight container until ready to serve.
*Most recipes call for cutting biscotti with a serrated knife, but I’ve had better luck with my super-sharp Santoku. Do as you wish!
recipe very slightly adapted from Bon Appetit